
Related Manuals for Electrolux ERW33900X


Summary of Contents for Electrolux ERW33900X
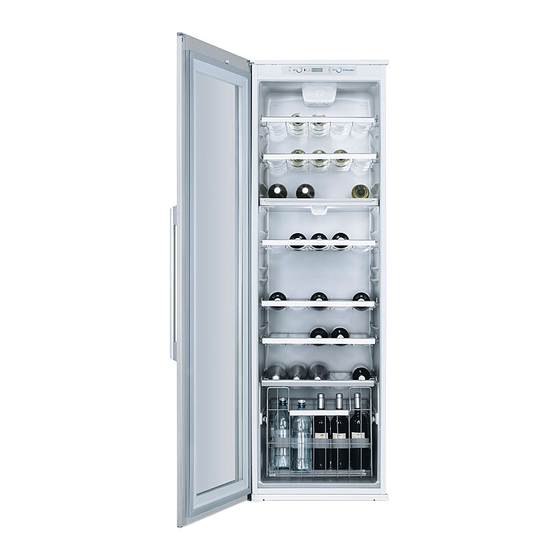
- Page 1 Wijnkelder Wine Cellar Vano cantina Bodega ERW33900X ERW33910X...
-
Page 2: Table Of Contents
2 electrolux Electrolux. Thinking of you. Ga voor meer van onze ideeën naar www.electrolux.com INHOUD Veiligheidsinformatie Problemen oplossen Bedieningspaneel Technische gegevens Het eerste gebruik Montage Dagelijks gebruik Het milieu Onderhoud en reiniging Wijzigingen voorbehouden VEILIGHEIDSINFORMATIE In het belang van uw veiligheid en om een •... - Page 3 3 – open vuur en ontstekingsbronnen ver- • Bewaar geen brandbare gassen of vloei- mijden, stoffen in het apparaat, deze kunnen ont- – de ruimte waar het apparaat zich be- ploffen. vindt, grondig ventileren • U dient zich strikt te houden aan de aan- •...
-
Page 4: Bedieningspaneel
4 electrolux • Het apparaat mag niet vlakbij radiatoren het koelcircuit en evenmin in de isolatie- of kooktoestellen geplaatst worden. materialen. Het apparaat mag niet wor- • Verzeker u ervan dat de stekker bereik- den weggegooid bij het normale huis- baar is nadat het apparaat geïnstalleerd is. -
Page 5: Het Eerste Gebruik
5 Uitschakelen alarmtoestand bij geopende deur wordt aan- gegeven door: Het apparaat wordt uitgeschakeld door de • knipperend controlelampje gekozen ruim- toets ON/OFF langer dan 1 seconde inge- drukt te houden. • rood branden van display Hierna wordt het aftellen van de tempera- •... - Page 6 6 electrolux Let op de aanbevelingen en de adviezen die u bij aanschaf hebt gekregen of die zijn ver- meld in de documentatie over de kwaliteit, de duurzaamheid en de optimale bewaar- temperatuur van de wijn. Flessenrek van de wijnkelder Verwijder het legplateau en schuif het rek in de twee geleiders.
-
Page 7: Onderhoud En Reiniging
7 Luchtbevochtiger De juiste luchtvochtigheid is cruciaal voor het correct bewaren van wijn. Uw wijnkelder beschikt over een speciale luchtbevochtiger, die de luchtvochtigheid in het apparaat verhoogt. Luchtcirculatie Verspreid de lavastenen die zijn meegele- Het koelvak is voorzien van een speciale AIR-... -
Page 8: Problemen Oplossen
8 electrolux Belangrijk! Trek niet aan leidingen en/of te maken om te voorkomen dat het water overloopt en in de koelkast gaat druppelen. kabels aan de binnenkant van de kast en verplaats of beschadig ze niet. Gebruik daarvoor de speciale reiniger, die al Gebruik nooit schoonmaakmiddelen, in het afvoergaatje zit. - Page 9 9 Probleem Mogelijke oorzaak Oplossing Het apparaat maakt la- Het apparaat wordt niet goed on- Controleer of het apparaat stabiel waai. dersteund. staat (alle vier de voetjes moeten op de vloer staan). De zoemer klinkt. Het dis- De deur is niet goed gesloten.
-
Page 10: Technische Gegevens
10 electrolux De deur sluiten 1. Maak de afdichtingen van de deur schoon. 2. Stel de deur, indien nodig, af. Raad- pleeg "Montage". 3. Vervang, indien nodig, de defecte deur- afdichtingen. Neem contact met de ser- vice-afdeling. TECHNISCHE GEGEVENS Afmetingen van de uitsparing... - Page 11 11 Klimaat- Omgevingstemperatuur klasse +10°C tot + 32°C +16°C tot + 32°C +16°C tot + 38°C +16°C tot + 43°C Elektrische aansluiting Zorg er vóór het aansluiten voor dat het vol- tage en de frequentie op het typeplaatje overeenkomen met de stroomtoevoer in uw huis.
-
Page 12: Het Milieu
12 electrolux 2. Plaats de stalen compensator zoals aan- gegeven in de afbeelding en plaats het bovenste gedeelte onder de kop van de schroeven. 4. Bevestig de afdekking op de schroeven. 3. Lijn de compensator uit met de stalen doorpaneel en draai de schroeven vast. - Page 13 13 verzamelpunt waar elektrische en gedetailleerdere informatie over het elektronische apparatuur wordt gerecycled. recyclen van dit product, kunt u contact Als u ervoor zorgt dat dit product op de opnemen met de gemeente, de juiste manier wordt verwijderd, voorkomt u...
-
Page 14: Safety Information
14 electrolux Electrolux. Thinking of you. Share more of our thinking at www.electrolux.com CONTENTS Safety information What to do if… Control panel Technical data First use Installation Daily use Environmental concerns Care and Cleaning Subject to change without notice SAFETY INFORMATION... - Page 15 15 Warning! Any electrical component • Regularly examine the drain in the refriger- ator for defrosted water. If necessary, (power cord, plug, compressor) must be replaced by a certified service agent clean the drain. If the drain is blocked, wa- or qualified service personnel.
-
Page 16: Control Panel
16 electrolux Environment Protection ance shall be disposed according to the applicable regulations to obtain This appliance does not contain gasses from your local authorities. Avoid dam- which could damage the ozone layer, aging the cooling unit, especially at the in either its refrigerant circuit or insula- rear near the heat exchanger. -
Page 17: First Use
17 When normal conditions are restored (door If you want to switch off the light before the closed), the acoustic alarm will stop. automatic turn off time, open the door and push the Light button. Light button The light has no negative effect on the qual- If you would like the light to remain on, with ity on the wine. - Page 18 18 electrolux Wine Cellar shelves The shelves can be removed for cleaning. Humidifier The right humidity is vitally important for the proper storage of wine. Your Wine Cellar is fitted with a special hu- Wine Cellar Bottle Holder midifying device that increases the humidity Remove the shelf and insert it between the inside the appliance.
-
Page 19: Care And Cleaning
19 Air circulation The refrigerator compartment has a special AIRLIGHT fan which is automatically activa- ted in function of the appliance thermostat setting and ambient conditions. CARE AND CLEANING Caution! Unplug the appliance before warm water with a little washing-up liquid carrying out any maintenance operation. -
Page 20: What To Do If
20 electrolux Periods of non-operation When the appliance is not in use for long pe- riods, take the following precautions: • disconnect the appliance from elec- tricity supply • defrost and clean the appliance and all accessories • leave the door/doors ajar to prevent un- pleasant smells. - Page 21 21 Problem Possible cause Solution Water flows on the rear During the automatic defrosting This is correct. plate of the refrigerator. process, frost defrosts on the rear plate. Water flows into the re- The water outlet is clogged. Clean the water outlet.
-
Page 22: Technical Data
22 electrolux 3. If necessary, replace the defective door gaskets. Contact the Service Center. TECHNICAL DATA Dimension of the recess Height 1780 mm Width 560 mm Depth 550 mm The technical information are situated in the rating plate on the internal left side of the ap- pliance and in the energy label. - Page 23 23 4. Fix the covers on the screws. 2. Install the appliance in the niche. Do a final check to make sure that: 3. Attach the appliance to the niche with 4 • All screws are tightened. screws. • The sealing strip is attached tightly to the cabinet.
-
Page 24: Environmental Concerns
24 electrolux 2. Position the steel compensator as indi- 4. Insert the steel carter inside the compen- cated in the figure and insert the upper sator as indicated in the figure. part under the head of the screws. 3. Align the compensator with the steel door panel and tighten the screws. -
Page 25: Informazioni Per La Sicurezza
25 Electrolux. Thinking of you. Per conoscere meglio il nostro modo di pensare, visitate il sito www.electrolux.com INDICE Informazioni per la sicurezza Cosa fare se… Pannello dei comandi Dati tecnici Primo utilizzo Installazione Utilizzo quotidiano Considerazioni ambientali Pulizia e cura... - Page 26 26 electrolux In caso di danneggiamento del circuito re- • Non riporre gas o liquidi infiammabili nel- frigerante: l'apparecchio: i contenitori potrebbero – evitare fiamme libere e scintille esplodere. – aerare bene il locale in cui si trova l'ap- • Osservare rigorosamente le raccomanda-...
-
Page 27: Pannello Dei Comandi
27 • Per il collegamento idrico, usare solo sor- di ozono nel circuito refrigerante o nei materiali isolanti. L'apparecchio non de- genti d'acqua potabile. ve essere smaltito assieme ai rifiuti ur- Assistenza tecnica bani e alla spazzatura. La schiuma del- •... -
Page 28: Primo Utilizzo
28 electrolux Tuttavia, è importante ricordare che la tem- Premere l'interruttore di disattivazione del- peratura all'interno dell'apparecchiatura di- l'allarme per disattivare l'allarme acustico. pende dai seguenti fattori: Quando vengono ripristinate le condizioni • temperatura ambiente; normali (sportello chiuso), l'allarme acustico •... - Page 29 29 tenuto alcolico e dal livello di fruttosio e tan- nino in esso contenuti. Al momento dell'ac- quisto, controllare se il vino è già invecchia- to o se migliorerà col passare del tempo. Temperature di conservazione consi- gliate: • per champagne e vini frizzanti dai 6 agli 8°C...
-
Page 30: Pulizia E Cura
30 electrolux Questa condizione potrebbe provocare un Ricircolo dell'aria appannamento delle bottiglie quando si Il vano frigorifero è dotato di una speciale apre lo sportello oppure il distacco delle eti- ventola AIRLIGHT che si attiva automatica- chette. In tal caso, ridurre di conseguenza mente in base alla regolazione del termosta- la quantità... -
Page 31: Cosa Fare Se
31 centro dell'apparecchiatura, per evitare fuo- Periodi di inutilizzo riuscite e gocciolamenti di acqua. Usare l'ap- Se l'apparecchiatura non viene utilizzata per posito utensile già inserito nel foro di scarico un lungo periodo, adottare le seguenti pre- cauzioni: • scollegare l'apparecchiatura dalla re- te elettrica;... - Page 32 32 electrolux Problema Possibile causa Soluzione La lampadina non si ac- La lampadina è in modalità stand- Chiudere e riaprire lo sportello. cende. La lampadina è difettosa. Fare riferimento alla sezione "So- stituzione della lampadina". Il compressore rimane La temperatura non è impostata Impostare una temperatura supe- sempre in funzione.
-
Page 33: Dati Tecnici
33 Chiusura della porta 1. Pulire le guarnizioni della porta. 2. Se necessario, regolare la porta. Vedere "Installazione". 3. Se necessario, sostituire le guarnizioni della porta difettose. Contattare il Cen- tro di assistenza locale. DATI TECNICI Nicchia di incasso... - Page 34 34 electrolux 1. Applicare la striscia sigillante adesiva al- Classe Temperatura ambiente l'apparecchiatura come mostrato nella fi- climati- gura. da + 10°C a + 32°C da + 16°C a + 32°C da + 16°C a + 38°C da + 16°C a + 43°C...
- Page 35 35 2. Posizionare il compensatore in acciaio come indicato nella figura e inserire la parte superiore sotto la testa delle viti. 4. Fissare i coprivite. 3. Allineare il compensatore al pannello in acciaio dello sportello e serrare le viti.
-
Page 36: Considerazioni Ambientali
36 electrolux CONSIDERAZIONI AMBIENTALI conseguenze negative per l’ambiente e per Il simbolo sul prodotto o sulla la salute, che potrebbero derivare da uno confezione indica che il prodotto non deve smaltimento inadeguato del prodotto. Per essere considerato come un normale rifiuto informazioni più... - Page 37 37 Electrolux. Thinking of you. Conozca mejor nuestros conceptos en www.electrolux.com ÍNDICE DE MATERIAS Información sobre seguridad Qué hacer si… Panel de mandos Datos técnicos Primer uso Instalación Uso diario Aspectos medioambientales Mantenimiento y limpieza Salvo modificaciones INFORMACIÓN SOBRE SEGURIDAD...
- Page 38 38 electrolux – mantenga el aparato alejado de las lla- • Se deben seguir estrictamente las reco- mas y de cualquier fuente de combus- mendaciones sobre almacenamiento del tión fabricante del aparato. Consulte las ins- – ventile bien la habitación en la que se trucciones correspondientes.
-
Page 39: Panel De Mandos
39 • Realice la conexión sólo con el suministro circuito de refrigerante ni en los materia- les aislantes. El aparato no se debe de- de agua potable. sechar junto con los residuos urbanos. Servicio técnico La espuma aislante contiene gases in- •... -
Page 40: Primer Uso
40 electrolux Regulación de la temperatura • indicador del compartimento selecciona- do intermitente Seleccione el compartimento pulsando la • iluminación del indicador en color rojo tecla de selección de compartimento. • señal acústica Programar la temperatura girando el mando Pulse el interruptor de desconexión de alar- (regulador de temperatura del compartimen- ma para desactivar la señal acústica. - Page 41 41 Portabotellas de la vinoteca Saque el estante y póngalo entre las dos guías. Las ménsulas portabotellas admiten un pe- so máximo de 30 kg. Sugerencias para la conservación El tiempo de conservación del vino depen- de del añejamiento, del tipo de uva, del gra- Es posible poner el estante entre guías a...
-
Page 42: Mantenimiento Y Limpieza
42 electrolux Humidificador Recirculación del aire La humedad adecuada es fundamental pa- El compartimiento frigorífico dispone de un ra una buena conservación del vino. ventilador AIRLIGHT especial que se activa Su bodega está equipada con un dispositi- automáticamente en función de la progra- vo humidificador especial que aumenta la mación del termostato y las condiciones am-... -
Page 43: Qué Hacer Si
43 Importante No mueva, dañe ni tire de los caiga en el interior. Utilice el limpiador espe- cial suministrado, que hallará ya colocado conductos o cables del interior del armario. No utilice detergentes, polvos abrasivos, en el orificio de desagüe. - Page 44 44 electrolux Problema Causa probable Solución El aparato hace ruido. El aparato no está bien apoyado Compruebe que los soportes del en el suelo. aparato descansan sobre una su- perficie estable (las cuatro patas deben estar bien apoyadas en el suelo).
-
Page 45: Datos Técnicos
45 para electrodomésticos y que tenga las mismas características. 4. Instale la cubierta de la bombilla. 5. Conecte el enchufe a la toma de red. 6. Abra la puerta. Compruebe que la bom- billa se enciende. Cierre de la puerta 1. -
Page 46: Instalación
46 electrolux INSTALACIÓN Colocación Instalación del aparato Instale el aparato en un punto en el que la Precaución Compruebe que el cable temperatura ambiente se corresponda con de alimentación puede moverse con la clase climática indicada en la placa de da- facilidad. - Page 47 47 2. Coloque el compensador de acero co- mo se indica en la figura e introduzca la parte superior bajo la cabeza de los tor- nillos. 4. Fije las tapas a los tornillos. 3. Alinee el compensador con el panel de la puerta de acero y apriete los tornillos.
-
Page 48: Aspectos Medioambientales
48 electrolux ASPECTOS MEDIOAMBIENTALES producto se desecha correctamente, usted El símbolo que aparece en el aparato o ayudará a evitar posibles consecuencias en su embalaje, indica que este producto negativas para el medio ambiente y la salud no se puede tratar como un residuo normal pública, lo cual podría ocurrir si este... - Page 49 49...
- Page 50 50 electrolux...
- Page 51 51...
- Page 52 222343425-00-062010...