Advertisement
Quick Links
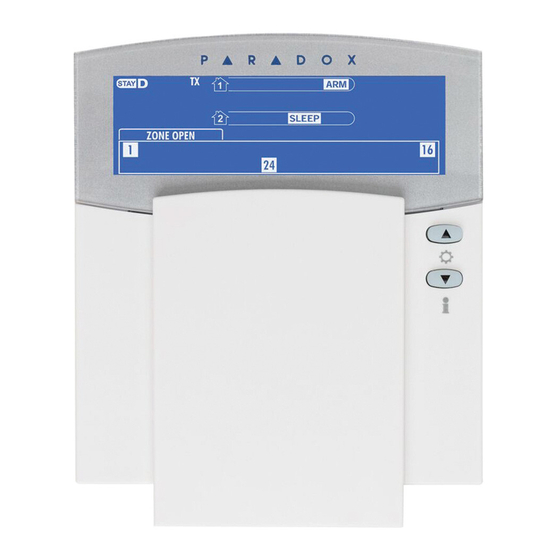
The K32IRF (32-Zone Wireless Fixed LCD Keypad) and K32RF (32-Zone Wireless LED Keypad) keypads provide the same functionality as
standard hardwired keypads, including system programming.
Unlike conventional wireless keypads which must be manually updated with new event information, the K32IRF displays new events live, as
they happen.
Compatibility
K32IRF MG5000 / MG5050 V3.2 Spectra SP V3.2 (requires MG-RTX3 V1.4)
K32RF
MG5000 / MG5050 V1.3 Spectra SP V2.0 (requires MG-RTX3 V1.1)
Step 1: Powering the Keypad
A. Installing the Batteries
K32IRF:
The K32IRF comes with it's primary power source (two AA batteries) already installed. To power the keypad, with the backplate removed, open
the battery compartment and remove the plastic tab. IMPORTANT: Do not use rechargeable batteries to power the K32IRF.
K32RF:
With the backplate removed, install the 3.7V
standard 3.7V
cell phone type battery. The backup battery is for backup purposes only and is not the keypad's primary power source.
DC
B. Connecting the DC Source (optional for K32IRF)
When connecting the DC source, use the PA6 6V
Do not use a 16V
AC
DC Power Failure trouble display on K32IRF
Since the DC source is optional, the trouble display must be enabled when a
DC source is used.
To enable: press [
ENTER
To disable: press [
C. Battery Charging Indicator (K32RF only)
The [
] key of the K32RF will light up to indicate that the backup battery is charging only after DC restoration.
Step 2: Assigning the Keypad
Automatic Assignment
After panel power-up, the control panel will open a 10 minute window for Automatic Assignment. Press and hold the [
three seconds. For the K32IRF, the Tx icon will flash. For the K32RF, the Rx/Tx and AC LED will flash. The keypad is assigned to the control
panel. Up to 8 wireless keypads can be assigned within the ten-minute window.
Compatibility Check (K32IRF only)
If the K32IRF keypad is not compatible with the current panel version, the following Trouble will be displayed :
[TROUBLE : flash] [17 : on] If this occurs, update your MG/SP panel to version 3.2.
Standard Assignment
Press [
]. Enter your [
ENTER
Go to sections [571] to [578] to assign keypads 1 to 8, respectively.
Press and hold the [
enter the serial number of the K32IRF/ K32RF into one of the eight sections to assign it to the panel.
K32IRF (backplate removed)
Removing the
Backplate
To remove the K32IRF's
backplate, insert a
screwdriver and push
down in the direction of
the arrow.
PUSH
To remove the keypad
when wall-mounted,
slide the keypad
upwards.
32-Zone Wireless Keypads
K32IRF V1.1 / K32RF V2.0 Installation Guide
Li-ion rechargeable backup battery (included). Please note that this can be replaced by a
DC
transformer.
], enter your [
INSTALLER CODE
], enter your [
ENTER
INSTALLER CODE
] or [
INSTALLER CODE
MAINTENANCE CODE
] and [
] key for three seconds on the respective keypad. The keypad is assigned to the control panel. Alternatively,
BYP
Firmware upgrade port cover
Power Adapter Plug only.
DC
], then press and hold the [
], then press and hold the [
].
Optional power
PA6 (6V
)
DC
Primary power
AA batteries x2
Available PA6 plug types:
- ACP-EU (Europe)
- ACP-UL (North America)
- ACP-CH (China)
- ACP-UK (United-Kingdom)
- ACP-AUS (Australia)
] until a confirmation beep is heard.
] until a confirmation beep is heard.
K32RF (backplate removed)
Firmware upgrade port cover
] and [
] key for
BYP
Backup battery
(3.7V
Li-ion)
DC
Primary power
PA6 (6V
)
DC
Advertisement

Related Manuals for Magellan K32IRF


Summary of Contents for Magellan K32IRF
- Page 1 ] key for three seconds. For the K32IRF, the Tx icon will flash. For the K32RF, the Rx/Tx and AC LED will flash. The keypad is assigned to the control panel. Up to 8 wireless keypads can be assigned within the ten-minute window.
-
Page 2: Technical Specifications
[ ] key. Zones that are open but have not triggered an alarm will only be displayed after pressing the [ ] key. The display will turn on, showing the status of all zones at the time the [ ] key was pressed. The K32IRF display will turn off after 20 seconds. The K32RF display will turn off after 30 seconds.