
Related Manuals for Oster VERSA BLSTVB-000-033


Summary of Contents for Oster VERSA BLSTVB-000-033
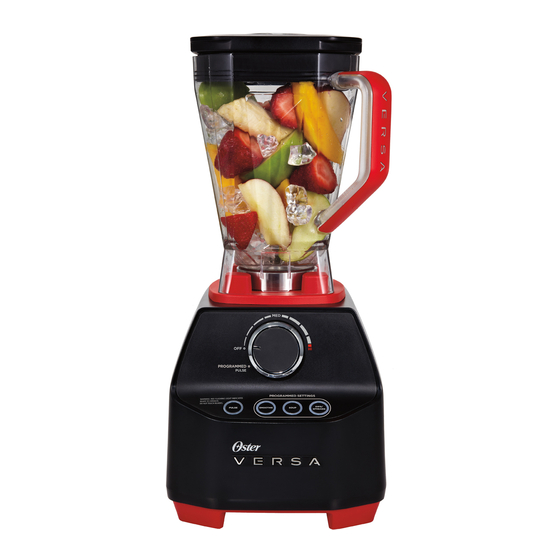
- Page 1 ® MÉLANGEUR VERSA PERFORMANCE PERFORMANCE VERSA BLENDER La puissance pour The Power to tout mélanger Blend Everything User Manual / Manuel d’utilisation Visit us at www.oster.ca P.N. 173011...
-
Page 2: Important Safeguards
• K eep hands and utensils out of jar while blending to reduce the risk of: – Severe personal injury. – Damage to the blender. • I f scraping is necessary, turn the power OFF, unplug from the electrical outlet, and use a rubber spatula only. • D o not use the appliance: – With a damaged cord or plug. – After the unit fails to work correctly. – After you drop or damage the product in any way. Return the product to your nearest Authorized Oster Appliance Service Center for a safety check, adjustment or repair. Call our toll-free, automated phone line to find the Service Center nearest to you. • T he 6 Point Star Blade is sharp. Handle it carefully. To reduce the risk of injury, never place the blade assembly on the base without a jar properly attached. • Always put the lid on the jar before operating the blender. • Do not use outdoors. • D o not allow the cord to touch hot surfaces or hang over the edge of a table or counter. • T urn all controls to OFF and unplug the blender when it is not in use, before taking off or putting on parts, and before cleaning. -
Page 3: Power Cord Instructions
SAVE THESE INSTRUCTIONS This product is for household use only • T he maximum rating marked on the product is based on the attachment that draws the greatest load. Other attachments may draw less power. Power Cord Instructions: Please follow the instructions below to ensure the safe use of the power cord. • T he Oster Versa Performance Blender comes equipped with a three-prong ® ™ (grounding) plug. If you do not have a three-prong outlet, you can use with an adapter to be able to use with a standard two-prong outlet. Do not cut or remove the third prong from the plug on the power cord. • T ry to position the blender near the power source to reduce the hazards associated with power cords (such as becoming entangled or tripping over a long power cord). • Do not pull, twist or otherwise abuse the power cord. • D o not wrap the power cord around the main body of the blender during or after use. -
Page 4: Table Of Contents
Table of Contents English Important Safeguards .......................2 Power Cord Instructions ....................3 Features and Assembly ....................5 Using the Product Control Panel ..................6 Using your Product ......................7 Blending Tips ........................8 Caring for Your Product ....................9 Cleaning ........................9 Storing .........................9 7 Year Limited Warranty ....................10 How to Obtain Warranty Service ................ -
Page 5: Features And Assembly
Welcome Congratulations on the purchase of your Oster Versa Performance Blender. If ® ™ you have any comments, questions or inquiries about this revolutionary product, please call 1-800-667-8623. Learning About Your Product Features and Assembly 1. F iller Cap – 2 oz / 60 ml filler cap BLSTVB-RV0-033 BLSTVB-000-033 doubles as a measuring cup. Align notch with the hole to insert in lid;... -
Page 6: Using The Product Control Panel
Using Your Product Control Panel A. Speed Dial – Turn dial clockwise to choose from manual speed settings from “Low” to “High”. Once you select a speed, the blender will run until you turn it back to “Off.” B. Programmed Settings – In order to activate the programmed buttons, first turn the speed dial counter-clockwise to the Programmed/Pulse Setting. Then select the programmed button you would like to use. They have been developed for optimal use when blending those types of foods. Soup: 20 second ramp up to “Medium”, 5 minutes on “High”. Dips/Spreads: 2 (10-second) pulses at “Medium-low”, 30 seconds on “High”. Smoothie: 10 seconds to ramp up to “Medium”, 20 seconds on “High”. NOTES: 1. I f you would like to stop the blender in the middle of a programmed cycle, simply press any button. 2. F or some blending tasks, it may be necessary to supplement the programmed setting with additional blending time. C. Pulse – Turn the speed dial counter-clockwise to the Programmed/ Pulse Setting. Then press the “Pulse” button for the desired time. D. LED Lights – The lights around the selected programmed buttons will pulse when the unit is operating in that mode. E. Flashing Light – When speed dial is turned to the Programmed/Pulse setting, the Pulse button light will flash red to indicate the unit is ready to operate. Warning: Flashing light indicates ready to operate. -
Page 7: Using Your Product
Using your Product Tamper – The tamper allows you to accelerate the process of very thick and/ or frozen mixtures that cannot be processed in a regular blender. If food is not circulating the machine may be overloaded or may have a trapped air bubble. Using the tamper helps to maintain circulation by preventing air pockets from forming. While the machine is running, remove the filler cap, and through the hole in the lid insert the tamper and use it to press ingredients onto the blades as you make frozen ice creams, nut butters, etc. The container should not be more than 2/3 full when the tamper is used during blending. Do not use tamper for more than 30 consecutive seconds (to avoid stressing the motor). You may need to move the tamper not only up and down, but also side to side. Jar Sensor – The unit is supplied with a jar sensor on the base. This will prevent the motor or the control panel from starting if the blender jar is not properly placed on the base. If the jar is removed from the base during operation the unit will stop. To restart the blender, turn the speed dial to “Off”, place the jar on the blender base and select the preferred speed to begin again. NOTE: The motor will not restart unless the unit is turned OFF first. -
Page 8: Blending Tips
Blending Tips • Do not operate for more than 10 minutes at a time. • Jar should be at least 25% full at all times for optimal performance. • Filler cap should always be assembled to the lid and locked when blending hot liquids. • Use High speeds as much as possible for whole fruit/vegetable juices, soups, shakes, frozen mixtures, making purées and nut butters. Processing times will generally be less than one minute (most take less than 30 seconds). High speed provides the best quality of refinement, breaking down ice, frozen fruit, whole fruits or vegetables to a smooth lump-free consistency. • Never blend without the lid firmly in place on the jar. • If on High speed the food is not circulating, try using the tamper. If this is also not working, try using a slower speed. Once the food begins to circulate again, you can switch back to a High speed. • A Quick Response code is located on the back of the base of the unit. Using the Microsoft Tag application on your smart phone, scan that tag to be directed ® to the product page to find pertinent product information such as instruction manuals, replacement parts, customer service, recipes, etc. • Due to the power of the machine, it is normal for it to be fairly loud during operation. Through the blending cycle, the noises may change, but there is no need to be concerned. I ce Crushing: For optimal ice crushing, fill the jar with preferred amount of ice. Then fill with water just above where the ice stops. Use the speed dial to blend on High for a few seconds. Then drain out the excess water and you are left with a jar filled with great consistent ice! Troubleshooting: 1. If the blender does not turn on: 1. Turn control knob to “OFF” position and unplug from electrical outlet. -
Page 9: Caring For Your Product
2. Remove the jar from the base and free the blade of any obstructions. 3. Wait 30-45 minutes for the unit to cool. 4. Press the resettable fuse button located on the bottom of the base. 2. Jar Sensor on base released 1. To restart the unit, turn control knob to “OFF“ position. 2. Make sure the jar is securely placed on the blender base. 3. Restart the blender by turning the control knob to the desired setting. If the warning light flashes and the motor will not run with the jar in place, the unit has not cooled sufficiently. Turn the control knob to “Off” and wait another 10-20 minutes before trying again. Caring for Your Product Cleaning Base: First turn the control to “Off” and unplug the power cord. Then wash... -
Page 10: Year Limited Warranty
7 Year Limited Warranty Sunbeam Products, Inc. doing business as Jarden Consumer Solutions or if in Canada, Sunbeam Corporation (Canada) Limited doing business as Jarden Consumer Solutions (collectively “JCS”) warrants that for a period of seven years from the date of purchase, this product will be free from defects in material and workmanship. - Page 11 For product questions contact: Sunbeam Consumer Service USA : 1.800.334.0759 Canada : 1.800.667.8623 www.oster.ca © 2013 Sunbeam Products, Inc. doing business as Jarden Consumer Solutions. All rights reserved. In Canada, imported and distributed by Sunbeam Corporation (Canada) Limited doing business as Jarden Consumer Solutions, 20 B Hereford Street, Brampton, Ontario L6Y 0M1. Pour les questions de produit: Service aux consommateurs Sunbeam États-Unis : 1.800.334.0759 Canada : 1.800.667.8623 www.oster.ca © 2013 Sunbeam Products, Inc. faisant affaires sous le nom de Jarden Consumer Solutions. Au Canada, importé et distribué par Sunbeam Corporation (Canada) Limited faisant affaire sous le nom de Jarden Consumer Solutions, 20 B Hereford Street, Brampton (Ontario) L6Y 0M1. Printed in China Imprimé en Chine GCDS-OST31679-LL...