Sony DAV-S500 Operating Instructions Manual
Sony corporation compact av system operating instructions dav-s500
Hide thumbs
Also See for DAV-S500:
- Operating instructions manual (88 pages) ,
- Service manual (108 pages) ,
- Supplementary manual (1 page)

Related Manuals for Sony DAV-S500


Summary of Contents for Sony DAV-S500
- Page 1 4-235-681-14(1) Compact AV System Operating Instructions DAV-S500 © 2001 Sony Corporation...
-
Page 2: Warning
Record the serial number in the space provided below. Refer to them whenever you call upon your Sony dealer regarding this product. Model No. DAV-S500 Serial No.______________ CAUTION As the laser beam used in this CD/ DVD player is harmful to eyes, do not attempt to disassemble the cabinet. -
Page 3: Welcome
For the customers in North America ® NERGY is a U.S. registered mark. ® As an NERGY partner, Sony Corporation has determined that this product ® meets the NERGY guidelines for energy efficiency. Precautions Safety • If anything falls into the cabinet, unplug the unit and have it checked by qualified personnel before operating it any further. -
Page 4: Precautions
Precautions On safety • Caution – The use of optical instruments with this product will increase eye hazard. • Should any solid object or liquid fall into the cabinet, unplug the system and have it checked by qualified personnel before operating it any further. -
Page 5: Table Of Contents
Table of Contents WARNING ... 2 Welcome! ... 3 Precautions ... 4 About this Manual ... 7 This system Can Play the Following Discs ... 7 Notes about the Discs ... 9 Index to Parts and Controls ... 10 Guide to the Control Menu Display (Magic Pad) ... 14 Getting Started ... - Page 6 Sound Adjustments ... 45 Changing the Sound ... 45 Selecting a Sound Field ... 47 Adjusting the level parameters ... 49 Enjoying Movies ... 50 Changing the Angles ... 50 Displaying the Subtitles ... 51 Checking the Play Information (ADVANCED) ... 52 Using Various Additional Functions ...
-
Page 7: About This Manual
About this Manual • Instructions in this manual describe the controls on the remote. You can also use the controls on the system if they have the same or similar names as those on the remote. • The icons used in this manual are explained below: Icon Meaning... - Page 8 Note on PBC (Playback Control) (VIDEO CDs) This system conforms to Ver. 1.1 and Ver. 2.0 of VIDEO CD standards. You can enjoy two kinds of playback depending on the disc type. Disc type You can VIDEO CDs Enjoy video playback without PBC (moving pictures) as well functions...
-
Page 9: Notes About The Discs
Copyrights This product incorporates copyright protection technology that is protected by method claims of certain U.S. patents, other intellectual property rights owned by Macrovision Corporation, and other rights owners. Use of this copyright protection technology must be authorized by Macrovision Corporation, and is intended for home and other limited viewing uses only unless otherwise authorized by Macrovision Corporation. -
Page 10: Index To Parts And Controls
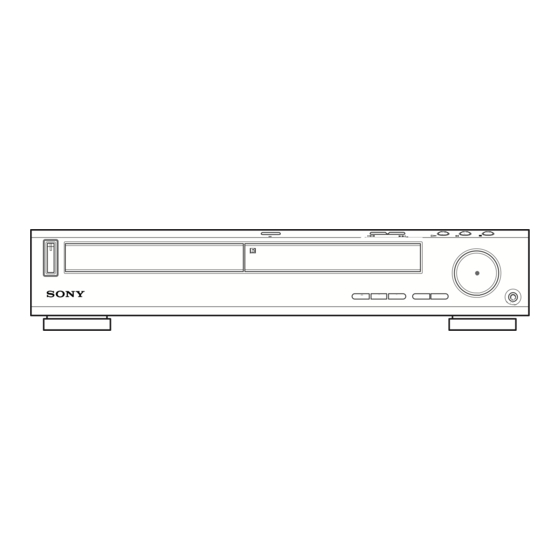
Index to Parts and Controls For more information, refer to the pages indicated in parentheses. Front Panel 1 POWER switch/indicator (31) 2 Disc tray (31) 3 A OPEN/CLOSE (31) 4 Front panel display (11) 5 ./> PREV/NEXT, PRESET +/– (29, 32) 6 H (play) (31) 7 X (pause) (32) 8 x (stop) (31) -
Page 11: Front Panel Display
Front Panel Display When playing back a DVD Current surround format Playing status DISC S AUTO TITLE TRACK PRO LOGIC DIGITAL FM AM NTSC PBC ANGLE Lights up when you Current title can change the angle number When playing back a SACD, CD, or VIDEO CD Playing status DISC S AUTO... - Page 12 Rear Panel V I D E O O U T V I D E O I N V I D E O I N A U D I O O U T A U D I O I N A U D I O I N COAXIAL VIDEO 1 VIDEO 2...
- Page 13 Remote > 10 10/0 Note This remote control glows in the dark. However, before glowing, the remote must be exposed to light for awhile. 1 TV [/1 (on/standby) (58) 2 OPEN/CLOSE (31) 3 NAME (61) 4 STEREO/MONO (60) 5 MEMORY (29) 6 CLEAR (35) 7 PLAY MODE (35) 8 AUDIO (45)
-
Page 14: Guide To The Control Menu Display (Magic Pad)
Guide to the Control Menu Display Use the Control Menu to select a function that you’d like to use. The Control Menu display appears when the DVD DISPLAY button is pressed. For details, refer to the page in parentheses. Control Menu Total number of titles or tracks recorded Current playing title number (Video CD/SACD/CD: track number) - Page 15 REPEAT (page 38) ADVANCED (DVD only) (page 52) CUSTOM PARENTAL CONTROL (page 53) SETUP (page 63) Each time you press DVD DISPLAY, the Control Menu display changes as follows: Control Menu display ADVANCED display (Appears if you select any setting other than “OFF.” See page 52.) Control Menu display off The Control Menu items are different depending on the disc.
-
Page 16: Getting Started
Getting Started Quick Overview This chapter presents a quick overview so you can begin enjoying your new system right away. For selecting a language used in the on-screen display, refer to the page 64. For selecting the aspect ratio of the TV to be connected, refer to the page 65. Unpacking Check that you have the following items: •... -
Page 17: Inserting Batteries Into The Remote
Inserting Batteries into the Remote You can control the system using the supplied remote. Insert two R6 (size AA) batteries by matching the 3 and # ends on the batteries to the markings inside the compartment. When using the remote, point it at the remote sensor Notes •... - Page 18 Terminals for connecting the speakers Connect the Front speakers Rear speakers Centre speaker Subwoofer Front speaker (R) Colour label V I D E O O U T V I D E O I N V I D E O I N A U D I O O U T A U D I O I N A U D I O I N...
- Page 19 To avoid short-circuiting the speakers Short-circuiting of the speakers may damage the system. To prevent this, be sure to follow these precautions when connecting the speakers. Make sure the bare wire of each speaker cord does not touch another speaker terminal or the bare wire of another speaker cord. Examples of bad conditions of the speaker cord Exposed end speaker cord is touching another speaker...
-
Page 20: Step 2: Antenna Hookups
Step 2: Antenna Hookups Connect the supplied AM/FM antennas for listening to the radio. Terminals for connecting the antennas Connect the AM loop antenna FM wire antenna AM loop antenna V I D E O O U T V I D E O I N A U D I O O U T A U D I O I N COAXIAL... - Page 21 If you have poor FM reception Use a 75-ohm coaxial cable (not supplied) to connect the system to an outdoor FM antenna as shown below. Outdoor FM antenna Note If you connect the system to an outdoor antenna, ground it to protect against lightning. To prevent a gas explosion, do not connect the earth wire to a gas pipe.
-
Page 22: Step 3: Tv And Video Component Hookups
Step 3: TV and Video Component Hookups Required cords Video cord for connecting a TV monitor Yellow Audio/video cords (not supplied) When connecting a cord, be sure to match the colour-coded pins to the appropriate jacks on the components. Yellow (Video) White (L/audio) Red (R/audio) Jacks for connecting video components... -
Page 23: Connecting Ac Power Cord
To set the system to PAL, turn on the system by pressing 1 (power) on the remote while pressing X (pause) button on the system. You need to hold the X button until DAV-S500 appears on the display. To reset to NTSC, turn off the system and then turn on again using the remote while pressing the X button on the system. -
Page 24: Speaker Setup
Speaker Setup For the best possible surround sound, all the speakers other than the subwoofer should be the same distance from the listening position (A). However, if necessary, this system allows you to place the centre speaker up to 1.6 meters (5 feet) closer (B) and the rear speakers up to 4.6 meters (15 feet) closer (C) to the listening position. - Page 25 C/X/x/c/ENTER To specify the size, distance, position and height of the speakers Press AMP MENU repeatedly to display 9 SP. SETUP on the front panel display. Sit in your listening position and select the item to be set using X/x. •...
- Page 26 xDISTANCE You can vary the distance of each speaker as follows. The default adjustments are in parentheses. • F. D. 5 m (17 ft) (front speakers distance) Front speaker distance can be set in 0.2 m (1 foot) steps from 1.0 to 15.0 m (3 to 50 feet). •...
- Page 27 Height diagram • R. H. LOW Select this if the rear speakers are located in section D. • R. H. HIGH Select this if the rear speakers are located in section C. These parameters are not available when “REAR“ is set to “NO”. To specify the balance and level of the speakers Press AMP MENU repeatedly to display 9 LEVEL on the front panel display.
- Page 28 xLEVEL You can vary the level of each speaker as follows. The default adjustments are in parentheses. • C. LEVEL (0 dB) (centre speaker level) Adjust the level of the centre speaker (–6 dB to +6 dB, 1 dB steps). •...
-
Page 29: Presetting Radio Stations
Presetting Radio Stations You can preset 20 stations for FM and 10 stations for AM. Before tuning, make sure to turn down the volume to minimum. MEMORY PRESET +/– 1 Press BAND repeatedly until the band you want appears on the front panel display. - Page 30 5 Press ENTER. The station is stored. 6 Repeat 1 to 5 to store other stations. To tune in a station with a weak signal Press TUNING + or – repeatedly in 2 to tune in the station manually. To change the preset number Start over from 1.
-
Page 31: Playing Discs
Playing Discs Playing Discs Depending on the DVD or VIDEO CD, some operations may be different or restricted. Refer to the operating instructions supplied with your disc. POWER Power indicator Adjust the volume Connect OPEN/ CLOSE > 10 10/0 Turn on your TV. Switch the input selector on the TV to this system. -
Page 32: Resuming Playback From The Point Where You Stopped The Disc (Resume Play)
Additional operations OPEN/CLOSE > 10 ./> Stop Pause Resume play after pause Go to the next chapter, track, or scene in continuous play mode Go back to the preceding chapter, track, or scene in continuous play mode Stop play and remove the disc Mute the sound Note... -
Page 33: Using The Dvd's Menu
Notes • Depending on where you stopped the disc, the system may not resume playback from exactly the same point. • The point where you stopped playing is cleared when: – you turn the power off by pressing POWER on the system. -
Page 34: Playing Video Cds With Pbc Functions (Pbc Playback)
Using the DVD menu Some DVDs allow you to select the disc contents using a menu. When you play these DVDs, you can select items such as the language for the subtitles and the language for the sound using the DVD menu. Number buttons >... -
Page 35: Creating Your Own Programme (Programme Play)
To go back to the menu Press O RETURN. z To play without using PBC, press ./> or the number buttons while the system is stopped to select a track, then press H or ENTER. “Play without PBC” appears on the TV screen and the system starts continuous play. - Page 36 Press c. The cursor moves to the title or track (in this case, “01”). PROGRAM ALL CLEAR 1. TITLE – – 2. TITLE – – 3. TITLE – – 4. TITLE – – 5. TITLE – – 6. TITLE – – 7.
-
Page 37: Playing In Random Order (Shuffle Play)
To cancel the programmed order To cancel all the titles, chapters, or tracks in the programmed order, press X, and select “ALL CLEAR” in Step 2. To cancel the selected programme, select the programme using X/x in Step 2, then press CLEAR, or select “--”... -
Page 38: Playing Repeatedly (Repeat Play)
Playing repeatedly Play) You can play all the titles/tracks or a single title/chapter/track on a disc. In Shuffle or Programme Play mode, the system repeats the titles or tracks in the shuffled or programmed order. You cannot perform Repeat Play during PBC playback of VIDEO CDs (page 34). -
Page 39: Searching For A Scene
Searching for a Scene Searching for a Particular Point on a Disc (Scan, Slow- motion Play) You can locate a particular point on a disc quickly by monitoring the picture or playing back slowly. Note Depending on the DVD/VIDEO CD, you may not be able to do some of the operations described. -
Page 40: Searching For A Title/Chapter/Track/Index/Scene
Searching for a Title/ Chapter/Track/Index/ Scene You can search a DVD disc by title or chapter, and you can search a VIDEO CD or CD by track, index, or scene. As titles and tracks are assigned unique numbers on the disc, you can select the desired one by entering its number. - Page 41 To turn off the Control Menu Press DVD DISPLAY repeatedly until the Control Menu is turned off. To search for a scene using the time code (TIME SEARCH) (DVD only) In Step 2, select TEXT). “T ** : ** : ** ” (playing time of the current title) is selected.
-
Page 42: Viewing Information About The Disc
Viewing Information About the Disc Viewing the Playing Time and Remaining Time on the Front Panel Display You can check information about the disc, such as the remaining time, total number of titles of a DVD, or tracks of a SACD, CD, or VIDEO CD, using the front panel display (page 11). -
Page 43: Checking The Playing Time And Remaining Time
Notes • While playing SACD, the index indicator does not appear on the front panel display. • Depending on the type of disc being played and the playing mode, the disc information may not be displayed. Checking the Playing Time and Remaining Time You can check the playing time and remaining time of the current title, chapter, or track, and the total playing time or... - Page 44 xWhen playing a DVD • T ** : ** : ** Playing time of the current title • T– ** : ** : ** Remaining time of the current title • C ** : ** : ** Playing time of the current chapter •...
-
Page 45: Sound Adjustments
Sound Adjustments Changing the Sound If a DVD is recorded with multilingual tracks, you can select the language you want while playing the DVD. If the DVD is recorded in multiple audio formats (PCM, Dolby Digital, MPEG audio, or DTS), you can select the audio format you want while playing the DVD. - Page 46 Displaying the audio information of the disc When you select “AUDIO,” the channels being played are displayed on the screen. For example, in Dolby Digital format, multiple signals ranging from monaural to 5.1 channel signals can be recorded on a DVD.
-
Page 47: Selecting A Sound Field
Selecting a Sound Field You can enjoy surround sound simply by selecting one of the pre-programmed sound fields according to the programme you want to listen to. Surround sound can be applied to DVD, VIDEO CD, and CD playback. > 10 10/0 Press SOUND FIELD repeatedly until the sound field you want appears on... - Page 48 V. MULTI DIMENSION* (Virtual Multi Dimension) Uses 3D sound imaging to create an array of virtual rear speakers positioned higher than the listener from a single pair of actual rear speakers. This mode creates 5 sets of virtual speakers surrounding the listener at approximately a 30°...
-
Page 49: Adjusting The Level Parameters
HEADPHONE THEATER* When you connect your headphone to the PHONES jack of the system, the HEADPHONE THEATER mode allows you to experience a theatre like environment while listening through a pair of headphones. This mode is very effective with 5.1 ch discreet signal sources like Dolby Digital and DTS. -
Page 50: Enjoying Movies
Enjoying Movies Changing the Angles If various angles (multi-angles) for a scene are recorded on the DVD, “ANGLE” appears in the front panel display. This means that you can change the viewing angle. For example, while playing a scene of a train in motion, you can display the view from either the front of the train, the left window of the train, or from the right... -
Page 51: Displaying The Subtitles
Displaying the Subtitles If subtitles are recorded on the discs, you can turn the subtitles on and off while playing. If multilingual subtitles are recorded on the disc, you can change the subtitle language while playing, or turn the subtitles on or off whenever you want. For example, you can select the language you want to practice and turn the subtitles on for better understanding. -
Page 52: Checking The Play Information (Advanced)
Checking the Play Information (ADVANCED) You can check information such as the bit rate or the disc layer that is being played. While playing a disc, an approximate bit rate of the playback picture is always displayed as Mbps (Mega bit per second) and the audio as kbps (kilo bit per second). -
Page 53: Using Various Additional Functions
Using Various Additional Functions Locking Discs (CUSTOM PARENTAL CONTROL, PARENTAL CONTROL) You can set two kinds of playback restrictions for a disc. • Custom Parental Control You can set the playback restrictions so that the system will not play inappropriate discs. - Page 54 Enter or re-enter your 4-digit password by using the number buttons, then press ENTER. “Custom parental control is set.” appears and then the screen returns to the Control Menu display. If you make a mistake entering your password Press C before you press ENTER and input the correct number.
- Page 55 In stop mode, press DVD SETUP. The Setup Display appears. Press X/x to select “CUSTOM SETUP,” then press ENTER. “CUSTOM SETUP” is displayed. CUSTOM SETUP COLOR SYSTEM PAUSE MODE: PARENTAL CONTROL TRACK SELECTION Press X/x to select “PARENTAL CONTROL t,” then press ENTER. xIf you have not entered a password The display for registering a new...
-
Page 56: To Change The Password
Press ENTER. The selection items for “LEVEL” are displayed. CUSTOM SETUP PARENTAL CONTROL LEVEL: STANDARD: CHANGE PASSWORD Select the level you want using X/x, then press ENTER. Parental Control setting is complete. CUSTOM SETUP PARENTAL CONTROL LEVEL: STANDARD: CHANGE PASSWORD The lower the value, the more strict the limitation. -
Page 57: Area Code
Area Code Standard Code Standard number Argentina 2044 Korea Australia 2047 Malaysia Austria 2046 Mexico Belgium 2057 Netherlands Brazil 2070 New Zealand Canada 2079 Norway Chile 2090 Pakistan China 2092 Philippines Denmark 2115 Portugal Finland 2165 Russia France 2174 Singapore Germany 2109 Spain... -
Page 58: Other Operations
Other Operations Controlling the TV with the Supplied Remote By adjusting the remote signal, you can control your TV with the supplied remote. Notes • If you enter a new code number, the code number previously entered will be erased. •... -
Page 59: Watching The Video Or Other Unit
Controlling the TV You can control your TV using the buttons below. By pressing You can TV [/1 Turn the TV on or off. TV/VIDEO Switch the TV’s input source between the TV and other input sources. Switching between TV and DVD Using the CONTROL DVD/TV switch, you can switch the remote signal between control of the TV and control of the DVD... -
Page 60: Listening To The Radio
Listening to the Radio Preset radio stations in the system’s memory first (see “Presetting Radio Stations” on page 29). STEREO/ MONO > 10 PRESET +/– Press FUNCTION repeatedly until TUNER appears on the front panel display. The last received station is tuned in. DISC S AUTO TITLE TRACK... -
Page 61: Using The Radio Data System (Rds) (Only For The European Models)
Using the Radio Data System (RDS) (Only for the European models) What is the Radio Data System? Radio Data System (RDS) is a broadcasting service that allows radio stations to send additional information along with the regular programme signal. This tuner offers convenient RDS features such as station name display. - Page 62 Press NAME. Create an index name by using the cursor buttons: Press x/X to select a character, then press c to move the cursor to the next position. If you make a mistake Press C or c repeatedly until the character to be changed flashes, then press x/X to select the right character.
-
Page 63: Settings And Adjustments
Settings and Adjustments Using the Setup Display By using the Setup Display, you can make various adjustments to items such as picture and sound. You can also set a language for the subtitles and the Setup Display, among other things. For details on each Setup Display item, see page 64-70. -
Page 64: Setting The Display Or Sound Track Language (Language Setup)
Select an item using X/x, then press ENTER. The options for the selected item appear. Example: “TV TYPE” SCREEN SETUP TV TYPE: SCREEN SAVER: BACKGROUND: Select a setting using X/x, then press ENTER. The setting is selected and setup is complete. -
Page 65: Settings For The Display (Screen Setup)
If you select “OTHERS t” in “DVD MENU,” “SUBTITLE,” or “AUDIO,” select and enter the language code from the list using the number buttons (page 79). After you have made a selection, the language code (4 digits) is displayed the next time you select “OTHERS t.”... -
Page 66: Custom Settings (Custom Setup)
16:9 4:3 LETTER BOX 4:3 PAN SCAN Note Depending on the DVD, “4:3 LETTER BOX” may be selected automatically instead of “4:3 PAN SCAN” or vice versa. xSCREEN SAVER Turns the screen saver on and off so that the screen saver image appears when you leave the system in pause or stop mode for 15 minutes, or when you play back a CD for more than 15 minutes. -
Page 67: Settings For The Speakers (Speaker Setup)
xPAUSE MODE (DVD only) Selects the picture in pause mode. AUTO The picture, including subjects that move dynamically, is output with no jitter. Normally select this position. FRAME The picture, including subjects that do not move dynamically, is output in high resolution. xPARENTAL CONTROL t (DVD only) Sets a password and playback limitation level for DVDs with playback limitation for... - Page 68 • REAR — BEHIND (LOW), BEHIND (HIGH), SIDE (LOW), SIDE (HIGH): Specify the position and height to implement the Digital Cinema Surround modes in the “Virtual Multi Dimension” sound field (page 48) properly. — NONE: Select this if no rear speaker is used.
- Page 69 FRONT Front speaker distance from the (5m/17ft) listening position can be set in 0.2 meter (1 ft) increments from 1 to 15 meters (3 to 50 feet). CENTER Centre speaker distance can be (5m/17ft) moved up to 1.6 meters (5 ft) forward closer to the listening position, in 0.2 meter (1 ft) increments.
- Page 70 Adjusting the speaker volume and level After you stop playback, select “SPEAKER SETUP” after pressing DVD SETUP in the Setup Display. Select “TEST TONE” and set “TEST TONE” to “ON.” You will hear the test tone from each speaker in sequence. From your listening position, select “BALANCE”...
-
Page 71: Additional Information
Additional Information Troubleshooting If you experience any of the following difficulties while using the system, use this troubleshooting guide to help remedy the problem before requesting repairs. Should any problem persist, consult your nearest Sony dealer. Power The power is not turned on. , Check that the AC power cord (mains lead) is connected securely. - Page 72 The sound loses stereo effect when you play a VIDEO CD, or a CD. , Set “AUDIO” to “STEREO” in the Control Menu display (page 45). , Make sure you connect the system appropriately. The surround effect is difficult to hear when you are playing a Dolby Digital sound track.
- Page 73 The disc does not start playing from the beginning. , Programme Play, Shuffle Play, or Repeat Play has been selected (pages 35, 37, 38). Press CLEAR to cancel these functions before playing a disc. , Resume Play has been selected. During stop, press x on the system or the remote and then start DVD playback (page 32).
-
Page 74: Self-Diagnosis Function (When Letters/Numbers Appear In The Display)
Self-diagnosis Function (When letters/numbers appear in the display) When the self-diagnosis function is activated to prevent the system from malfunctioning. In this case a five-character service number (e.g., C 13 00) with a combination of a letter and digits appears on the screen and the front panel display. - Page 75 Dolby Pro Logic Surround As one method of decoding Dolby Surround, Dolby Pro Logic Surround produces four channels from two-channel sound. Compared with the former Dolby Surround system, Dolby Pro Logic Surround reproduces left-to-right panning more naturally and localizes sounds more precisely.
- Page 76 Title The longest sections of a picture or a music piece on a DVD; a movie, etc., for a picture piece on video software; or an album, etc., for a music piece on an audio software. Each title is assigned a title number enabling you to locate the title you want.
-
Page 77: Specifications
Specifications AUDIO POWER SPECIFICATIONS POWER OUTPUT AND TOTAL HARMONIC DISTORTION: Amplifier section Stereo mode Surround mode * Depending on the sound field settings and the source, there may be no sound output. Inputs (Analog) Inputs (Digital) Outputs (Analog) Outputs (Digital) SACD/DVD system Laser Signal format system... - Page 78 Tuning range North American model: European, Middle Eastern, and Philipinne models: Other models: Antenna Video section Inputs Outputs Speakers Front Speaker system Speaker unit Rated impedance Dimensions (approx.) Mass (approx.) Centre/Rear Speaker system Speaker unit Rated impedance Dimensions (approx.) Mass (approx.) Subwoofer Speaker system Speaker unit...
-
Page 79: Language Code List
Language Code List For details, see pages 45, 51, 65. The language spellings conform to the ISO 639: 1988 (E/F) standard. Code Language Code Language 1027 Afar 1183 Irish 1028 Abkhazian 1186 Scots Gaelic 1032 Afrikaans 1194 Galician 1039 Amharic 1196 Guarani 1044 Arabic 1203 Gujarati... -
Page 80: Dvd Setup Menu List
DVD Setup Menu List You can set the following items with the DVD setup menu. The order of the displayed items may be different from the actual display. LANGUAGE SETUP (Select the language you want to use from the displayed language list.) DVD MENU (Select the language you want to use from the... -
Page 81: Index
Index Numerics 16:9 65 4:3 LETTER BOX 65 4:3 PAN SCAN 65 ADVANCED 52 AMP MENU 25 ANGLE 50 Antenna Hookups 20 AUDIO 45, 64 BACKGROUND 66 BALANCE 27, 69 BAND 29 Batteries 17 Bit rate 52, 74 CD 31 CHAPTER 40 Chapter 7, 74 Continuous play... - Page 84 Sony Corporation Printed in Korea...