Table of Contents
Advertisement
Appliance Registration
Base Grille
Care and Cleaning
Condenser
Energy Saver
Energy-Saving Tips
Food Storage Suggestions
Storage Times
Ice Dispenser
Installation
Adapter Plug
Adjustable Rollers
Clearances
Electrical
Requirements
Extension Cord
Grounding
Location
Water Supply to Icemaker 4
Light Bulb Replacement
Model and Serial Numbers
Problem Solver
2
Repair Service
4
Safety Instructions
13
Shelves
13
Storage Drawers
5
Drawer & Cover Removal 12
2
Temperature Controls
9
Vacation & Moving Tips
9
Warranty
6-8
Water Filter Accessory
6-8
3,4
4
4
4
3,4
4
3
4
14
2
GE Answer Center
15-17
800.626.2000
Use and Care of
19
3
11, 12
5
with Ice &
14
Back Cover
Chilled Water
8
models
Service
Advertisement
Table of Contents

Related Manuals for Hotpoint HotPoint CSX22D

Summary of Contents for Hotpoint HotPoint CSX22D
- Page 1 Safety Instructions Shelves Storage Drawers 11, 12 Drawer & Cover Removal 12 Temperature Controls Vacation & Moving Tips Warranty Back Cover Water Filter Accessory GE Answer Center 800.626.2000 Use and Care of models CSX22D CSX24D with Ice & Chilled Water Service...
-
Page 2: Model And Serial Numbers
Help us help you... Read this book carefully. It is intended to help you operate and maintain your new refrigerator properly. Keep it handy for answers to your questions. If you don’t understand something or need more help, write (include... -
Page 3: Grounding
When moving your refrigerator away from the wa~, be careful not to roll over or damage the power cord. . After your refrigerator is in operation, do not touch the cold surfaces, particdarly when hands are damp or wet. Skin may adhere to these extremely cold surfaces. -
Page 4: Base Grille
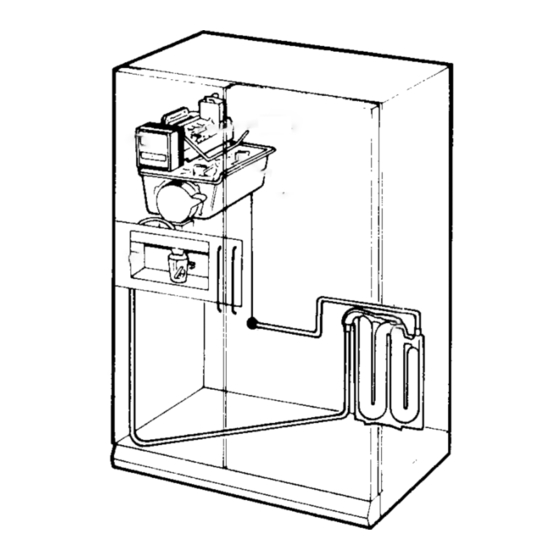
There should be sufficient tubing for the icemaker from the cold water supply to allow moving the refrigerator out from the wall several feet (approximately 8 feet of 1/4” copper tubing in three 10-inch diameter coils). -
Page 5: Energy Saver
Note: Turning the fresh food control to “OFF” turns off cooling in BOTH compartments—fresh food AND freezer, but does not shut off power to the refrigerator. How to Test Temperatures Use the milk test for the fresh food compartment. Place a container of milk on the top shelf in the fresh food compartment. -
Page 6: Before Using Your
Before Using Your Icemaker and Dispenser If you use your refrigerator before the water connection is made, raise the ice access door and make sure the icemaker feeler arm is in the OFF (up) position as shown below. - Page 7 Once Your Icemaker and Dispemer Are in Operation Throw away the first few batches of ice cubes (16 or 24 cubes). This will flush away any impurities in the water line. Do the same thing after vacations or extended periods when ice isn’t used.
- Page 8 Going away on vacation, at which time you should also turn off the valve in the water supply line to your refrigerator. If This is Your First Icemaker... You’ll hear occasional sounds that may be unfamiliar. These are normal icemaking sounds and are not cause for concern.
-
Page 9: Storage Times
Open the door the fewest times possible to save electrical energy. * When going out of town for several days, leave as few perishables as possible in the refrigerator. Set the icemaker to the OFF position and shut off water to the refrigerator. -
Page 10: Freezer Compartment
Adjwtible Shelves in Fresh Food Compartment To remove shelves: Tilt shelf up at front, then lift it up and out of tracks on rear wall of refrigerator. Engage top lug~<-- ~ Lower to lock Into place ,/’... - Page 11 Set control lever to VEGETABLES to convert the drawer to normal refrigerator temperature and provide extra vegetable storage space. Cold air duct is turned off. Variable settings between these extremes can be selected.
- Page 12 L------- 5. Pull the drawer forward, lift the front to clear stops, and remove the drawer. If the refrigerator door doesn’t open completely, pull the drawer out until it hits the door. Then lift the drawer up until it is higher than the drawer supports, tilt it and take it out.
-
Page 13: Care And Cleaning
Protect the paint finish. The finish on the outside of the refrigerator is a high quality, baked-on paint finish. With proper care, it will stay new- looking and rust-free for years. -
Page 14: Light Bulb Replacement
OFF, clean interior with baking soda solution of one tablespoon of soda to one quart of water. Wipe dry. To prevent odors, leave open box of soda in refrigerator. Leave doors open. For shorter vacations, remove perishable foods and leave controls at regular settings. -
Page 15: Energy-Saving Tips
If interior light is not on, refrigerator may not be plugged in at wall outlet. If plug is secure and the refrigerator still fails to operate, plug a lamp or a small appliance into the same outlet to determine if there is a tripped circuit breaker or burned out fuse. - Page 16 COMPARTMENTS FEELS WARM outside of refrigerator in hot, humid weather. . Not unusual for moisture to form on outside of refrigerator during periods of high MOISTURE FORMS ON OUTSIDE humidity.
- Page 17 . Poor-tasting incoming water. Install water filter-see page 8. WATER IN FIRST . Allow about 24 hours for water to cool to proper temperature after refrigerator is first GLASS IS WARM installed.
-
Page 19: If You Need Service
If You Need Service To obtain service, see your warranty on the back page of this book. We’re proud of our service and want you to be pleased. If for some reason you are not happy with the service you receive, here are three steps to follow for further help. -
Page 20: What Is Covered
To know what your legal rights are in your state, consult your local or state consumer affairs office or your state’s Attorney General. If further help is needed concerning this warranty, write: Manager—Consumer Affairs, GE Appliances, Louisville, KY 40225 2-90...