Table of Contents
Advertisement
Available languages
Available languages
PORTABLE AIR CONDITIONER
Table of Contents
CLIMATISEUR PORTATIF
Table des Matières
KEEP THESE INSTRUCTIONS FOR FUTURE REFERENCE: If the unit changes ownership, be sure this manual
CONSERVER CES INSTRUCTIONS POUR CONSULTATION ULTÉRIEURE: En cas de revente du l'appareil, ce manuel
CAUTION: Read and
instructions before first
. . . . . . . . . . . . . . . . . . . . . . . . . . . . . . . . . . . . . . . . . 1
. . . . . . . . . . . . . . . . . . . . . . . . . . . . . . . . . . . . . . . . 13
accompanies the unit.
doit être inclus avec l'appareil.
Danby Products Ltd, PO Box 1778, Guelph, Ontario Canada N1H 6Z9
Danby Products Inc, PO Box 669, Findlay, Ohio USA 45839-0669
Owner's Use and Care Guide
Guide d'utilisation et soins de
Model • Modèle
follow all safety rules
and operating
use of this product
.
Propriètaire
DPAC 12099
MISE EN GARDE:
Veuillez lire
attentivement les
consignes de sécurité et
les directives
d'utilisation avant
l'utilisation de ce
produit.
Version 2.1.09 JF
Advertisement
Chapters
Table of Contents

Related Manuals for premiere DPAC 12099


Summary of Contents for premiere DPAC 12099
- Page 1 CONSERVER CES INSTRUCTIONS POUR CONSULTATION ULTÉRIEURE: En cas de revente du l’appareil, ce manuel doit être inclus avec l’appareil. Danby Products Ltd, PO Box 1778, Guelph, Ontario Canada N1H 6Z9 Danby Products Inc, PO Box 669, Findlay, Ohio USA 45839-0669...
-
Page 2: Table Of Contents
TABLE OF CONTENTS UNIT SPECIFICATIONS ........2 PART IDENTIFICATION . -
Page 3: Unit Specifications
WELCOME Thank you for choosing a Danby appliance to provide you and your family with all of the “Home Comfort” requirements of your home, cottage, or office. This Owner’s Use and Care Guide will provide you with valuable information necessary for the proper care and maintenance of your new appliance. -
Page 4: Important Safety Information
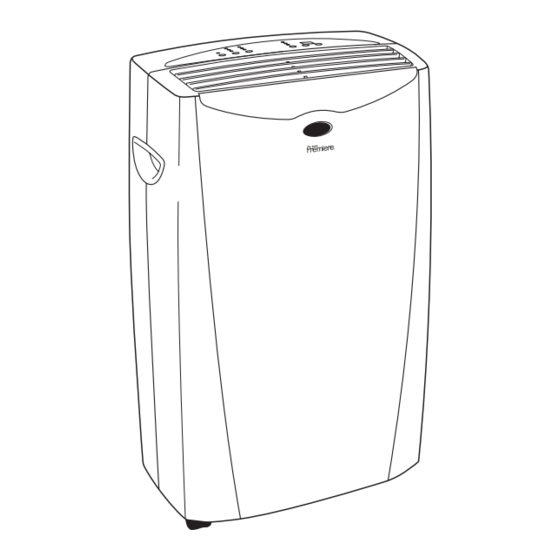
UNIT PARTS IDENTIFIED Control Panel Air outlet Air intake (evaporator) Handle Signal Hole receptor Air outlet Air intake hose hose Castor Water outlet drain Power supply cord IMPORTANT SAFETY INFORMATION READ ALL SAFETY INFORMATION BEFORE USING TABLE 1 ELECTRICAL SPECIFICATIONS Suggested Individual Branch Circuit Nameplate Amps *AWG Wire Size... -
Page 5: Energy Saving Tips
“TEST” button is pushed in. head). ENERGY- Your Danby appliance is designed to be highly efficient in energy savings. Follow SAVING TIPS these recommendations for greater efficiency. 4) Start your air conditioner before the outdoor air... -
Page 6: Installation
INSTALLATION INSTALLATION ACCESSORIES Fig. 1 ELECTRIC SHOCK HAZARD: To avoid WARNING Flexible Exhaust Hose the possibility of personal injury, disconnect Fixture Exhaust Nozzle power to the unit before installing or servicing. Connector INSTALLATION ACCESSORIES (FIG. 1) Flexible Exhaust Hose (13cm) & Exhaust nozzle connector (2 pcs)... -
Page 7: Lcd Display
OPERATING INSTRUCTIONS FEATURES OF THE CONTROL PANEL KEY PAD FUNCTIONS Timer & Temp. Display Room Temp. POWER SWITCH:Turns unit ON/OFF Temp. Set MODE: Allows you to scroll through and select Timer Set desired operating mode. FAN: Select from three different fan settings; MODE INDICATOR LIGHTS High, Medium, and Low. -
Page 8: Air Conditioning
OPERATING INSTRUCTIONS (cont’d) Fig. A IMPORTANT: The exhaust hose must be properly AIR CONDITIONING vented (outdoors) during air conditioning mode. 1) Press the POWER SWITCH key (Fig. A) to switch on the unit, and the previous set temperature will be shown in the temperature display area of the control panel. 2) Press the MODE key (Fig. -
Page 9: Remote Control Features
REMOTE CONTROL FEATURES Control Buttons: 1) Power Switch 2) Mode 3) Fan Speed 4) On / Off Timer 5) Time / Temperature Set • Used for adjusting the timer and temperature. • The default display on control panel is room temperature. •... -
Page 10: Care And Maintenance
CARE AND MAINTENANCE CLEANING THE UNIT CAUTION: Before cleaning or servicing this unit, disconnect from any electrical supply outlet. 1) DO NOT use gasoline, benzene, thinner, or any other chemicals to clean this unit, as these substances may cause damage to the finish and deformation of plastic parts. 2) Never attempt to clean the unit by pouring water directly over any of the surface areas, as this will cause deterioration of electrical components and wiring insulation. -
Page 11: Troubleshooting
TROUBLESHOOTING PROBLEM POSSIBLE CAUSE SOLUTION • Wait for power to return • Unit does not work • Power is out • Plug in properly • The plug is not plugged in properly • Remove drain water from • The full-tank indicator is ON; tank the drain tank is full •... -
Page 12: Warranty
This quality product is warranted to be free from manufacturer’s defects in material and workmanship, provided that the unit is used under the normal operating conditions intended by the manufacturer. This warranty is available only to the person to whom the unit was originally sold by Danby or by an authorized distributor of Danby, and is non-transferable. TERMS OF WARRANTY Plastic parts, are warranted for thirty (30) days only from purchase date, with no extensions provided. - Page 13 TABLE DES MATIÈRES SPÉCIFICATIONS DE L’UNITÉ ..... . . 16 IDENTIFICATION DE PARTIE ......17 CONSIGNES DE SÉCURITÉ...
-
Page 14: Spécifications De L'unité
BIENVENUE Merci d’avoir choisi un appareil Danby qui vous fournira ainsi qu’à votre famille, le confort au foyer, à la maison, au chalet ou au bureau. Ce manuel d’utilisation vous offre des renseignements pratiques pour le soin et l’entretien de votre nouvel appareil. Un appareil Danby bien entretenu vous fournira plusieurs années de service sans ennui. -
Page 15: Identification De Partie
IDENTIFICATION DE PARTIES Panneau de commande Bouche Entrée d’air d’air (vaporisateur) Receteur Poignée de signal Tuyau de Tuyau bouche d’air d’entrée d’air Roulette Corde d’alimentation Drain de sortie de l’eau d’energie CONSIGNES DE SÉCURITÉ IMPORTANT LISEZ TOUTE L'INFORMATION DE SÉCURITÉ AVANT UTILISATION SPÉCIFICATIONS TABLEAU 1 ÉLECTRIQUES... - Page 16 ‘TEST’ est enfoncé. SUGGESTIONS POUR L’ÉCONOMIE DE Votre appareil ménager Danby est conçu pour l’efficacité en économie de L’ÉNERGIE l’énergie. Pour le rendement maximal, observer les recommandations qui suivent. 1) Choisir un réglage du thermostat qui répond à vos 4) Activer votre climatiseur avant que la température...
-
Page 17: Installation
CONSIGNES D’UTILISATION Fig. 1 ACCESSOIRES D’INSTALLATION INSTALLATION Tuyau d'échappement Ferrure flexible RISQUE DE CHOC ÉLECTRIQUE: Pour éviter la possibilité Connecteur de la tuyère de sortie de blessures corporelles,débrancher l’alimentation de courant à l’unité avant d’entreprendre l’installation ou le service. MISE EN GARDE: Pour éviter les difficultés durant l’installation et/ou le fonctionnement, lire ces directives attentivement. - Page 18 CONSIGNES D’UTILISATION DISPOSITIFS DE PANNEAU COMMANDE FONCTIONS DU BLOC NUMÉRIQUE Chronométreur et Temp. affichage INTERRUPTEUR D’ALIMENTATION : Température ambiante Permet de mettre l’appareil en Marche/Arrêt Réglage du Température MODE: Vous permet faire défiler et de Réglage du Minutrie sélectionner le mode de fonctionnement désiré. LES LUMIÈRES DE SIGNALISATION DE VENTILATEUR : Sélectionnez à...
-
Page 19: Déshumidificateur
FONCTIONNEMENT REMARQUE: Le tuyau flexible pour l’échappement d’air doivent Fig. A CLIMATISEUR être installés pour le fonctionnement en mode de climatisation 1) Appuyer sur la touche INTERRUPTEUR (Fig. A) pour activer l’unité et le réglage précédent du température sera montrée dans l’affichage de la température sur le panneau de commande. - Page 20 CARACTÉRISTIQUES DE TÉLÉCOMMANDE Boutons De Commande: 1) Commutateur de courant 2) Mode 3) Vitesse du Ventilateur Minuterie Marche/Arrêt (On/Off) 5) Réglage de l'heure/température • Utilisé pour régler la minuterie et la température. • La température ambiante est l'affichage par défaut sur le panneau de commande.
-
Page 21: Soins Et Entretien
SOINS ET ENTRETIEN NETTOYAGE DE L’UNITÉ MISE EN GARDE: Avant de nettoyer ou de faire le service sur cette unité, il est recommandé de débrancher le cordon d’alimentation de la prise de courant électrique. 1) NE PAS utliser d’essence, de benzène, de diluant ou tous autres produits chimiques pour nettoyer cette unité. -
Page 22: Dépannage
DÉPANNAGE PROBLEME CAUSE PROBABLE SOLUTION • Attendez que • L'unité ne fonctionne pas • Il n'y a pas d'alimentation l'alimentation revienne • La fiche n'est pas branchée • Branchez adéquatement adéquatement • Enlevez l'eau du drain du • L'indicateur du réservoir plein est réservoir du drain en MARCHE;... -
Page 23: Garantie
En vertu de la présente, Danby Products Limitée (Canada) ou Danby Products Inc. (E.- U. d’A.) ne peut être tenue responsable en cas de blessures corporelles ou des dégâts matériels, y compris à l’appareil, quelle qu’en soit les causes. Danby ne peut pas être tenue responsable des dommages indirects dus au fonction- nement défectueux de l’appareil. - Page 24 • Type de produit • Numéro de modèle • Numéro de pièce • Description de la pièce Danby Products Ltd, PO Box 1778, Guelph, Ontario Canada N1H 6Z9 Danby Products Inc, PO Box 669, Findlay, Ohio USA 45839-0669 Printed in China (P.R.C.)