FujiFilm FinePix A205 Owner's Manual
Fujifilm digital camera owner's manual finepix a205/finepix a210
Hide thumbs
Also See for FinePix A205:
- Brochure & specs (2 pages) ,
- Owner's manual (44 pages) ,
- Operating instructions manual (11 pages)

Related Manuals for FujiFilm FinePix A205


Summary of Contents for FujiFilm FinePix A205
- Page 1 This manual will show you how to use your FUJIFILM DIGITAL CAMERA FinePix A205/FinePix A210 correctly. Please follow the instructions carefully. BL00278-200 ( 2 )
-
Page 2: Ec Declaration Of Conformity
5. Limited Warranty. AGREEMENT, YOU WILL BE ABLE TO USE THE FUJIFILM warrants to you that Media is free from any defect in material SOFTWARE RECORDED ON THE CD-ROM. BY OPENING and workmanship under normal use for ninety (90) days from the date of THE PACKAGE, YOU ACCEPT AND AGREE TO BE your receipt of Media. -
Page 3: Table Of Contents
Warning Displays ... 72 Applicable Batteries ... 68 Troubleshooting ... 74 Notes on the Batteries ... 68 Specifications (FinePix A205) ... 76 Specifications (FinePix A210) ... 78 Notes on Using AA-size Ni-MH Batteries and the Rechargeable Battery NH-10 Correctly ... 69 Explanation of Terms ... -
Page 4: Accessories Included
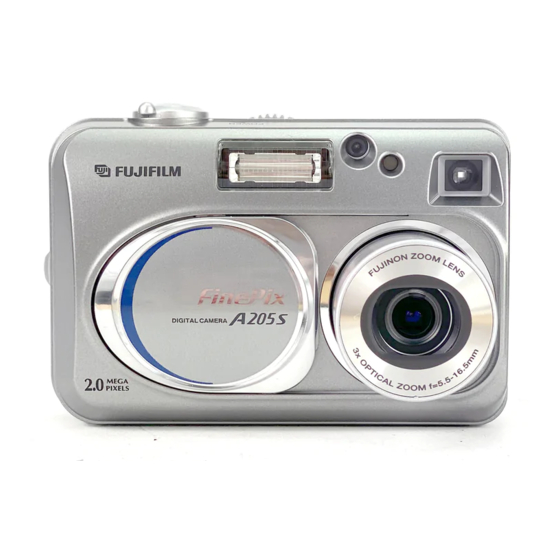
Then seek medical assistance. PAL: I Exif Print (Exif ver. 2.2) Exif Print Format is a newly revised digital camera file format that contains a variety of shooting information for optimal printing. camera contains... - Page 5 Nomenclature ✽ Refer to the pages in parentheses for information on using the camera features. Mode switch Still photography mode (P.18) Playback mode (P.24) Movie mode (P.33) Shutter button POWER switch (P.12) Flash (P.27) Lens cover Lens DISP (Display) button (P.16, 23) Viewfinder lamp Viewfinder...
-
Page 6: Getting Ready
MH batteries is recommended for this reason. h Cradle can be used in combination with camera and to charge rechargeable Battery NH-10 (sold separately). Use Fujifilm Battery charger (sold separately) to charge AA-size Ni-MH batteries. h See P.68, 69 for other notes on using batteries. -
Page 7: Switching On And Off/Setting The Date And Time
SWITCHING ON AND OFF/SETTING THE DATE AND TIME 1 Turn the Mode switch to select the mode you want to use. 2 Open the lens cover to use the camera in still photography/Movie mode. Slide the “POWER” switch to turn the camera on and off. -
Page 8: Correcting The Date And Time/Changing The Date Order
CORRECTING THE DATE AND TIME/CHANGING THE DATE ORDER 1 Press the “MENU/OK” button. 2 Press “d” or “c” to select “ then press “a” or “b” to select “SET-UP”. 3 Press the “MENU/OK” button. 1 Press “a” or “b” to select “DATE/TIME”. 2 Press “c”. -
Page 9: Using The Camera
Using BASIC OPERATION GUIDE the Camera You’ve read the chapter on getting ready and the camera is now set up and ready to take pictures. “Using the Camera” describes the basic camera operations of “Taking Pictures”, then “Viewing Images” and “Erasing Images”. This section describes the camera’s functions. -
Page 10: Still Photography Mode
SHOOTING STILL IMAGES ( STILL PHOTOGRAPHY MODE 1 Turn the Mode switch to “ 2 Open the lens cover. 3 Slide the “POWER” switch sideways to switch the camera on. h Focus distance: Approx. 80 cm (2.6 ft.) to infinity For subjects closer than 80 cm (2.6 ft.), use Macro photography (➡P.27). -
Page 11: Number Of Available Frames
✽ When the LCD monitor is switched on, more detailed warning messages are displayed (➡P.72-73). Subjects Not Suitable for Autofocus Though the FinePix A205/FinePix A210 uses an accurate autofocus mechanism, it may have difficulty focusing or not be able to focus at all for the types of subjects and situations listed below. In such cases, the image may be out of focus. -
Page 12: Using Af/Ae Lock
AF (Autofocus)/AE lock (Auto-exposure) On the FinePix A205/FinePix A210, when you press the Shutter button down half way, the focus and exposure settings are fixed (AF/AE lock). If you want to focus on a subject that is off to one side of the image or if you want to set the exposure before you compose the final shot, lock the AF and AE settings and then compose and shoot your picture to get the best results. -
Page 13: Playback Mode
Playback zoom cannot be used with multi-frame playback. Still images that can be viewed You can use this camera to view still images recorded on the FinePix A205/FinePix A210 or still images (excluding some uncompressed images) recorded on a FUJIFILM digital camera that supports xD- Picture Cards. -
Page 14: Erasing Images (Erase Frame)
ERASING IMAGES ( ERASE FRAME ) PLAYBACK MODE Turn the Mode switch to “ 1 Press the “MENU/OK” button during playback to display the menu. 2 Press “d” or “c” to select “ ” ERASE. Note that mistakenly erased frames (files) cannot be recovered. -
Page 15: Still Photography Menu
MACRO ( CLOSE-UP ) PHOTOGRAPHY/ FLASH STILL PHOTOGRAPHY MODE Red-Eye Reduction Use this mode to ensure that the subject’s eyes appear natural when photographing people in low-light conditions. The flash fires a pre-flash just before the picture is taken and then fires again to take the actual picture. The flash fires automatically as required by the shooting conditions. -
Page 16: Photography Menu
PHOTOGRAPHY MENU STILL PHOTOGRAPHY MENU PHOTOGRAPHY MENU OPERATION 1 Press the “MENU/OK” button to display the menu. 2 Press “d” or “c” to select the menu item and “a” or “b” to change the setting. 3 Press the “MENU/OK” button to confirm the selection. -
Page 17: Ev (Exposure Compensation)
LCD monitor. h Digital zoom focal lengths (35 mm camera equivalents) Digital zoom focal length Model (35 mm camera equivalent) FinePix A205 Zoom bar FinePix A210 Approx. 36 mm-115 mm h Focus distance Approx. 0.8 m (2.6 ft.) to infinity Shots taken with the digital zoom have slightly lower image quality. -
Page 18: Movie Menu
2 levels of quality can be selected. For better image quality, select “ photography time, select “ I Number of seconds of recording per movie Quality Model FinePix A205 FinePix A210 2 Press the “MENU/OK” button to confirm the selection. ” QUALITY. ”, and for longer ”. -
Page 19: Playback Mode
It may not be possible to play back a movie file that was recorded on a camera other than the FinePix A205/FinePix A210. i To play back movie files on a computer, save the movie file on the xD-Picture Card to the computer’s hard disk and then play back the saved file. -
Page 20: Dpof Set Frame
Card. The recorded specifications include information on which frames are to be printed. This section gives a detailed description of how to order your prints with the FinePix A205/ FinePix A210. On the FinePix A205/FinePix A210, you can specify multiple prints per image. -
Page 21: Reset All
DPOF SET FRAME PLAYBACK MENU 1 Press “a ” or “b ” to select “WITH DATE” or “WITHOUT DATE”. By selecting the “WITH DATE”, the date is imprinted on your prints. 2 Press the “MENU/OK” button. By selecting the “WITH DATE” setting, you can have the date imprinted on your shots when you use the Print Service or a DPOF-compatible printer. -
Page 22: Protecting Images:frame/Set All/Reset All
PROTECTING IMAGES: FRAME/SET ALL/RESET ALL PLAYBACK MENU 1 Turn the Mode switch to “ 2 Press the “MENU/OK” button to display the menu screen. Protection is a setting that prevents frames (files) from being accidentally erased. However, the “FORMAT” function erases all the frames (files), including protected frames (files) (➡P.48). -
Page 23: Auto Play (Automatic Playback)
AUTO PLAY ( AUTOMATIC PLAYBACK ) PLAYBACK MENU 1 Turn the Mode switch to “ 2 Press the “MENU/OK” button to display the menu on the screen. The Power Save function does not operate during playback. Movie starts automatically. When the preview movie or movie ends, playback moves on to the next frame. -
Page 24: Set-Up
SET-UP I SET-UP Menu Options Settings Display Default setting This option specifies whether or not an image checking screen (photography results) is displayed after you take a shot. IMAGE DISP. ON/OFF The photographed image is displayed for a few moments and then automatically recorded. -
Page 25: Format
FinePix CONVERTER LE Creates a FinePix CD Album Used when you open RAW (OS-X is not supported). files that were photographed on cameras that support the RAW file format. FinePix A205/FinePix A210 is not supported for CCD- RAW file. -
Page 26: Installation On A Windows Pc
5.2 INSTALLATION ON A Windows PC Pre-installation checklist ( For Windows ) To run this software, you must have the hardware and software described below. Check your system before you begin the installation. ✽1 Compatible PCs IBM PC/AT or compatible Operating System Windows 98 (including the Second Edition) Windows Millennium Edition (Windows Me) -
Page 27: Installation On A Mac Os 8.6 To 9.2
5.3 INSTALLATION ON A Mac OS 8.6 TO 9.2 Pre-installation Checklist To run this software, you must have the hardware and software described below. Check your system before you begin the installation. ✽1 Compatible Mac Power Macintosh G3 , PowerBook G3 Power Macintosh G4, iMac, iBook, Power Macintosh G4 Cube or PowerBook G4 ✽2... -
Page 28: Installation On A Mac Os X
5.3 INSTALLATION ON A Mac OS 8.6 TO 9.2 Install QuickTime as directed by the on-screen instructions and then restart your Macintosh. If you have already installed QuickTime version 5.0.2 or later, this installation is not performed. Click [Agree] button in the “License” window. If the “Connection Speed”... - Page 29 5.4 INSTALLATION ON A Mac OS X FinePixViewer and RAW FILE CONVERTER LE are installed on Mac OS X. AVI movies cannot be played back on version 10.0.4. Switch your Macintosh on and start up Mac OS X. Do not launch any other applications. Load the enclosed CD-ROM into the CD-ROM drive.
-
Page 30: Viewing Images
Adapter AC-3VW bundled with the cradle (sold separately) for the connection. Constant power supply will prevent unsuccessful data transfer caused by an interrupted power supply. Use only the FUJIFILM “AC Power Adapter AC-3V” or the “AC Power Adapter AC-3VW” bundled with the PictureCradle CP-FXA10 (➡P.67). - Page 31 6.1 CAMERA CONNECTION Use at DSC mode Set a camera 1 Insert an xD-Picture Card containing photographed images into your camera. Plug the AC power adapter connector into the DC IN 3V socket on the camera and then plug the adapter itself into the main power outlet.
-
Page 32: Disconnecting The Camera
6.1 CAMERA CONNECTION 6.1.4 Disconnecting the Camera 1 Quit all applications (FinePixViewer etc.) that are using the camera. 2 Check that the viewfinder lamp is lit green or that the self-timer lamp is off (no data is being exchanged with the computer). For a DSC connection, proceed to step For a PC CAMERA connection, proceed to step Even when “Copying”... -
Page 33: System Expansion Options
Quit FinePixViewer and DP Editor. Then drag the installed FinePixViewer folder to the Trash and select “Empty Trash” in the “Special” menu. System Expansion Options eBy using the FinePix A205/FinePix A210 together with other optional FUJIFILM products, your system can be expanded to fill a wide range of uses. FinePix A205/FinePix A210... -
Page 34: Overview Of The Optional Cradle
Rechargeable Battery NH-10 This is a battery pack that uses nickel-metal hydride (Ni-MH) batteries. The NH-10 can be charged using the Digital Camera FinePix A205/FinePix A210 and Cradle CP-FXA10, or the AC Power Adapter AC-3VW. Obtain this battery pack if you need a spare battery after purchasing the cradle. (Note that the NH-10 cannot be charged by itself.) -
Page 35: Notes On Using Your Camera Correctly
Plug the connection cord plug securely into the DC input terminal of the FUJIFILM Digital camera. h Turn off the power switch of the FUJIFILM Digital camera before disconnecting the connection cord from the FUJIFILM Digital camera’s DC input terminal. -
Page 36: Procedure For Discharging Rechargeable Ni-Mh Batteries
I Protecting Your Data h Data may be lost or destroyed in the following situations. Please note that FUJIFILM assumes no responsibility for data that is lost or destroyed. 1. Removal of the memory card or turning the power ”... -
Page 37: Warning Displays
Card. If the error message is still displayed, replace the xD-Picture Card. i Contact your FUJIFILM dealer. i Wipe the contact area on the xD-Picture Card with a soft dry cloth. It may be necessary to format the xD-Picture Card. -
Page 38: Troubleshooting
Troubleshooting eIf you think the camera is faulty, check the following once more. Troubleshooting Possible causes No power. i The batteries run out. i The batteries are loaded backwards. i The battery cover is not closed properly. i The AC power adapter plug has come out of the power outlet. -
Page 39: Specifications (Finepix A205)
DPC-256 (256 MB) 1997 ✽ These specifications are subject to change without notice. FUJIFILM shall not be held liable for damages resulting from errors in this Owner’s Manual. ✽ The LCD monitor on your digital camera is manufactured using advanced high-precision technology. -
Page 40: Specifications (Finepix A210)
DPC-128 (128 MB) DPC-256 (256 MB) ✽ These specifications are subject to change without notice. FUJIFILM shall not be held liable for damages resulting from errors in this Owner’s Manual. ✽ The LCD monitor on your digital camera is manufactured using advanced high-precision technology. -
Page 41: Explanation Of Terms
DPOF is a format used for recording information on a storage media (image memory card, etc.) that allows you to specify which of the frames shot using a digital camera are printed and how many prints are made of each image. -
Page 42: Safety Notes
This could cause a fire or electric shock. here. Do not cover or wrap the camera or The charger is designed for Fujifilm HR- the AC power adapter in a cloth or AA Ni-MH batteries. Using the charger quilt. - Page 43 26 - 30, Nishiazabu 2 - chome, Minato - ku, Tokyo 106 - 8620, Japan http://home.fujifilm.com/products/digital/ Printed on recycled paper. FGS - 305106 - FG Printed in Japan...