Advertisement
Quick Links
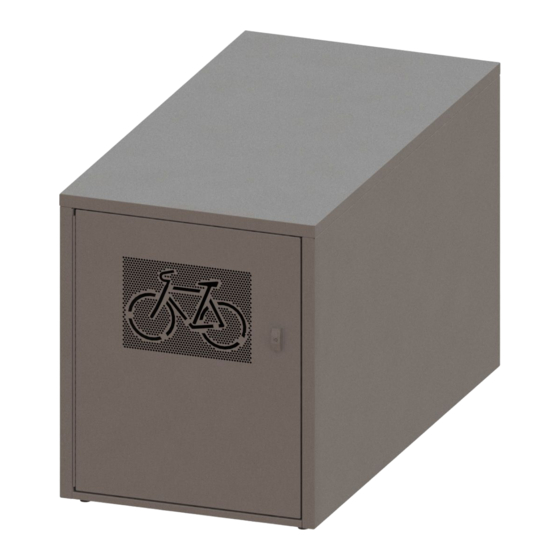
MADRAX MADLOCKER ™ Assembly Instructions
GENERAL INSTRUCTIONS
1. Handle with care so that the painted surfaces are not marred.
2. Leave all fasteners loose until instructed to tighten.
3.
Take care to not cross thread fasteners.
4.
All fasteners are ¼"-20 x ½" Stainless Steel Button Head Screws, except for the leveling
hardware and the hardware used to attach the lock handle.
TOOLS NEEDED
5/32" and 1/8" Hex Allen Wrenches
3/8" Open End Wrench
7/16" Open End Wrench
3/4" Open End Wrench
8" Adjustable Wrench
Straight Tip Screwdriver
Padding to protect painted surfaces during assembly
MATERIALS INCLUDED IN KIT
1/4"-20 x 1/2" Button Head
3/8" x 5" Anchor Spikes
1/2"-13 Nut
1/2"-13 x 3 1/2" Carriage Bolt
1/4" Flat Fender Washer
1/4"-20 x 1" Button Head Socket Cap Screws
10-24 Nylon Nuts
10-24 x 3/4" Tamper Resistant Screws
1/4"-20 Hex Nut
STEP 1
Assemble the DOOR PANEL(S) with the CAM AND LOCKING BAR ASSEMBLY(S) and the LOCK AND
HANDLE ASSEMBLY(S) on a padded surface, face down. Allow the handle(s) to extend over the
edge of a work surface for ease of assembly.
Insert the bottom lock bar(s) first, then the top. See handle assembly illustrations below for order
of assembly. Assemble the appropriate handle with 10-24 x 3/4" Tamper Resistant Screws and
10-24 Nylon Nuts.
3/30/18
ML1-1 and ML2-2
Padlock / U Lock Handle Assembly
Page 1 of 7
GRABER MANUFACTURING, INC.
WWW.MADRAX.COM, EMAIL:
SALES@MADRAX.COM
Pop Out T Handle Assembly
MADRAX DIVISION
Advertisement

Summary of Contents for MADRAX MADLOCKER ML1-1
- Page 1 MADRAX MADLOCKER ™ Assembly Instructions MADRAX DIVISION ML1-1 and ML2-2 GRABER MANUFACTURING, INC. WWW.MADRAX.COM, EMAIL: SALES@MADRAX.COM GENERAL INSTRUCTIONS 1. Handle with care so that the painted surfaces are not marred. 2. Leave all fasteners loose until instructed to tighten. Take care to not cross thread fasteners.
- Page 2 MADRAX MADLOCKER ™ Assembly Instructions MADRAX DIVISION ML1-1 and ML2-2 GRABER MANUFACTURING, INC. WWW.MADRAX.COM, EMAIL: SALES@MADRAX.COM STEP 2 Attach the HINGE(S) with 1/4-20 x 1/2" Button Head Socket Cap Screws. It is important that the HINGE is parallel and straight to the front face of the door.
- Page 3 MADRAX MADLOCKER ™ Assembly Instructions MADRAX DIVISION ML1-1 and ML2-2 GRABER MANUFACTURING, INC. WWW.MADRAX.COM, EMAIL: SALES@MADRAX.COM STEP 5 Slide the PARTITION HALVES together and secure with 1/4”-20 x 1/2" Button Head Socket Cap Screws and 1/4”-20 Hex Nut. NOTE: If an ML1 was purchased, any reference to a PARTITION can be ignored.
- Page 4 MADRAX MADLOCKER ™ Assembly Instructions MADRAX DIVISION ML1-1 and ML2-2 GRABER MANUFACTURING, INC. WWW.MADRAX.COM, EMAIL: SALES@MADRAX.COM STEP 9 If this is a bank of lockers please see Locker Connection Instructions before installing the ROOF PANEL. There is a hole on the lock side, nearest to the door, where the SIDE and the ROOF PANEL should be screwed together.
- Page 5 MADRAX MADLOCKER ™ Assembly Instructions MADRAX DIVISION ML1-1 and ML2-2 GRABER MANUFACTURING, INC. WWW.MADRAX.COM, EMAIL: SALES@MADRAX.COM ML2-2 ITEM # ITEM ML-S SIDE ML-DP DOOR PANEL ML-DJA DOOR JAMB ASSEMBLY ML-H HINGE ML-RP ROOF PANEL ML-F FLOOR ML-LF LEVELING FOOT ML-LH LOCK AND HANDLE ASSEMBLY...
- Page 6 MADRAX MADLOCKER ™ Assembly Instructions MADRAX DIVISION ML1-1 and ML2-2 GRABER MANUFACTURING, INC. WWW.MADRAX.COM, EMAIL: SALES@MADRAX.COM ML1-1 ITEM # ITEM ML-S SIDE ML-DP DOOR PANEL ML-DJA DOOR JAMB ASSEMBLY ML-H HINGE ML-RP ROOF PANEL ML-F FLOOR ML-LF LEVELING FOOT ML-LH LOCK AND HANDLE ASSEMBLY...
- Page 7 MADRAX MADLOCKER ™ Assembly Instructions MADRAX DIVISION ML1-1 and ML2-2 GRABER MANUFACTURING, INC. WWW.MADRAX.COM, EMAIL: SALES@MADRAX.COM LOCKER CONNECTION INSTRUCTIONS FROM STEP 9 STEP 1 Before installing the roof, lay the common wall roof connectors over the two adjoining locker sides. Continue to the Locker Assembly sheet to install the roof.