Advertisement
Advertisement
Table of Contents

Related Manuals for Niles OS5.3


Summary of Contents for Niles OS5.3
- Page 1 / o u t d o o r W e a t h e r P r o o F L o u d s P e a K e r s OS7 .3 OS6.3 OS5.3...
-
Page 2: Table Of Contents
Niles manufactures the industry’s most complete line of custom installation components and accessories for audio/video systems. To see the complete Niles product assortment, visit us on the Internet at: www.nilesaudio.com TABLE OF CONTENTS... -
Page 3: Introduction
INTROdUCTION Niles once again raises the bar. With our first OS Indoor/Outdoor models, we revealed a radical new understanding of loudspeaker capabilities. Niles original OS Indoor/Outdoor Loudspeakers are constantly praised for their ability to deliver exemplary reliability and outstanding sound quality. -
Page 4: Features And Benefits
FEATURES ANd BENEFITS LIMITEd LIFETIME WARRANTY We engineer bulletproof reliability into all OS loudspeakers and back them up with our industry- leading Limited Lifetime Warranty INTEGRATEd WOOFER/BAFFLE ASSEMBLY Increases the woofer cone-area to cabinet-width ratio for enhanced bass output. MICA-FILLEd POLYPROPYLENE WOOFER CONE Reduces breakup and lowers distortion. - Page 5 Provide a variety of secure, quick and easy mounting solutions. TAPEREd ShAPE Facilitates mounting in corners and under eaves. INvERTEd GOLd-PLATEd 5-WAY BINdING POSTS Repel moisture and ensure positive connections in virtually any conditions over long periods of time. niLes audio CorPoration – 1-800-buy-hiFi – 305-238-4373...
-
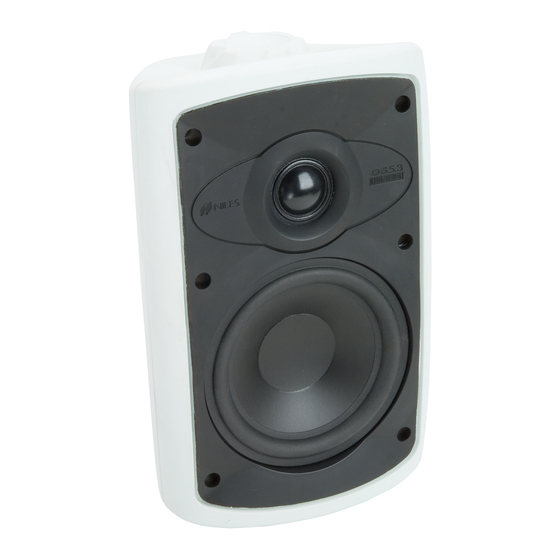
Page 6: Parts Guide
PARTS GUIdE Figure 1. OS .3 Series Parts Guide a. Mounting Bracket b. Nail Hole c. Wire Hole d. Screw Hole e. Bracket Knob f. Grille g. Cabinet h. Shelf Stand... - Page 7 Figure 2. OS .3 Series Parts Guide (continued) i. Binding Posts j. Threaded Insert (1/4"-20 Thread size) NOTE: Bracket and Shelf Stand are used depending upon installation requirements. See InStaLLatIOn on page 14. niLes audio CorPoration – 1-800-buy-hiFi – 305-238-4373...
-
Page 8: Installation Considerations
It’s possible to control the volume of the sound at the loudspeaker location. Plan to wire the system so that each pair of loudspeakers has its own volume control. Niles makes a wide range of indoor and outdoor volume controls with and without muting capabilities. Consult your local Niles dealer for more information. -
Page 9: Placing Loudspeakers For Best Sound Quality
A good rule of thumb is to install a pair of loudspeakers for every 200 to 400 square feet of listening area. Your local Niles dealer is a good source for advice on loudspeaker placement for your particular installation. - Page 10 If the sound is carrying into areas where you do not want sound, try pointing the loudspeakers more downward; this will reduce the amount of sound further away from the loudspeaker. Speaker Placement Zone...
- Page 11 1. if the loudspeaker is never going to be exposed to sudden accidental impacts, wind, waves, or earthquakes, you can simply hang it on a nail using the nail hole(s) on the bracket (see Figure 8 on the next page). 2. T he safest and most secure way to mount the loudspeaker is by screwing it to the mounting surface using your own hardware (suitable for the surface you are mounting to) and the bracket supplied with the loudspeaker (see Figure 8). 3. T here is a threaded brass insert (1/4" – 20) on the back of the oS loudspeakers for attaching a custom bracket (see Figure 8). This allows you to position the loudspeaker at unusual angles or varying distances from the mounting surface. niLes audio CorPoration – 1-800-buy-hiFi – 305-238-4373 Figure 7. Placement for less bass output. (ConTinuEd on nExT PagE)
-
Page 12: Safety First
MOUNTING METhOdS (continued) Nail Mounting Screw Mounting Custom Bracket Mounting Figure 8. The OS loudspeakers can be mounted three ways. SAFETY FIRST! Be careful to use hardware that is designed for the surface you are mounting to. The OS 5.3 loudspeaker with the bracket weighs 5-1/2 pounds. -
Page 13: Painting The Loudspeaker
• M asking tape • T wo paint masks (supplied) • a damp cloth and a dry cloth PREPARING TO PAINT 1. S eparate the parts of the loudspeaker. You should remove the brackets and the bracket knobs. Remove the grille by hooking it with the tip of an awl and pulling it away from the cabinet (see Figure 9 on the next page). 2. W ipe off the sides of the cabinet, the bracket, bracket knobs, and grille with a damp cloth. do not touch or rub the loudspeakers on the front baffle. Make sure everything is dry before masking. 3. M ask off the binding posts and the brass threaded inserts on the back panel with masking tape. niLes audio CorPoration – 1-800-buy-hiFi – 305-238-4373 (ConTinuEd on nExT PagE) - Page 14 PREPARING TO PAINT Figure 9. Removing the grille using an awl. 4. Mask off the threaded inserts on the top and bottom with masking tape. 5. Protect the front of the loudspeakers by inserting the supplied paint masks in place of the grilles. PAINTING ThE CABINET, BRACkET kNOBS, ANd BRACkET 1. a pply two thin coats of a sandable spray primer to the cabinet and knobs. The bracket doesn’t require a coat of primer. 2. allow the primer to dry completely. 3. apply the finish color. 4. allow the paint to dry completely. 5. Carefully remove the masking material. 6. d o not reattach the loudspeaker to the bracket until the bracket is mounted. Try to keep all handling of the freshly-painted parts to a minimum.
-
Page 15: Painting The Grille
You will feel a positive “snap” when it is in place. niLes audio CorPoration – 1-800-buy-hiFi – 305-238-4373... -
Page 16: Installation
INSTALLATION MOUNTING ThE BRACkET (IF ATTAChING ThE LOUdSPEAkER TO A WALL, CEILING, BEAM, OR OThER SOLId STRUCTURE) 1. Loosen the bracket knobs and remove the bracket from the loudspeaker. 2. H old the bracket up to the mounting surface. The loudspeaker can be mounted either horizontally or vertically. Hold the bracket so that the loudspeaker wire fits through the large, circular wire hole in the center of the bracket. align the bracket so it is square with the surroundings (use a level for accuracy). 3. M ark the locations of the three oval-shaped screw holes (see Figure 10). Be sure to use all of the holes. Figure 10. Mounting the Bracket 4. drill pilot holes into the mounting surface. 5. P ull the loudspeaker wire through the wire hole in the center of the mounting bracket. align the bracket so that the holes all line up. 6. use your hardware to attach the bracket to the mounting surface. - Page 17 Figure 11. Mounting the shelf stand on the OS loudspeaker CONNECTING ThE LOUdSPEAkER 1. S eparate the two conductors of the loudspeaker wire so that at least 2 inches of each conductor are free. 2. S trip away 1/2 inch of insulation from the end of each conductor of the loudspeaker wire. 3. i f you have any connectors (gold pins or bananas) which you prefer to use, affix them to the stripped wire ends now. only gold-plated connectors should be used outside, as they will not tarnish or corrode. niLes audio CorPoration – 1-800-buy-hiFi – 305-238-4373 Bottom of Speaker (ConTinuEd on nExT PagE)
- Page 18 CONNECTING ThE LOUdSPEAkER 4. if using the bracket to attach to a solid surface, slide the loudspeaker onto the bracket. do not tighten the knobs completely. angle the loudspeaker so that the rear terminals are accessible. if using the shelf stand, position the loudspeaker on the stand and place it on the shelf or table where you want it. 5. Connect one stripped wire end to the black terminal and one to the red terminal, using correct polarity. NOTE: ObsErvE cOrrEcT pOlariTy: pOsiTivE (+) gOEs TO ThE rED pOsT aND NEgaTivE (–) gOEs TO ThE blacK pOsT. if yOu arE uNsurE Of wirE pOlariTy, sEE CHECKING LOUDSPEAKER PHASE bElOw. 6.
-
Page 19: Operation
Hosing off the loudspeaker is not recommended, as the tweeter is a precise mechanism which might be damaged by a high-pressure stream of water. niLes audio CorPoration – 1-800-buy-hiFi – 305-238-4373... -
Page 20: Specifications
Wiring Requirements We recommend using 16- to 18-gauge speaker wire for runs up to 80 feet and 14-gauge speaker wire for runs up to 200 feet. The connectors will accommodate 12- to 22-gauge wire. Dimensions (Loudspeaker with U-Bracket) 8-3/16"... -
Page 21: Notes
NOTES niLes audio CorPoration – 1-800-buy-hiFi – 305-238-4373... - Page 22 NILES dealer (with proof of purchase – claims made without proof of purchase will be denied) who will test the product and if necessary, forward it to NILES for service. If there are no authorized NILES dealers in your area, you must contact NILES to receive a factory Return Authorization Number.
-
Page 23: Warranty
Popular ❍ $25,000-$34,999 ❍ R&B ❍ $35,000-$44,999 ❍ Rock ❍ $45,000-$59,999 ❍ other _____________ ❍ $60,000-$74,999 ❍ $75,000-$99,999 How did you hear ❍ over $99,999 about niles? ❍ architect/developer ❍ occupation: Custom installer ❍ arts/Entertainment direct Mail ❍ ❍ Business owner Friend/Family ❍ ❍ Engineer in-Store display ❍ ❍ Finance/accounting interior designer ❍... - Page 24 ® l e n d i n g i g H i d e l i t y r c H i t e c t u r e n i l e s a u d i o C o r p o r a t i o n 1 2 3 3 1 s .