Advertisement
Quick Links
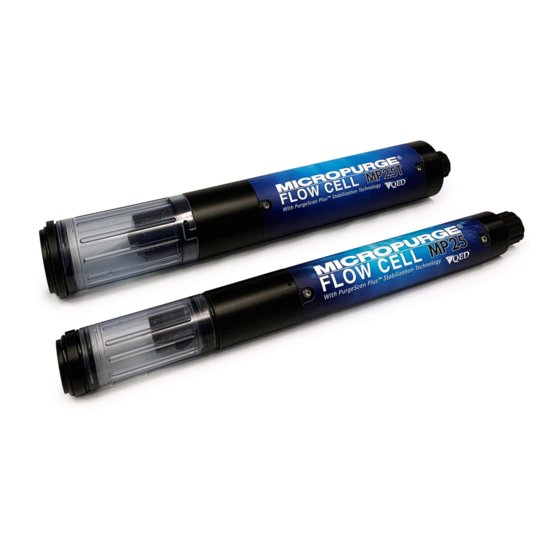
MicroPurge® Flow Cell Quick Start Guide
MP25 & MP25T
Set up Flow Cell:
1. Remove storage cup from sonde
2.
For MP25, attached flow cell adapter to the threads on the sonde bottom cap.
3. Insert sonde/adaptor into flow cell and push into bayonets slots, then turn sonde clockwise to lock.
4. Determine necessary flow cell inlet connection fittings based on pump discharge tubing type and size.
5. Connect the included flow cell flexible tubing from pump to flow cell and then from flow cell discharge to purge
water collection bucket.
Connect to App:
1. If not already installed, download and install the MicroPurge Android app on your Android device (tablet, phone
or Android OS laptop)
2. Enable the Bluetooth connection on your device for pairing.
3. Locate the Bluetooth ID on the bottom of the MP25 external battery pack
4. Launch the MicroPurge and watch for the Bluetooth ID to appear on the screen after 1-2 minutes.
5. Select the ID on the screen to connect the sonde to your device.
6. After the Sonde has successfully connected, press Settings, MicroPurge Sonde then at the top of the list press
Calibrate.
To Calibrate:
To Start PurgeScan Logging
1. Select the desired parameters to be measured from the Purge Scan > Sensors & Parameters menu and hit Save
2. Select desired Stabilization parameters from the Purge Scan > Stabilization Criteria menu and set the desired
stabilization range for each parameter in percent or units
3. Select Logging Interval using the pulldown menu from 1-10 minutes
4. If desired, enable the Trending function using the on/off toggle button on the Stabilization Criteria screen
5. Save Stabilization parameters and Logging Interval.
6. Create PurgeScan log name or select from an existing file.
7. Hit OK
8. From the Tablet/Phone menu, look to see where the PurgeScan log files are being saved. "Using Phone Storage"
will save files to the internal device memory; touch this to toggle to switch to "Using SD card if available" to save
files to an SD card in the device.
9. If backup logging to the sonde is desired, go to the MicroPurge Sonde > Backup Log Setup and create Backup Log
file name or select from an existing file.
10. Hit OK
11. Turn PurgeScan Log ON and then, in the pop-up window, hit OK
12. If Stabilization function is desired, hit OK in the Stabilization pop-up window.
13. After stabilization has been achieved and purging is completed, go to Settings and select "Turn PurgeScan Log
OFF" and then hit "OK" in the pop-up window.
14. To View your saved PurgeScan Log files, hit the View PurgeScan Logs button on the main screen. Select the
desired log file name using the pull-down menu arrow in the upper right corner
MicroPurge Application
tinyurl.com/ycal8zyq
See opposite side for Quick Start Calibration Guide.
MP25 & MP25T Manual
tinyurl.com/yawc4kb7
MP25 & MP25T Quick
Calibration Guide
tinyurl.com/y8lfh8j8
Advertisement

Related Manuals for QED MicroPurge MP25


Summary of Contents for QED MicroPurge MP25
- Page 1 MicroPurge® Flow Cell Quick Start Guide MP25 & MP25T Set up Flow Cell: 1. Remove storage cup from sonde For MP25, attached flow cell adapter to the threads on the sonde bottom cap. 3. Insert sonde/adaptor into flow cell and push into bayonets slots, then turn sonde clockwise to lock. 4.
- Page 2 MicroPurge® Flow Cell Quick Calibration Guide MP25 & MP25T Sensor Calibration To Start: 7. Connect Sonde to the Bluetooth Battery Pack and then connect to your tablet or smartphone through the MicroPurge App. (See section 3.2 in the MP25 O&M Manual for more details.) 8.