Advertisement
Available languages
Available languages
Quick Links
INSTRUCTION
EN
TPDAxxxxAx
i
Read this instruction before installation
and wiring of the product
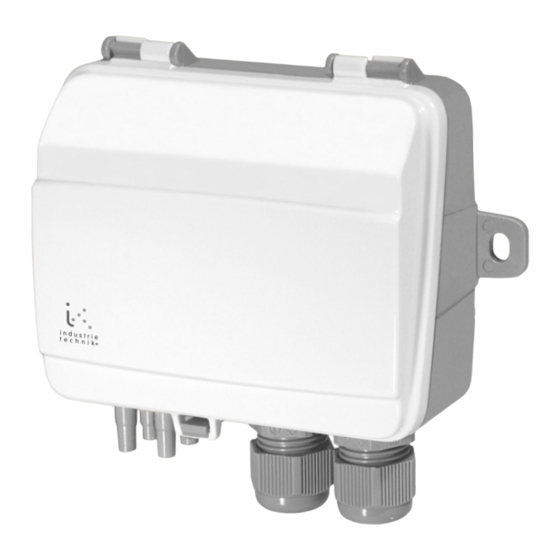
Pressure transmitter
TPDA...A are single or dual port pressure transmitters with one or two
universal outputs for 0...10 V or 4...20 mA (selectable).
Technical data
Supply voltage
24 V AC/DC ±15 %
Protection class
IP54
Calculated power consumption
0...10 V mode
2 VA (rms) / min. trafo size 7.5 VA
4...20 mA mode
2.7 VA (rms) / min. trafo size 9 VA
Overall accuracy, pressure
≤ 1 % full scale
Annual deviation (typical)
P1250 models
±2 Pa
P2500 models
±4 Pa
P7500 models
±20 Pa
Damping (settable)
1, 2, 4 and 8 s
Operating temperature range
-25...+50°C
Operating humidity
Max. 95 % RH (non-condensing)
Overvoltage on any terminal
Max. ±18 V (referenced to GND)
Universal outputs PS1, PS2
Configured as 0...10 V
Load impedance ≥ 10 kΩ,
Output impedance ≤ 35Ω
Configured as 4...20 mA
Output is actively sourced into a resistive
load impedance to signal ground. The
load impedance must be between
40...500Ω
Pressure ranges (full scale)
Model
Pressure
mBar
range (Pa)
TPDA-12A
PS1 0...1250
0...12.5
TPDA-25A
PS1 0...2500
0...25
TPDA-75A
PS1 0...7500
0...75
PS1 0...1250
0...12.5
TPDA-1225A2
PS2 0...2500
0...25
PS1 0...1250
0...12.5
TPDA-1275A2
PS2 0...7500
0...75
Note: The suffix in the name denotes the number of sensors in the unit.
The suffix "-2" indicates two sensors. No suffix means one sensor only.
Installation
The transmitter comes with one cable gland mounted and one loose. If
two cables are used, one for supply voltage and one for output signals,
the other cable gland must be assembled to the housing. Screw in the
cable gland until the plastic knockout in the housing snaps. Make sure to
remove the plastic knockout completely. Secure the cable gland.
Instruction TPDAxxxxAx
1.
Mount the transmitter horizontally or vertically on a stable,
vibration-free surface. If the unit is installed in a humid environ-
ment, install it vertically with the cable gland edge of the unit
pointing down to allow moisture to escape.
Take extra care when connecting the hoses to the inlet ports, as
the thin inner connections of the inlets are very sensitive. The lid
should be kept closed while performing the connections, or the
thin tubing might detach from the sensor.
2.
Refer to the graphics below for wiring. Use the leftmost cable
gland for supply voltage and use the rightmost gland for output
signals in order to minimise crosstalk between supply wires and
mmH
O
inH
O
2
2
signal wires.
3.
Set the DIP-switch to the desired operational mode and param-
0...125
0...5
eters.
0...250
0...10
4.
Power up the unit.
5.
Let the unit warm up for 10 minutes, then perform a zero-set
0...750
0...30
calibration by pressing the pushbutton.
0...125
0...5
6.
Connect plastic tubes from the ventilation duct to the pressure
0...250
0...10
inlets.
0...125
0...5
NOTE: A straight cut off nipple must be used for mounting in the
ventilation duct.
0...750
0...30
For optimal measuring results, measuring points with turbulent air
flow should be avoided. Preferably, measuring should be performed
at a distance of 2 duct diameters before bends and branching and at
6 duct diameters after bends and branching.
Wiring
1. G (+)
2. G0 (-)
3. UO1 +
4. UOI GND
5. UO2 +
6. UO2 GND
Terminals 2, 4 and 6 are galvanically the same (GND/G0).
For models with two sensors, the leftmost DIP-switch controls sensor
1 and the rightmost DIP-switch controls sensor 2 (see diagram 2
below).
1
Advertisement

Related Manuals for industrie technik TPDA-12A

Summary of Contents for industrie technik TPDA-12A
- Page 1 Model Pressure mBar signal wires. range (Pa) Set the DIP-switch to the desired operational mode and param- TPDA-12A PS1 0…1250 0…12.5 0…125 0…5 eters. TPDA-25A PS1 0…2500 0…25...
- Page 2 If the yellow LED starts blinking during the zeroing procedure, the unit DIP- Parameter Key pattern Parameter Status LEDs has failed to zero-set properly. If so, ensure that the pressure ports Pushbutton switch setting are open and unobstructed and then power-cycle the unit and try DIP-switch Output 0...10 V...
- Page 3 Intervalli di mBar pressione (Pa) un ambiente umido, installarlo in verticale con il bordo pres- sacavo dell’unità verso il basso per permettere all’umidità di TPDA-12A PS1 0…1250 0…12,5 0…125 0…5 Leggere le istruzioni prima di montare e cablare il fuoriuscire.Fare particolare attenzione quando si collegano i tubi TPDA-25A PS1 0…2500...
- Page 4 Pulsanti DIP- Parametri Settaggio pulsante Settaggio Status LEDs Pushbutton Pressione rapida: Calibrazione a zero dei sensori di pressione. switch parametri DIP-switch Scollegare le prese di pressione prima dell’azzeramento. Lasci- Funzione 0...10 V * are riscaldare l’unità per 10 minuti prima di eseguire la procedura. uscita 4...20 mA Sensor 1...