Advertisement
Quick Links
Transmission distance, PC to relay Board:
Standard RS232 specifications 50 feet, minimum.
Relay outputs:
10 Amp 240VAC/28VDC SPDT 1 form C power relays.
Operating Temperature & Humidity:
0º to 50º centigrade, 90% Relative
Parts Listing
All Models Include:
1 – Custom wired RS232 9 pin Dsub to Modular Cable Adapter
(Part number: ADP-MOD)
1 – RJ-11 Modular telephone cable (reverse wired)
Part Number MC4-7.
Model: S1-RLY-IO-INT & S2-RLY-IO-INT
With internal power transformer 120VAC 50/60 Hz with terminal block connection.
Model: S1-RLY-IO-INT-2 & S2-RLY-IO-INT-2
With internal power transformer 230VAC 50/60 Hz with terminal block connection.
Model: S1-RLY-IO-EXT & S2-RLY-IO-EXT
1 - AC to 9VDC Wall Transformer adapter
Setup Instructions
Important: make sure you use the proper modular cables (reverse wired) when connecting the
relay board to the PC. A 7' cable is supplied with the unit, but some customers require longer
cables to extend the distance from the PC. If you intend to extend the distance from the PC
purchase the cables with your unit to assure correct configuration.
Connect the computer, RS232 Modular cable adapter, modular cable, relay card, and wall
transformer as shown in Figure 1. If you have the internal transformer version reference Figure
2. Note if your version has a 230VAC input transformer connect one side of the 230V power
to L1 and the other side to L2/N on the terminal block, ground wire is connected to GND.
Note only one output connection is shown on the drawing although this is a dual channel unit.
The relays can control an AC or DC voltage.
Figure1
RS-232 IN
P C
Modular cable
GND
adapter
CH8
connected to the
CH7
serial port
CH6
CH5
Modular Cable
CH4
CH3
CH2
8 Channel Non-isolated
CH1
Input/Output Port
VCC
Individuallyselectable as
I/O Port
input or output
5VDC Maximum
Copyright (c) 2008 Pencom Design, Inc
Wall
Tranformer
Download, install, and run the relay test software on your IBM compatible personal computer.
Select the correct COM port in the software that's connected to the relay board. The Relay
Test Program operation is explained in the help file.
Pencom Design, Inc.
Plug in the wall transformer or apply power to board (on-board transformer). Make sure the
board address in the software is set to "A". This is the software default and is used in a single
or dual channel board configuration. Click ON #1 relay in the software program and there
should be an audible click from the relay selected, and the LED will illuminate.
Figure 2
Personal Computer
Modular cable
adapter
GND
connected to the
CH8
serial port
CH7
CH6
Modular Cable
CH5
CH4
CH3
8 Channel Non-isolated
CH2
Input/Output Port
CH1
Individuallyselectable as
VCC
input or output
I/O Port
5VDC Maximum
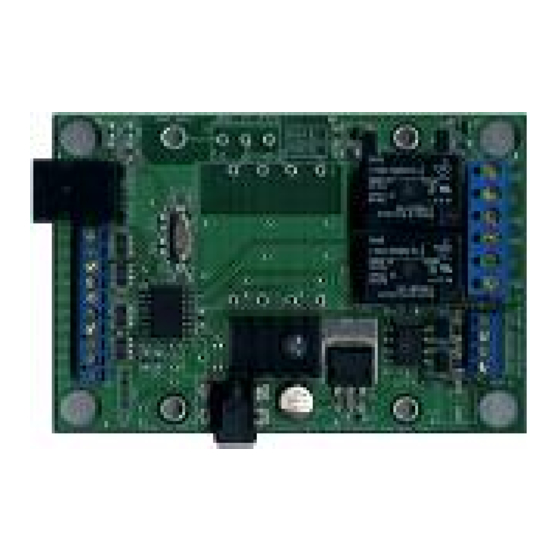
Connecting Relay Outputs
At the right side of the board as shown above you will see one or two 3-contact terminal blocks
marked with NC, COM, NO these are the relay outputs. Relay channel numbers are marked
next to each terminal block. Warning do not touch any other components on the board since
static electricity from your fingers may damage these devices.
Strip the insulation back on your wire approx. ¼ inch. Wire the hot (or positive if DC) side of
the power to the COM pin, and the output to the device under control using the NO (normally
open) or NC (normally closed) pins depending on your application. Insert the stripped wire
into the side of the terminal block and tighten the screw to clamp the wire in place. The
terminal blocks are designed for 14-22 AWG wire size. Do not exceed the 10 amp current
rating of the relays. Most applications will use the normally open contacts.
8 Channel Input / Output Port (Port #1)
The I/O port is on the 10 position terminal block. Warning these connections are for 5VDC
logic only, do not exceed this voltage or damage to the board will result. They are current
limited to approx. 12ma. The I/O ports are typically used for dry contacts (switch inputs) or
controlling an external device with a 5V input. Use the RTP software on the PC for setup.
2 Channel Opto-Isolated Input Port (Port #2)
The opto-isolated input is the 4-pin terminal block on the lower right of the board next to the
relay outputs. This is a input only port and is optically isolated from the circuit on the board,
the inputs are capable of handling up to 24VDC directly to the pins and must be driven from an
Line or
external power source to maintain isolation. The positive side of the voltage is connected to +.
Positive Voltage
Ch1
Modular Cable Wiring
NC
C
When routing modular cables, do not place them next to power cables as this will induce noise
NO
on the lines and could cause RS232 communication problems.
NC
Important use only reversed wired modular cables in Figure 3, NOT network/printer/data
C
NO
cables-- that are straight wired which may damage the boards as shown in Figure 4. Note in
Device to
Ch2
Figure 3, when you hold the modular connectors together on both ends of the wire with the
Control
CH1+
CH1-
gold pins facing you the same color wires are on opposite sides (the color doesn't matter only
CH2+
the position).
CH2-
2 Channel
Opto-Isolated
See figures 3 & 4 below to view diagrams of wiring differences:
(Input only) Port
28VDC Maximum
Reverse Connection for normal telephone lines.
CORRECT
For Relay Boards
Figure 3
2
Neutral
Line
Ground
GND
L1
N/L2
Line or
Positive Voltage
RS-232 IN
Channel 1
NC
C
NO
NC
T1
C
NO
Channel 2
Device to
Control
CH1+
CH1-
CH2+
CH2-
2 Channel
Opto-Isolated
(Input only) Port
28VDC Maximum
Copyright (c) 2008 Pencom Design, Inc
2CH-RLY-IO
Straight Connection for network or data use only
DO NOT USE
Figure 4
Pencom Design, Inc.
3
Software
The relay boards can be used with almost any software language that is able to use the PC
RS232 serial port. The relay board recognizes standard ASCII characters that are transmitted
from the host computer. Commands are case sensitive.
Command Structure: "AH1<cr>" (without the quotes) as shown below
"<Board Identification><Board Command><Relay Number or Data><Carriage return>"
Board Identification
Board Commands
The Board ID is "A" For the
H = Relay HIGH (ON)
single or dual channel relay
L = Relay LOW (OFF)
boards, these boards will only
R = Read relay status
respond to this address.
W = Write data latch
M = Momentary Delay
T = Toggle relay
I or a = read port 1 input
O or A = Write port1 output
b = read port 2 input
Board identification:
The board address is the first part of the command sent to the relay board it is set to "A" in
firmware and may not be changed for the single and dual channel relay boards.
Board Commands:
The board command is the second part of the serial data sent to the relay board. These
commands work in conjunction with the third part of the serial data that will be explained in
the following section.
H = Relay High (ON) – Sending an "H" will direct the board to turn ON the relay (making a
connection between the NO & COM contacts on the board).
L = Relay High (OFF) – Sending an "L" will direct the board to turn OFF the relay (breaking
the connection between the NO & COM contacts on the board).
W = Write data latch – Sending an "W" will write directly to the port. This command allows
you to turn multiple relays ON or OFF on the same board at the same time.
R = Read relay status – When this command is sent to the board, the board will respond back
to the PC with a decimal number, which corresponds to the status of the relays on the board.
This will be explained in more detail below:
M = Momentary Command – This command will briefly activate or deactivate a single relay
or all relays. The initial state of the relay will determine whether the relay toggles ON – OFF
– ON or OFF – ON – OFF. The momentary delay default is 30 milliseconds, but may be
changed from 10-50 milliseconds in the setup.
T = Toggle command - The toggle command will reverse the relay from it's current position.
The initial state of the relay will determine whether the relay toggles ON or OFF.
I or a = Input command – Read the inputs on 8 channel I/O port #1
O or A = Output command – Set the outputs on 8 channel I/O port #1
b = Input Command – Read the inputs on 2 channel opto-isolated port #2
Relay Number or Data:
The relay number or data command is the third part of the serial data that is sent to the relay
board(s) - this data is numerical. The data that is sent or received will relate directly to the
board commands that were explained in the previous section.
If the board command is "H" or "L":
Send a number 1 or 2 which represents the relay number on the board and will turn ON or
OFF the individual relay specified. Sending a zero that will turn ON or OFF ALL relays
on this board.
If the board command is "W":
Send a number from 0 to 3. When this number is converted into binary, it represents the
relay numbers on the board. This command allows you to turn multiple relays ON or
OFF at the same time with one command. Binary data is one's and zero's which
represents ON and OFF on the relay board (ON = 1 & OFF = 0). See table #1
Pencom Design, Inc.
Relay Number or Data
(H or L) = Relay number 1 or 2 or 0
to turn ON all relays on the selected
board
(R) = receive a number 0 – 3
(W) = write a number 0 - 3
4
Advertisement

Related Manuals for Pencom Design S1-RLY-IO-EXT

Summary of Contents for Pencom Design S1-RLY-IO-EXT
- Page 1 With internal power transformer 120VAC 50/60 Hz with terminal block connection. (Input only) Port Board Commands: 28VDC Maximum Copyright (c) 2008 Pencom Design, Inc 2CH-RLY-IO The board command is the second part of the serial data sent to the relay board. These Model: S1-RLY-IO-INT-2 & S2-RLY-IO-INT-2...
- Page 2 ON or OFF. The goal of Pencom Design is to provide top quality equipment at low cost. All of our The following code receives the data from the relay board on the “R” (Read command).