Advertisement
Quick Links
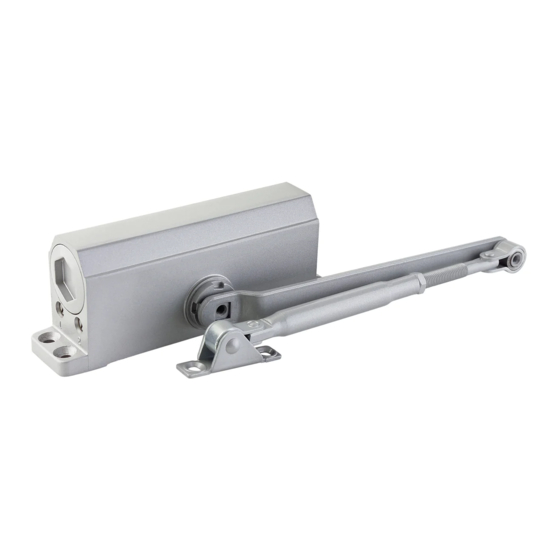
INSTRUCCIONES DE INSTALACIÓN PARA
CIERRA PUERTAS
DOOR CLOSER INSTALLATION INSTRUCTIONS
PARA MODELOS / FOR MODELS:
L5241AL • L5242AL • L5243AL
PARA UTILIZAR LA PLANTILLA DOBLE ESTA ORILLA / TO USE THE TEMPLATE FOLD THIS SIDE.
IMPORTANTE:
Utilice las partes y accesorios originales contenidos en el empaque para el
correcto armado e instalación de la cerradura. Si sustituye partes se perderá la
garantía. Lea completamente las instrucciones de instalación y si tiene alguna duda consulte
al distribuidor que le vendió el producto. Recuerde que esta cerradura puede instalarse en
puertas de hasta 45 mm (1-3/4") de espesor.
IMPORTANT: Original parts included on the box should be used to get proper set up of the lock. By
replacing parts in the lock the warranty will be void.
Read carefully the installation instructions and when doubt seek help from authorized dealer or in the store
you bought this product. Remember that this lock will fit any door up to 1 3/4" (45 mm) of thickness.
Herramientas
a utilizar /
Tools needed:
Taladro /
Power Drill
DIMENSIONES /
DIMENSIONS:
Código /
A
(mm)
Code
L5241AL
105
L5242AL
135
L5243AL
165
Guía.
Link.
Cuerpo.
Body.
ANTES DE LA INSTALACIÓN /
IDENTIFIQUE LA ORIENTACIÓN DE
LA PUERTA.
El cierra puertas puede ser
instalado en puertas que abren
hacia la IZQUIERDA o DERECHA,
así que antes de instalar
identifique el sentido de la puerta
de acuerdo a la ilustración (fig.1).
IDENTIFY DOOR OPENING
ORIENTATION: This door closer applies
to right hand (RH) or left hand (LH) door
opening. Before installation, identify the
door opening by referring to illustration
show below (fig.1).
PREPARACIÓN DE INSTALACIÓN /
1. Utilizando la plantilla para el cuerpo y
una vez identificada la dirección de
instalación, doble en las partes indicadas y
coloque la plantilla sobre la puerta cerrada
(puede utilizar cinta adhesiva para
sujetarla). Marque los cuatro orificios del
cuerpo utilizando un punzón y un martillo
(fig.2).
2. Utilizando la plantilla de la zapata,
marque con el punzon dos orificios más en
el marco o sobre la pared. Vea la figura 2.
3. Utilice un rotomartillo para barrenar los
orificios, utilice la broca adecuada (fig.3).
1. Using the template for the body and once the
installation direction is identified, fold the template
as in indicated over the closed door (you can use
tape to hold it). Mark the four holes of the body
using a punch and a hammer (Fig.2).
2. Using the shoe template, mark two more holes
on top jamb with the punch. See figure 2.
3. Use a rotary hammer for drilling holes, use the
appropriate drill bit (fig.3).
AJUSTES INICIALES /
INITIAL SETTINGS
AJUSTE FINO DEL CIERRE
FINE CLOSURE ADJUSTMENT
El cierre puede ajustarse girando la zapata
antes de instalar a la distancia deseada.
The closure can be adjusted by turning the shoe
before installing at the desired distance.
Una mayor distancia del brazo a la línea de centro de la bisagra proporciona menor fuerza de cierre.
Una distancia mas corta proporciona mayor fuerza de cierre.
The longer distance from link to hinge center line will make closing force weaker.
The shorter distance will make closing force stronger.
Broca /
Desarmador /
Drill bit:
3/16"
Screwdriver:
B
C
D
E
(mm)
(mm)
(mm)
(mm)
130
162
49
20
130
162
49
20
95
162
49
20
Zapata.
40 mm
Shoe.
C
BEFORE INSTALLING:
INTERIOR
Puerta izquierda
Left hand door
EXTERIOR
Bisagra
Hinge
Fig. 1
INSTALLATION PREPARATION:
Fig. 2
Punzón
Punch
Fig. 3
PAG. 1-2
Punzón /
#2
Punch
Peso de puerta /
F
(mm)
Door weight
19
25-45 kg
19
40-65 kg
19
60-85 kg
B
A
Puerta derecha
Right hand door
Bisagra
Hinge
Marco superior
Top jamb
Bisagra
Hinge
Advertisement

Summary of Contents for Lock L5241AL
- Page 1 Read carefully the installation instructions and when doubt seek help from authorized dealer or in the store CIERRA PUERTAS you bought this product. Remember that this lock will fit any door up to 1 3/4" (45 mm) of thickness. DOOR CLOSER INSTALLATION INSTRUCTIONS...
- Page 2 L5243AL cuerpo. Coloque el tornillo, arandela de presión y rondana. Apriete firmemente. Attach the square inlet with the end of the pinion to the body, place the screw, split lock washer and washer. Tighten firmly. COMPLETE LA INSTALACIÓN COMPLETE INSTALLATION Ponga la tapa del piñon para completar la instalación.