Advertisement
Quick Links
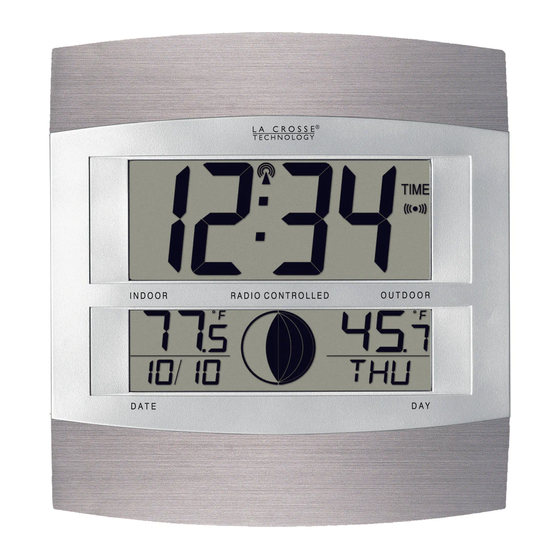
ATOMIC CLOCK WITH OUTDOOR WIRELESS TEMPERATURE AND MOON PHASE
FEATURES:
ATOMIC CLOCK:
LCD1
display
LCD2
display
•
WWVB Radio controlled time with manual time setting
•
12/24 hour time display
•
Time display: hour, minute, second
•
Alarm setting with snooze function
•
Calendar display
•
Weekday display (3 languages to choose from: English, French and Spanish)
•
Time zone setting
•
Daylight savings time ON/OFF option (DST)
•
ºC or ºF temperature display selectable
•
Indoor temperature display
•
Outdoor temperature display via 433MHz transmission
•
Wall mount or freestanding
•
Current moon phase display
OUTDOOR TEMPERATURE TRANSMITTER:
•
Remote transmission of outdoor temperature to the atomic clock by 433 MHz signals
•
Wall mounting case
TO INSTALL AND REPLACE BATTERIES IN THE ATOMIC CLOCK
The atomic clock uses 2 x AA, 1.5V batteries. To install and replace the batteries, please follow the steps below:
1.
Insert finger or other solid object in the space at the bottom center of the battery compartment and lift up to remove the cover.
2.
Insert batteries observing the correct polarity (see marking inside battery compartment).
3.
Replace compartment cover.
DO NOT SET THE CLOCK.
TO INSTALL AND REPLACE BATTERIES IN THE TEMPERATURE TRANSMITTER
The transmitter uses 2 x AA,1.5V batteries. To install and replace the batteries, please follow the steps below:
1.
Remove the cover.
2.
Insert the batteries, observing the correct polarity (see marking inside battery compartment).
3.
Replace the battery cover on the unit.
Alkaline batteries are recommended for use in both units. Avoid using rechargable batteries.
SETTING UP:
Alkaline batteries are recommended for use in both units. Avoid using rechargable batteries.
NOTE: Do not set the clock until the outdoor temperature is displayed.
1.
Place batteries in the outdoor transmitter first, then into the atomic clock. DO NOT PRESS ANY BUTTONS FOR 10 MINUTES.
2.
After the 10 minutes both the Indoor and Outdoor areas on your clock should have a temperature showing. If not, remove both sets of
batteries, wait 10 minutes and repeat step one.
3.
After the clock receives the outdoor temperature, set your time zone using the manual settings below. The default (factory)
time zone is Eastern Standard Time.
4.
After the clock receives the outdoor temperature the WWVB time code reception will automatically start. This reception typically takes
between 5-10 minutes in good conditions. If after 10 minutes the WWVB time has not been received, use the "SET" key to manually
enter the set-up mode and change either the time or date in order to activate the WWVB reception (see manual settings below). The
clock will then automatically attempt to receive the WWVB time from 12:00 am through 6:00 am each day (attempts WWVB reception
every full hour within this time frame). When this is successful, the received time will override the manually set time. The date is also
updated with the received time (Please refer to notes on "Radio controlled time" and "Manual time setting").
All manuals and user guides at all-guides.com
WS-6118
Instruction Manual
Battery cover
Holder
1
Hanging holes
Function keys
Foldable stand
Advertisement

Related Manuals for La Crosse WS-6118


Summary of Contents for La Crosse WS-6118
- Page 1 All manuals and user guides at all-guides.com WS-6118 ATOMIC CLOCK WITH OUTDOOR WIRELESS TEMPERATURE AND MOON PHASE Instruction Manual FEATURES: ATOMIC CLOCK: Hanging holes LCD1 Function keys display LCD2 display Foldable stand • WWVB Radio controlled time with manual time setting Battery cover •...
- Page 2 All manuals and user guides at all-guides.com Note: In the event of changing batteries of the unit ensure that the batteries do not spring free from the contacts. Always wait at least 10 minutes after removing the batteries before reinserting, otherwise start up and transmission problems may occur. FUNCTION KEYS The atomic clock has four easy to use keys: SET key...
- Page 3 All manuals and user guides at all-guides.com LANGUAGE SETTING The weekdays can be displayed in LCD2 with the pre-set languages: US English, French and Spanish. Set the desired language for the weekday display in LCD 2 by use of the + key. Press and release the SET key to enter the mode “Manual Time Setting”.
-
Page 4: Outdoor Temperature Transmitter
All manuals and user guides at all-guides.com OUTDOOR TEMPERATURE TRANSMITTER: The temperature is measured and transmitted to the atomic clock every 1 minute. The atomic clock will update the temperature display every 5 minutes. The range of the outdoor temperature transmitter may be affected by the temperature. At cold temperatures the transmitting distance may be decreased. -
Page 5: Troubleshooting
All manuals and user guides at all-guides.com • use of the foldout table stands, or • wall mounting FOLDOUT TABLE STAND The Foldout table stand legs are located on the backside, at the lower corners, and on both sides of the battery cover. The hinges are towards the edges of the atomic clock, and the ends (with no hinge) need to be folded out towards the edge. -
Page 6: Care And Maintenance
All manuals and user guides at all-guides.com The outdoor temperature will be displayed again once the current surrounding temperature is within the range of the transmitter. CARE AND MAINTENANCE: • Avoid placing the units in areas prone to vibration and shock as these may cause damage. •... -
Page 7: Warranty Information
La Crosse Technology provides a 1-year warranty on this atomic clock. Contact La Crosse Technology immediately upon discovery of any defects covered by this warranty. Before sending the atomic clock in for repairs, contact La Crosse Technology. The atomic clock will be repaired or replaced with the same or similar model.