Advertisement
Quick Links
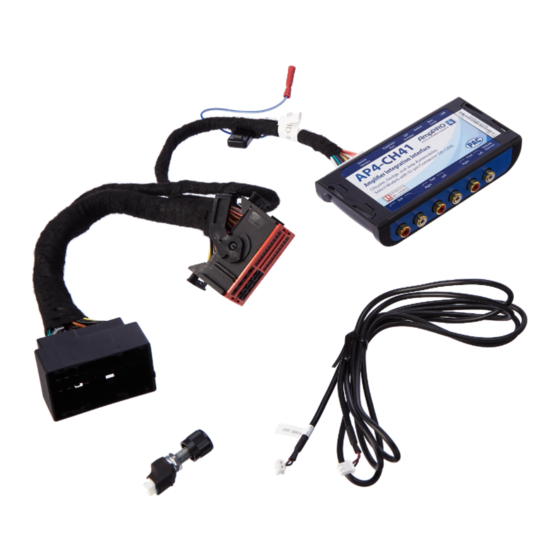
AP4-CH41 (R.2)
Introduction and Features
The AP4-CH41 provides a 6-channel pre-amp output for use with aftermarket audio equipment. Using the full range, fixed
level head unit output, in conjunction with CAN messages, the AP4-CH41 delivers a variable 5v RMS pre-amp output
with fading, balance, equalization, and level control capabilities. The module also retains all audio from other vehicle
features such as factory navigation prompts, Bluetooth, uConnect, and parking sensor chimes. A data controlled remote
amplifier turn on wire is also provided by the AP4-CH41. When used in conjunction with the APA-TOS1 (sold separately),
the module can provide a variable, stereo, digital audio signal over fiber optic (TOSLINK).
Important Notes
1. These instructions only apply to R.2.1.3.15 or later revisions of the AP4-CH41
2. Compatible with both amplified and non-amplified factory systems.
• Amplified Vehicles
• Compatible with all data-bus controlled amplified systems, no matter the screen size (including the 12" screen). To identify
these systems, look for logos on door speakers, tweeters, dash speakers or the subwoofer to confirm if the vehicle has an
amplified system (Alpine, Beats or Harman Kardon). Some vehicles may not always have branded systems. Unbranded
amplified systems are generally identified by locating a center channel speaker or subwoofer.
• Non-Amplified Vehicles
• Jeep Wrangler: Compatible with all screen sizes (5", 7", and 8").
• All other models: Only compatible in vehicles equipped with the 7" or 8" screen. Vehicles equipped with the 5" screen
are not compatible.
• If you are installing the AmpPRO in a vehicle that is not equipped with a factory amplifier, you must add an amplifier to
the vehicle's speakers, as the factory radio will no longer have a 4 channel variable output after it has been re-configured
by the AmpPRO. For example, you can not add only a subwoofer to a non-amplified vehicle, as the radio will no longer
power the cabin speakers properly.
• Non-amplified vehicles equipped with an Active Noise Cancellation (ANC) system require the ANC module to be bypassed.
This can be done manually or with the ANC bypass harness ANC-CH01. The following vehicles have an ANC module
that needs to be bypassed:
• 2019 RAM Truck
• 2017-2019 Pacifica
3. If a factory amplifier is present, it must remain connected and in the vehicle after the Amp PRO has been installed.
4. The remote output is rated at 2A of current. If more current is needed, an external relay must be used.
5. Channels 5 and 6 are non-fading outputs. The output level of channels 5 and 6 can be controlled using the supplied level
control knob.
6. The chime volume and minimum volume levels are set to 0 dB by default. If you are happy with this level in your particular
application, additional adjustment is not required. Please refer to the Setup and Configuration section on page 2 for more details.
7. The level control knob must be connected in order to manually adjust the chime volume and minimum volume settings.
8. The factory radio's speed controlled volume and surround sound mode are not supported by the AP4 outputs.
9. When using the TOSLINK output (APA-TOS1 sold separately), DIP switch 1 must be on in order for all warning chimes to be
heard through the sound system (see page 2 for details).
10. No adjustments can be made manually using the programming button, or the factory SWC, when the module is connected to
a PC.
Module Layout
Interface Connector 1
Expansion Port
Programming Button
USB Connection
Pacific Accessory Corporation
Feature Select
DIP switches
Non-Fading Level Control
Knob Connection
© 2019 AAMP Global. All rights reserved. PAC is a Power Brand of AAMP Global.
Advanced Amplifier Interface for
Chrysler / Dodge / Jeep / RAM
TOSLINK Output
(APA-TOS1 sold separately)
Front Output
Ch. 1(L) and 2(R)
Rear Output
Ch. 3(L) and 4(R)
PAC-audio.com
LED 1
LED 2
Non-Fading Output
Ch. 5(L) and 6(R)
Rev. V12
Date:092019
Page 1
Advertisement

Related Manuals for PAC AP4-CH41R2


Summary of Contents for PAC AP4-CH41R2
- Page 1 Ch. 1(L) and 2(R) Rear Output USB Connection Ch. 3(L) and 4(R) Non-Fading Output Ch. 5(L) and 6(R) © 2019 AAMP Global. All rights reserved. PAC is a Power Brand of AAMP Global. Rev. V12 Page 1 PAC-audio.com Date:092019 Pacific Accessory Corporation...
-
Page 2: Wiring Connection Chart
9. Connect the level control knob to the module and install in an accessible location. 10. Connect the signal cables and remote input from the aftermarket amplifier. © 2019 AAMP Global. All rights reserved. PAC is a Power Brand of AAMP Global. Rev. V12 Page 2 PAC-audio.com... -
Page 3: Setup And Configuration
6. Turn the level control knob clockwise until the desired minimum volume level is reached. 7. You can now either press the programming button once or wait ten seconds to exit the settings. © 2019 AAMP Global. All rights reserved. PAC is a Power Brand of AAMP Global. Rev. V12 Page 3 PAC-audio.com... - Page 4 1.00 0.75 Bass Q Factor Mid Q Factor Treble Q Factor 1.50 1.25 2.00 1.50 1.25 © 2019 AAMP Global. All rights reserved. PAC is a Power Brand of AAMP Global. Rev. V12 Page 4 PAC-audio.com Date:092019 Pacific Accessory Corporation...
-
Page 5: Firmware Updates
If the audio is still only on the rear channels and does not change with the volume knob, repeat the sleep cycle process. © 2019 AAMP Global. All rights reserved. PAC is a Power Brand of AAMP Global. Rev. V12 Page 5 PAC-audio.com... -
Page 6: Troubleshooting
Volume Down button on the factory SWC for 12 seconds until a tone is heard. © 2019 AAMP Global. All rights reserved. PAC is a Power Brand of AAMP Global. Rev. V12 Page 6 PAC-audio.com...