Advertisement
Quick Links
PAT. #043-2005 BB-Y
PAT. #043-2005 BB-Y
PAT. #043-4092 NAC-Y
PAT. #043-4092 NAC-Y
PAT. #043-3839 NPB-Y
PAT. #043-3839 NPB-Y
PAT. NAC-E
PAT. NAC-E
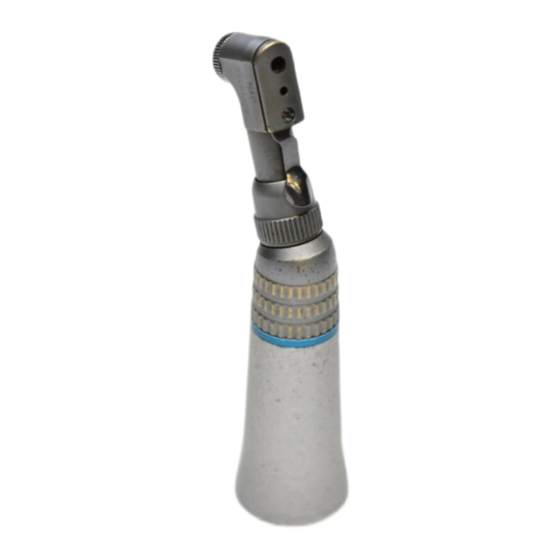
Latch Contra Angle Attachment
Latch Contra Angle Attachment
OPERATION MANUAL
OPERATION MANUAL
Caution, before use
Caution, before use
he Patterson Brand attachment is intended for use by dental
• The Patterson Brand attachment is intended for use by dental
professionals only.
ofessionals only.
• Read this operation manual carefully before using the attachment.
ead this operation manual carefully before using the attachment.
e sure to follow all the operating instructions, including all
• Be sure to follow all the operating instructions, including all
utions and warnings.
cautions and warnings.
eep this Operation Manual for future reference.
• Keep this Operation Manual for future reference.
onsider primarily the safety of the patient and the operator when
• Consider primarily the safety of the patient and the operator when
ing the attachment.
using the attachment.
Specifications
1. Specifications
HEAD: PAT. #043-4092 NAC-Y
HEAD: PAT. #043-4092 NAC-Y
HEAD: PAT. #043-2005 BB-Y
HEAD: PAT. #043-2005 BB-Y
HEAD: PAT. #043-3839 NPB-Y
HEAD: PAT. #043-3839 NPB-Y
NAC-Y head with E-type Sheath: NAC-E
NAC-Y head with E-type Sheath: NAC-E
P/N #s
#043-4092 NAC-Y
N #s
#043-4092 NAC-Y
Applicable burs
ISO 2.34 latch bur
plicable burs
ISO 2.34 latch bur
Installation/removal
allation/removal
Traditional type
Traditional type
of bur
ur
wable max. speed
Allowable max. speed
30,000rpm
30,000rpm
plicable contra
Applicable contra
PAT. #043-4126 ISO E-type, 1:1 drive type
PAT. #043-4126 ISO E-type, 1:1 drive type
le sheath
angle sheath
PAT. #043-2542 ISO E-type, 4:1 speed reduction type
PAT. #043-2542 ISO E-type, 4:1 speed reduction type
2. Installation/Removal of Head onto/from Contra Angle Sheath
Installation/Removal of Head onto/from Contra Angle Sheath
erform installation/removal of head onto/from the contra angle
- Perform installation/removal of head onto/from the contra angle
sheath. Refer to instructions 8: Replacement of Head.
eath. Refer to instructions 8: Replacement of Head.
Caution
Caution
Never use the attachment if it cannot be smoothly installed
• Never use the attachment if it cannot be smoothly installed
onto or removed from the contra angle sheath. In such a case,
onto or removed from the contra angle sheath. In such a case,
consult the Patterson Service Center.
consult the Patterson Service Center.
Installation/Removal of bur into/from Attachment
3. Installation/Removal of bur into/from Attachment
NAC-Y and BB-Y
C-Y and BB-Y
- Swing the latch plate out, holding the sheath connected to the head.
wing the latch plate out, holding the sheath connected to the head.
- Insert a bur into the chuck hole until the end of the bur touches the
sert a bur into the chuck hole until the end of the bur touches the
back of the chuck.
ack of the chuck.
- Swing the latch plate back until it is snaps at the center of the
wing the latch plate back until it is snaps at the center of the
collar of the contra angle head.
ollar of the contra angle head.
ake sure that the bur is locked securely with the latch, pulling the
- Make sure that the bur is locked securely with the latch, pulling the
ur with fingers and rotating it manually.
bur with fingers and rotating it manually.
NPB-Y
B-Y
- Holding the sheath connected to the head, press the head button
olding the sheath connected to the head, press the head button
with thumb to open the chuck and then insert a bur into the chuck
ith thumb to open the chuck and then insert a bur into the chuck
hole. When the end of the CA bur touches the back of the chuck,
ole. When the end of the CA bur touches the back of the chuck,
release the head button.
lease the head button.
ake sure that the bur is securely fixed after the installation,
- Make sure that the bur is securely fixed after the installation,
pulling the bur with your fingers and rotating it manually.
ulling the bur with your fingers and rotating it manually.
Caution
Caution
• Never use non-ISO standard, damaged or worn-out burs.
Never use non-ISO standard, damaged or worn-out burs.
• Use clean burs. Dirt or debris stuck to the bur shank may clog
Use clean burs. Dirt or debris stuck to the bur shank may clog
the chuck mechanism.
the chuck mechanism.
: AUTOCLAVABLE
OM-CK285E 001
OM-CK285E 001
#043-2005 BB-Y
#043-3839 NPB-Y
#043-2005 BB-Y
#043-3839 NPB-Y
ISO 2.34 latch bur
ISO 2.34 latch bur
ISO 2.34 latch bur
ISO 2.34 latch bur
Traditional type
Traditional type
Pushbutton type
Pushbutton type
40,000rpm
40,000rpm
40,000rpm
40,000rpm
4. Operation
NAC-Y
- Setting the motor speed below 30,000rpm, perform a test run of
the attachment, making sure that the bur is securely installed.
- Use the attachment, setting the motor speed appropriately.
BB-Y and NPB-Y
- Setting the motor speed below 40,000rpm, perform a test run of
the attachment, making sure that the bur is securely installed.
- Use the attachment, setting the motor speed appropriately.
: AUTOCLAVABLE
• When abnormal vibration, noise, overheating, etc., occurs
while the attachment is in the test run or in use, stop using the
attachment immediately. In such a case, consult the
Patterson Service Center.
• NAC-Y and BB-Y: Never swing the latch plate out when the
motor is rotating.
• NPB-Y: Never press pushbutton when the motor is rotating.
• Never connect/disconnect the attachment when the motor is
rotating.
• NAC-Y: Never set motor speed above 30,000rpm.
• BB-Y and NPB-Y: Never set motor speed above 40,000rpm.
5. Cleaning and Drying
Cleaning and Drying the Exterior
Wash the handpiece under running water following the procedures
below. (Water condition: ≤100°F, ≥3.5L/min; water should be of the
same quality as drinking water)
- Clean the external surfaces of
the handpiece with a soft
bristled toothbrush for 15
seconds or more.
- Clean around the bur insertion
hole for 15 seconds or more,
using an interdental brush
(wire thickness 0.7mm) that
conforms to size 4 in ISO
16409.
Under appropriate lighting
(natural office lighting, 500 lx
or higher), inspect the
handpiece for blood or other
debris. If any visible debris remains, repeat the process until the
handpiece is visually clean.
After cleaning, if the residual moisture is present, wipe off with
dry cloth or blow it off with compressed air (≤50.75psi) until there
is no moisture in the interior and exterior.
When blowing off with compressed air, cover the handpiece with
cloth to prevent scattering of water. Proceed to 6: Cleaning and
Lubrication.
6. Cleaning and Lubrication
Cleaning and Lubricating the Interior
- Attach an E-Type spray
nozzle to the nozzle of the
PANA SPRAY Plus.
- Shake the can 3 or 4 times,
and insert the E-Type spray
nozzle into the rear of the
handpiece while holding the
head of the handpiece with a cloth etc.
- Hold the handpiece, and spray for 2 or 3 seconds until oil comes
out of the handpiece head. Repeat lubrication until foreign material
stops coming out of the tip.
4. Operation
NAC-Y
- Setting the motor speed below 30,000rpm, perform a test run of
the attachment, making sure that the bur is securely installed.
- Use the attachment, setting the motor speed appropriately.
BB-Y and NPB-Y
- Setting the motor speed below 40,000rpm, perform a test run of
the attachment, making sure that the bur is securely installed.
- Use the attachment, setting the motor speed appropriately.
Warning
Warning
• When abnormal vibration, noise, overheating, etc., occurs
while the attachment is in the test run or in use, stop using the
attachment immediately. In such a case, consult the
Patterson Service Center.
• NAC-Y and BB-Y: Never swing the latch plate out when the
motor is rotating.
• NPB-Y: Never press pushbutton when the motor is rotating.
• Never connect/disconnect the attachment when the motor is
rotating.
• NAC-Y: Never set motor speed above 30,000rpm.
• BB-Y and NPB-Y: Never set motor speed above 40,000rpm.
5. Cleaning and Drying
Cleaning and Drying the Exterior
Wash the handpiece under running water following the procedure
below. (Water condition: ≤100°F, ≥3.5L/min; water should be of
same quality as drinking water)
- Clean the external surfaces of
the handpiece with a soft
bristled toothbrush for 15
seconds or more.
- Clean around the bur insertion
hole for 15 seconds or more,
using an interdental brush
(wire thickness 0.7mm) that
conforms to size 4 in ISO
16409.
Under appropriate lighting
(natural office lighting, 500 lx
or higher), inspect the
handpiece for blood or other
debris. If any visible debris remains, repeat the process until the
handpiece is visually clean.
After cleaning, if the residual moisture is present, wipe off with
dry cloth or blow it off with compressed air (≤50.75psi) until th
is no moisture in the interior and exterior.
When blowing off with compressed air, cover the handpiece wi
cloth to prevent scattering of water. Proceed to 6: Cleaning and
Lubrication.
6. Cleaning and Lubrication
Cleaning and Lubricating the Interior
- Attach an E-Type spray
nozzle to the nozzle of the
PANA SPRAY Plus.
- Shake the can 3 or 4 times,
and insert the E-Type spray
nozzle into the rear of the
handpiece while holding the
head of the handpiece with a cloth etc.
- Hold the handpiece, and spray for 2 or 3 seconds until oil come
out of the handpiece head. Repeat lubrication until foreign mate
stops coming out of the tip.
E-Type spray nozzle
E-Type spray nozzle
Advertisement

Related Manuals for Patterson NAC-E


Summary of Contents for Patterson NAC-E
- Page 1 Patterson Service Center. he Patterson Brand attachment is intended for use by dental • The Patterson Brand attachment is intended for use by dental • NAC-Y and BB-Y: Never swing the latch plate out when the • NAC-Y and BB-Y: Never swing the latch plate out when the professionals only.
- Page 2 10. Guarantee actual setting temperature. actual setting temperature. Patterson guarantees the head for six months and the sheath for 10 Patterson guarantees the head for six months and the sheath for 1 months subject to observance of maintenance instructions, cautions,...