Advertisement
Available languages
Available languages
Quick Links
Cord
Driver
Assembly Instructions (English)
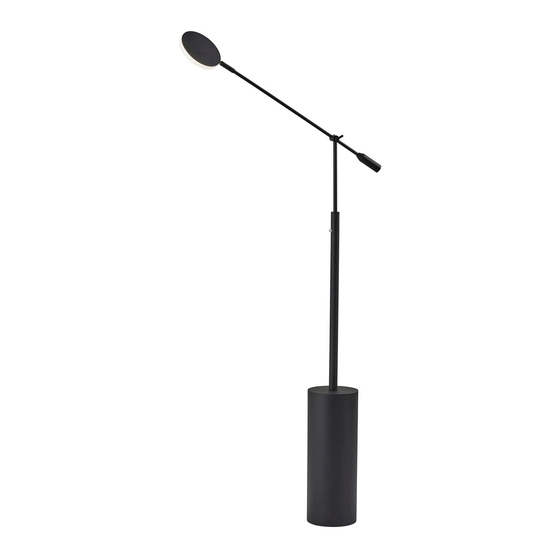
ASSEMBLY INSTRUCTIONS FOR
GROVER LED FLOOR LAMP
Model # 2151-01
Swing pole
Upper pole
Bottom pole
Base
Switch Directions:
Push & hold switch to dim or brighten,
push and release switch to change
Shade
color temperature.
1. In order to tighten the adjustable arm for safety
reasons, please use the provided Allen Wrench to
screw in the mini screw at the arm joint. Please also
find extra mini-screws in your parts bag in case this
one gets lost.
2.
Screw bottom pole onto upper pole and
tighten.
3.
Screw bottom pole onto base.
4.
Insert cord plug into the driver.
Adjust the swing arm to the appropriate
5.
direction.
GENERAL PRODUCT INFORMATION:
This product is suitable
for dry locations only.
IMPORTANT SAFETY INSTRUCTIONS:
This portable lamp has a polarized plug (one
blade is wider than the other) as a feature to
reduce the risk of electric shock. This plug will fit
in a polarized outlet only one way. If the plug does
not fit fully in the outlet, reverse the plug. If it still
does not fit, contact a qualified electrician. Never
use with an extension cord unless plug can be
fully inserted. DO NOT ALTER THE PLUG.
BULB TYPE: (1) 10W Integrated LED
21 Penn Plaza Suite 909 New York, NY 10001
2151-01
Tel: (212) 736 4440 Fax: (212) 736 4806
www.adessohome.com
1.0
Advertisement

Related Manuals for Adesso GROVER LED FLOOR LAMP

Summary of Contents for Adesso GROVER LED FLOOR LAMP
- Page 1 ASSEMBLY INSTRUCTIONS FOR 2151-01 GROVER LED FLOOR LAMP Model # 2151-01 Switch Directions: Push & hold switch to dim or brighten, push and release switch to change Shade color temperature. 1. In order to tighten the adjustable arm for safety...
- Page 2 INSTRUCCIONES DE ENSAMBLAJE PARA 2151-01 GROVER LAMPARA DE PISO LED Modelo # 2151-01 Instrucciones del Interruptor: Presione y mantenga pulsado el interruptor para atenuar o aclarar. Empujar y soltar el interruptor para cambiar el color de la temperature. Pantalla 1. Para apretar el brazo oscilante ajustable de modo que se mantenga en su lugar en todas las posiciones, use la llave Allen para atornillar el Brazo Oscilante...