Advertisement
Quick Links
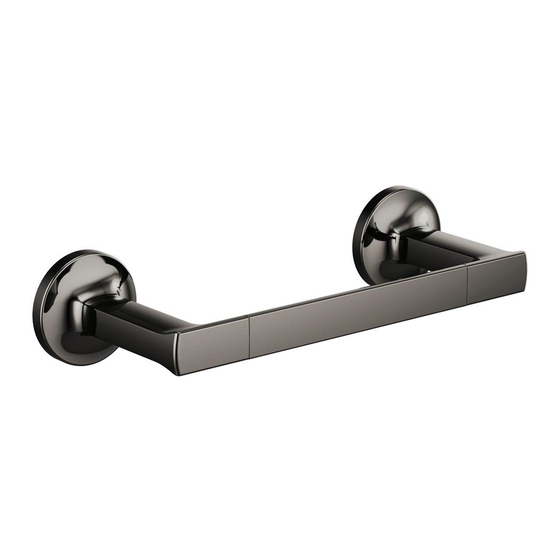
Model/Modelo/Modèle
694706▲
691806▲
692406▲
Series/Series/Seria
Kintsu
TM
▲Specify Finish / Especifíque el Acabado / Précisez le Fini
You may need / Usted puede necesitar /
Articles dont vous pouvez avoir besoin:
1
8" (203 mm) for Model 694706
18" (457 mm) for Model 691806
24" (610 mm) for Model 692406
1
2
NOTE: If possible, it is best to mount at least one
end of your towel bar into a wall stud. Try to locate a
wall stud with a stud finder or by tapping on the wall.
Place mounting bracket (1) in the desired location. Ensure
the mounting bracket is level; then, mark the position of the
holes (2) on the wall. Repeat for the 2nd mounting bracket
as noted above.
NOTA: Si es posible, es mejor que instale, aun que sea,
un extremo de su toallero en un entramado o soporte de
pared. Trate de ubicar un entramado con un detector de
entramados o golpeando la pared. Coloque el abrazadera
de montaje (1) en el sitio deseado. Asegúrese que el
abrazadera de montaje está nivelado; luego, marque la
posición de los agujeros (2) en la pared. Repita para el
segundo soporte de montaje como se indicó anteriormente.
REMARQUE: Dans la mesure du possible, il est préférable
de fixer au moins une extrémité du porte-serviette dans un
montant. Essayez de trouver un montant à l'aide d'un
localisateur de montants ou en tapotant sur le mur. Placez
le support de montage (1) à l'endroit voulu. Assurez-vous qu'il
est de niveau, puis marquez la position des trous (2) sur le mur.
Répétez pour le 2ème support de montage comme indiqué
ci-dessus.
?
www.brizo.com
1-877-345-BRIZO(2749)
brizosupport@brizo.com
10/22/2019
107008
2
For Drywall
1
2
If you were able to locate a wall stud to mount your accessory, drill 1/8" (3mm) holes and
mount the mounting bracket with the two screws provided.(Skip to step 4 if both mounting brackets
were mounted into wall studs.)
For drywall - Use a Phillips screwdriver to insert the anchors (1). Push and turn the anchors
in a clock-wise direction until flush with the wall surface. Do Not Drill.
For tile or solid walls - Drill 1/4" (6mm) holes then insert anchors (1) and tap flush with wall.
Note: Hollow doors may require molly or toggle bolts, which are included with this product.
Si logró ubicar un entramado de pared para instalar su accesorio, taladre agujeros de 1/8" (3mm)
e instale el perno de instalación con los dos tornillos incluidos. (Continue con el paso 4 si ambos pernos
de instalación se instalaron en los entramados).
Para muros en seco – Use un destornillador Phillips para introducir los soportes (1). Empuje
y gire los soportes en dirección de las manecillas del reloj hasta que queden al ras con la
superficie de la pared. No taladre.
Para lozas y paredes sólidas – Taladre agujeros de 1/4" (6mm) y luego introduzca los
soportes (1) y de golpecitos hasta que queden al ras con la pared.
Nota: Puertas huecas podrán requerir sujetador o pernos de palanca, que se incluyen con
este producto.
Si vous avez pu trouver un montant pour fixer votre accessoire, percez des trous de 1/8 po
(3mm) et montez l'élément de fixation à l'aide des deux vis no fournies. (Passez à l'étape 4, si les deux
éléments de fixation sont ancrés dans des montants).
Dans le placoplâtre - À l'aide d'un tournevis Phillips, introduisez les ancrages (1). Enfoncez les
ancrages et tournez-les dans le sens horaire jusqu'à ce qu'ils se trouvent à égalité de la surface
du mur. Ne faites pas de trous à la perceuse.
Dans les carreaux ou les murs pleins - Percez des trous de 1/4 po (6 mm), puis introduisez les
ancrages (1) et frappez-les légèrement jusqu'à ce qu'ils soient à égalité de la surface du mur.
Note : Les portes creuses, il peut être nécessaire d'utiliser les boulons Molly ou les boulons
à ailettes fournis avec ce produit.
TOWEL BARS
BARRA PARA TOALLAS
PORTE-SERVIETTES
1
1
1
Date of Purchase: ____________________
Fecha de compra
Date d'achat
For Tile or Solid Walls
694706▲
691806▲
692406▲
1
1
107008 Rev. A
Advertisement

Related Manuals for Brizo Kintsu Series


Summary of Contents for Brizo Kintsu Series
- Page 1 (1) et frappez-les légèrement jusqu’à ce qu’ils soient à égalité de la surface du mur. Note : Les portes creuses, il peut être nécessaire d’utiliser les boulons Molly ou les boulons à ailettes fournis avec ce produit. www.brizo.com 1-877-345-BRIZO(2749) brizosupport@brizo.com 10/22/2019 107008 Rev.
- Page 2 With the mounting bracket (1) oriented as shown, place it Position body (1) over mounting bracket (2) and tighten set screw (3). (Set screw should be on the over the installed anchors (2) and attach with screws (3). bottom of body.) Place one end of the towel bar (4) into the second body (5), and place the other Repeat for second mounting bracket.
- Page 3 Notes / Notas / Notes CLEANING AND CARE Care should be given to the cleaning of this product. Although its finish is extremely durable, it can be damaged by harsh abrasives or polish. To clean, simply wipe gently with a damp cloth and blot dry with a soft towel. LIMPIEZA Y CUIDADO DE SU LLAVE Tenga cuidado al ir a limpiar este producto.
- Page 4 TO THE MAXIMUM EXTENT PERMITTED BY APPLICABLE LAW, THIS WARRANTY DOES NOT COVER, AND BR- is not practical, Brizo Kitchen & Bath Company may elect to refund the purchase price in exchange for the return of the product. These IZO KITCHEN &...