
Related Manuals for Sony RM-TP501 Primary


Summary of Contents for Sony RM-TP501 Primary
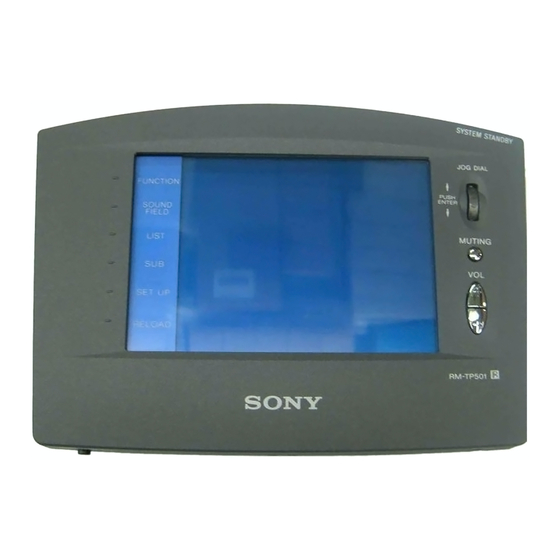
- Page 1 3-864-784-11(1) Remote Commander Operating Instructions RM-TP501 1998 by Sony Corporation...
-
Page 2: About This Manual
If you have any question or problem concerning your receiver, please consult your nearest Sony dealer. About This Manual • The following icon is used in this manual: z Indicates hints and tips for making the task easier. -
Page 3: Table Of Contents
Operations 9 Front panel 9 Rear panel 10 Operation 11 Basic Operations 11 Example: Operating a CD Player 13 Example: Operating the Tuner 14 Example: Recording from CD to MD 15 Selecting Sound Fields 16 Adjusting Sound Fields 17 Adjusting the Commander’s Operating... -
Page 4: Preparations
AV components connected to the receiver. Compatible Components This unit can be used to operate Sony AV components as well as AV components manufactured by other manufacturers. Set up is necessary in order to operate components manufactured by other companies (see page 18). -
Page 5: Preparing The Commander
Preparing the Commander Please be sure to carry out the procedures described in “Setting up the commander” on page 6 after inserting the batteries. Inserting batteries into the commander Insert the four size-AA (LR6) alkaline batteries (for commander operation) and lithium battery (for preservation of the commander’s internal memory). - Page 6 If the tip of the touch pen is damaged, or the touch pen is lost, please consult your nearest Sony dealer. Turn CONTRAST to adjust brightness of the LCD. CONTRAST control Touch panel adjustment Adjust the position of the touch panel’s LCD.
- Page 7 1 m ~ 2 m Note • To ensure good communication conditions, carry out initial setup from directly in front of, and close to the receiver. • Do not move the unit during initial setup. If a communication error occurs during setup An error message will be displayed.
-
Page 8: Screen Hierarchy
Screen Hierarchy The following diagram show the basic composition of this unit’s screen hierarchy. FUNCTION screen Normally, the FUNCTION screen is displayed. To display a different screen, touch the left side of the LCD. SOUND FIELD screen SETUP screen RELOAD... Touch when the song titles of a CD or MD being played back are not displayed... -
Page 9: Location Of Parts And Basic Operations
Rotate to scroll through items in a list (etc.). Push to select the highlighted item. 5 SYSTEM/STANDBY button Normally used to turn off all Sony components. Can also be used to turn the receiver on or off depending on the settings made in the SETUP screen (see page 21). -
Page 10: Rear Panel
2 Battery cover 3 Touch pen 4 SYSTEM/STANDBY button Normally used to turn off all Sony components. Can also be used to turn the receiver on or off depending on the settings made in the SETUP screen (see page 21). -
Page 11: Operation
Operation This chapter explains how to operate the receiver and connected audio/ video components. Basic Operations Displaying the FUNCTION screen To operating components connected to the receiver, first display the FUNCTION screen, then select the component you wish to operate (CD, MD etc.). Normally, the FUNCTION screen is displayed. - Page 12 Basic Operations FUNCTION screen hierarchy The following diagram shows the composition of the FUNCTION screen hierarchy. The types of icons that can be displayed on the FUNCTION screen can be set using FUNCTION HOOK UP in the SETUP screen. (For details on FUNCTION HOOK UP, see page 20.)
-
Page 13: Example: Operating A Cd Player
To view the LIST Touch LIST to view the song titles in a Sony CD changer (5, 50, 200 CD) or MD deck connected by a CONTROL A1 cord. In this case, the information must be downloaded from the receiver (see page 20 for details). -
Page 14: Example: Operating The Tuner
Example: Operating the Tuner This section describes how to operate the tuner. For details on tuner operation, please refer to the operating instructions provided with the receiver. Touch FUNCTION. The FUNCTION screen appears. Touch The receiver’s function switches to TUNER and the tuner screen appears. -
Page 15: Example: Recording From Cd To Md
When MD/DAT is touched, the REC EDIT operation screen appears. Touching r in RECORDER: MD/DAT, then touch ( in PLAYER: CD. Starts playback from the CD player Starts recording on the MD deck. Recording starts. The FUNCTION screen returns once the recording finishes. -
Page 16: Selecting Sound Fields
Selecting Sound Fields These sections describe how to select and make adjustments to the sound fields. For details concerning sound fields, please refer to the operating instructions supplied with the receiver. Displaying the SOUND FIELD screen Touch SOUND FIELD. SOUND FIELD The SOUND FIELD screen appears. -
Page 17: Adjusting Sound Fields
Adjusting Sound Fields Sound fields can be adjusted with the following 3 items: • EQ EDIT (frequency band adjustments) • SURROUND EDIT (surround parameter adjustments) • LEVEL (speaker volume adjustments) For details on what can be adjusted, refer to the operating instructions supplied with the receiver. -
Page 18: Adjusting The Commander's Operating Environment
Adjusting the Sound Fields To adjust the speaker volume Touch LEVEL on the SOUND FIELD screen. The LEVEL screen appears. Adjust as desired. Touch to adjust to the level of the corresponding speaker. Touch EXIT when adjustment is finished. To listen to the adjusted sound and check its balance Touch TEST TONE. - Page 19 To display other items, use the JOG DIAL or touch 4 or $ to scroll through the list. The FUNCTION&USER IR:CATEGORY screen appears. Select the type of component connected (Ex: Sony VTR1). To display other items, use the JOG DIAL or touch 4 or $ to scroll through the list.
- Page 20 TUNER PRESET NAME: Broadcast station names etc., memorized in receiver. CD MEMO: CD song titles or disc titles etc., from a Sony CD changer (5/50/200 CD) connected to receiver with CONTROL A1 cable. Downloading starts, and the progress is displayed.
- Page 21 Select a short turn off time in step 2. p Changing the function of the SYSTEM/STANDBY button ALL OFF: Switches power of all Sony AV components off. ON/OFF: Switches only the receiver on or off. p Setting the operation sound on or off A beep can be set to sound or not sound when the touch panel is touched.
-
Page 22: Additional Information
If the tip of the touch pen is damaged, or the touch pen is lost, please consult your nearest Sony dealer. On handling The touch panel (display section) is made of glass. -
Page 23: Troubleshooting
Please place away from the florescent light. / Make sure you have selected the correct function on the remote. / When you operate a programmed non-Sony component, the remote may not function properly depending on the make and model of the component. -
Page 24: Index
160 x 111 x 46 mm Mass 290 g (Main unit only including touch pen) Design and specifications are subject to change without notice. Sony Corporation Printed in Malaysia Index A, B Battery 5, 7 CD player 13 Downloading receiver data 20...