Advertisement
Quick Links
MAC FAUCETS
Installation Procedure:
Take a moment to view drawings and read "special Installation note" on pages 4 and 5 of this manual before proceeding with
installation. Connect Faucet Autmator model FA43 exactly as shown in drawing, with sensor cable connection pointing down,
water inlet on the right, water outlet from below. Failure to install Faucet Automator Model FA43 exactly as shown will result
in premature product failure and will void all warranties including extended warranty.
Make sure wall surface area is clean and free of debris.
> Faucet FA43-124: slide supplied disc (flashing) over spout with smooth surface facing forward.
> Faucet FA43-125 place supplied decorative ring onto end of spout. This faucet requires 1/2" nipple (not supplied).
> Faucets FA43-129 and FA43-130 require 1/2" nipple (not supplied).
Install new faucet by fastening spout to pipe elbow which has been installed behind the wall. Elbow must be 1/2" NPT
Install Sensor by placing sensor wire through the hole designated for sensor.
Using "Plumbers Putty" or Silicon as a bedding compound, push sensor body into hole and allow to hold.
Make sure that wire is not crimped or cut during installation. Cutting or severely crimping sensor wire will cause faucet to
malfunction and will also void warranty. Sensor wire is specifically designed to resist damage,
simple careful steps and common sense is all that is necessary for a complete and rewarding installation process.
Locate a spot on the wall (below counter) that you feel is suitable for installing Faucet Automator FA43. The spot selected
should be within reach of braided hose and sensor wire, and should not be located below an area with potential water leaks.
1. Place Faucet Automator FA43 against the wall and mark the 2 spots where mounting holes will be. Using drill size ¼" drill 2
holes. Insert supplied anchors in the holes.
2. Fasten Faucet Automator FA43 using supplied fasteners.
3. Remove stainless steel braided hose from package and fasten to brass pipe below sink that is designed to deliver water to the
spout. Install the other end of the hose to Faucet Automator's water outlet located at the bottom of the FA43 Automator.
4. Align groove on sensor plug with groove on Faucet Automator FA43 sensor receptacle, insert plug into receptacle and push.
5.
If Supplied, connect mixing valve to inlet side of faucet Automator located on the right side of the FA43 Automator.
Before proceeding to step the next step, purge both hot and cold water lines for at least a minute each at high volume.
Purging water lines clears out dirt and debris that would otherwise find its way to screen filter.
***For single water source application: Install cold water supply hose to Faucet Automator's water inlet. Do not install hot water
supply hose only in single water source application as this might result in scalding injury..
***For hot/cold water application: Install hot and cold water supply hoses to inlet side mixing valve. Turn angle stops on.
Check for leaks.
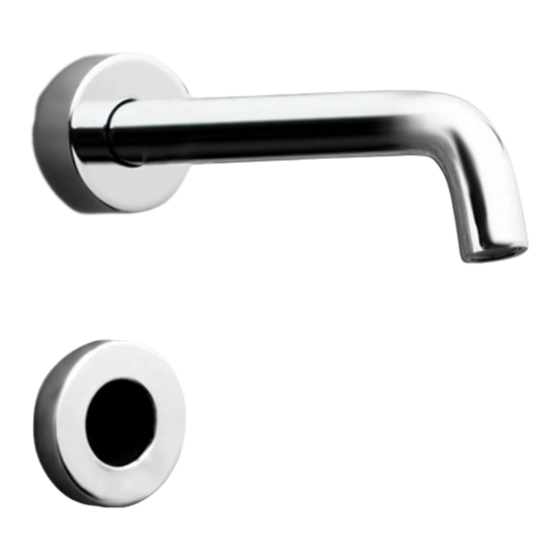
FA43 WALL MOUNT FAUCETS
Please be especially careful not to mar the faucet surface.
MAC FAUCETS
13105 Crenshaw Blvd
Hawthorne, CA 90250
Tel 866.558.3200 – Fax 310.919.3073
www.macfaucets.com
1
Advertisement

Related Manuals for Mac Faucets FA43 Series

Summary of Contents for Mac Faucets FA43 Series
- Page 1 MAC FAUCETS FA43 WALL MOUNT FAUCETS Installation Procedure: Take a moment to view drawings and read “special Installation note” on pages 4 and 5 of this manual before proceeding with installation. Connect Faucet Autmator model FA43 exactly as shown in drawing, with sensor cable connection pointing down, water inlet on the right, water outlet from below.
- Page 2 Batteries installed improperly in battery pack, battery harness not plugged in properly, see installation instruction, and battery replacement instructions. 5. Sensor wire loose, unplugged, plugged improperly, plug sensor wire properly. Please call MAC Faucets for instructions. Faucet does not operate, red light DOES blink in response to approaching objects: 1.
- Page 3 1. Turn down water flow rate. 2. Replace aerator with 0.5GPM aerator (when possible). 3. Adjust sensor range to “shorter”. Please call MAC Faucets for instructions. Runaway faucet, water runs out of faucet continuously, longer than 1 minute, does not stop.
- Page 4 LIMITED WARRANTY Mac Faucets warrant this faucet to be free of defects for a period of one year from date of purchase. Mac Faucets will replace, free of charge, during this warranty period, parts that prove defective when properly installed and under normal use and service. Damage that occurs as a result of abuse, improper installation, environmental conditions, or improper application will void this warranty.