Advertisement
Quick Links
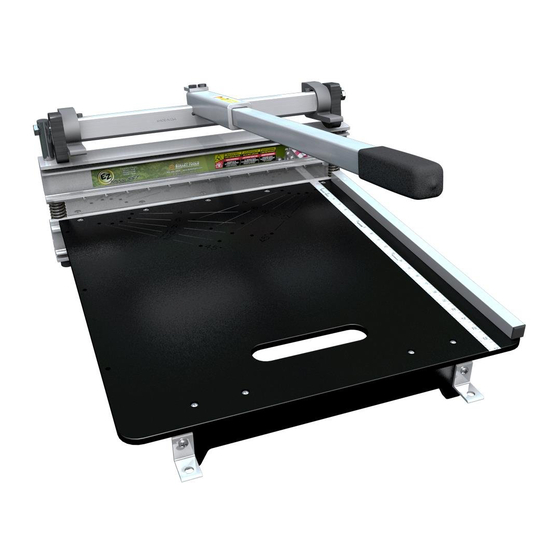
Quick Start Guide
for EZ Shear Model #220
In the Box:
1. Power Assembly
5. Tail
1a. Safety Lock pin
6. Rails x 2
2. Handle Assembly
7. Hone Stone
3. Fence
8. Mounting Brackets x 4
4. Table
9. Hardware Kit
for EZ Shear Model #226
In the Box:
1. Power Assembly
5. Tail
1a. Safety Lock pin
6. Rails x 4
2. Handle Assembly
7. Hone Stone
3. Fence
8. Mounting Brackets x 4
4. Table
9. Hardware Kit
ASSEMBLING YOUR SHEAR
Tools needed: #2 & #3 Phillips head screwdrivers and a 1/2" (13mm) socket or wrench.
IMPORTANT! Start all screws BY HAND when assembling your shear. This will help avoid cross-threading.
1. ATTACH RAILS
Attach rails and mounting brackets to Power
Assembly base using Item A machine screws, fitted
with Item B star washers.
1
3. ATTACH TABLE
A. Attach table to base starting
with front, start screws by
hand, use Item D screws.
B. Attach back of table to tail
using Item E self tapping screws.
Tighten with #2 Phillips.
A. (4) M6 x 65mm PH Phillips Machine Screws
B. (4) M6 Star Washers
C. (6) M6 x 25mm PH Phillips Machine Screws
The Hardware Kit is used in multiple models. Your Shear may not use all of the items listed.
A. (8) M6 x 65mm PH Phillips Machine Screws
B. (8) M6 Star Washers
C. (8) M6 x 25mm PH Phillips Machine Screws
The Hardware Kit is used in multiple models. Your Shear may not use all of the items listed.
3
3A
In the Hardware Kit:
D. (5) M6 x 16mm FH Phillips Machine Screws
E. (4) #10 x 1 FH Phillips Self Tapping Screws
F. (2) M8 x 50mm Hex Bolts
G. (2) M6 Wing Nuts
In the Hardware Kit:
D. (6) M6 x 16mm FH Phillips Machine Screws
E. (4) #10 x 1 FH Phillips Self Tapping Screws
F. (2) M8 x 50mm Hex Bolts
G. (1) M6 Allen Wrench
2. ATTACH TAIL
Attach tail and mounting brackets to rails using
Item C machine screws. Make sure holes in tail are
facing up.
2
3B
Tail
Advertisement

Related Manuals for Bullet tools EZ Shear 220


Summary of Contents for Bullet tools EZ Shear 220
- Page 1 Quick Start Guide for EZ Shear Model #220 In the Box: In the Hardware Kit: 1. Power Assembly 5. Tail A. (4) M6 x 65mm PH Phillips Machine Screws D. (5) M6 x 16mm FH Phillips Machine Screws 1a. Safety Lock pin 6.
- Page 2 For full manuals, warranty info, Trim, Fiber Cement accessories, & tips on using and maintaining your EZ Shear, go to Trim, Vinyl BulletTools.com or scan Shingles, Tar or Wood the QR code below. Hayden, ID USA • 208-772-0175 PRT-INS-QEZB REV.A.6.15 ©2015 Bullet Tools...