Advertisement
Quick Links
Flex Series Infinity Glow™ Underglow Installation Guide
STEP 1:
I nspect the kit to ensure all the contents were included.
STEP 2: TESTING THE KIT
With an external 12V power source, connect the red wire (power) and black wire (ground) to the
power source's appropriate spots. Thoroughly test and make sure all LED strips are working
correctly.
STEP 3: DETERMINING MOUNTING LOCATIONS
Locate the areas on the vehicle you will be mounting the LED strips. Once you know the
mounting locations with rubbing alcohol or non-residue degreaser, clean the areas thoroughly.
Allow to air dry and give a final wipe down with a clean microfiber towel.
* LED strips should not be mounted on hot surfaces or moving parts*
STEP 4: MOUNTING THE LED STRIPS
You have two options to mount your kit. These options are general guidelines. Every vehicle is
different; please make the necessary adjustments if needed, without damaging the strips.
OPTION 1 - MOUNT THE LED STRIPS WITH THE NYLON CABLE TIE MOUNTS
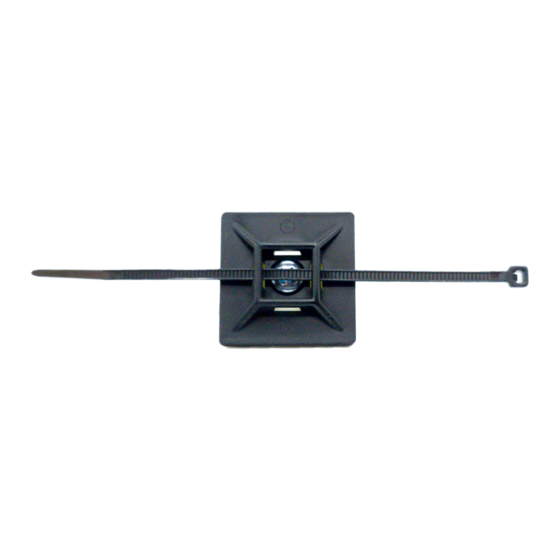
Start by measuring the mounting area. Once you have the area aligned, grab a nylon cable
mount and a self-tapping screw. You will use the screw on the middle portion of the cable mount
(picture below for reference). Screw-in 3 cable mounts on each side of the car. Make sure the
cable mounts are spread out evenly on the surface.
Once you have all cable tie mounts screw in, you will now be adding the LED strip to the top of
the cable tie mount. Align the strip to the top of the cable tie mounts and remove the 3M tape.
Press down on the strip to apply medium pressure (DO NOT press down on the LED itself) and
hold for 15 - 30 seconds. This will allow the strips to bond to the surface.
Nylon cable tie with a self-tapping screw
Advertisement

Summary of Contents for Lit Lightz Flex Series
- Page 1 Flex Series Infinity Glow™ Underglow Installation Guide STEP 1: I nspect the kit to ensure all the contents were included. STEP 2: TESTING THE KIT With an external 12V power source, connect the red wire (power) and black wire (ground) to the power source's appropriate spots.
- Page 2 To fully secure the strips, you will be adding one of the small zip ties provided with your kit. You will see four open sections on the cable tie mount, grab a zip tie, and run it through one of the available areas (picture below for reference).
- Page 3 Lit Lightz or www.litlightz.com holds no liability for any consequences, legal or other, of such use or misuse. Lit Lightz reserves the right to alter or amend any portion of the disclaimer, as mentioned above.
- Page 4 Questions? Reach us at s upport@litlightz.com M - F 9 AM - 5 PM CST...