Advertisement
Quick Links
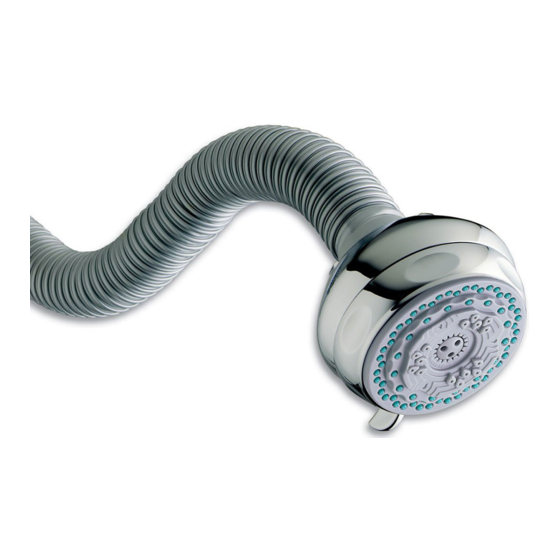
NML-603
NSL-603
Instruction
Manual de Instrucciones
Manuel d'instructions
FN 20010911-F AC
Note: Drawings may not match your product. Remarque: Les illustrations peuvent ne pas correspondre
a´votre produit. Nota: Es posible que los dibujos no coincidan con su producto.
ENGLISH
NML-603
NSL-603
Arm
Nut
Control Ring
Easy Clean Nozzles
bend to break off build-up
and wipe with a soft cloth
Flow Control
2.5 gallons per minute maximum flow is limited by the flow regulator as
mandated by U.S. federal law.
• Regulator may be removed for cleaning or to
increase flow if you have low water pressure.
• CAUTION: Removing regulator
will increase water flow and
shower force.
• If regulator is removed you
must replace filter screen
and washer to prevent leaks.
Filter Screen
Washer
Installation
• Tools are not required.
• Do not use pipe tape as product may loosen during use.
• Hand tightening is sufficient to secure the shower thread.
• Make sure the washer is in the end of the nut.
1. Remove old showerhead. Clean pipe threads thoroughly.
2. Tighten the flexible shower arm onto the "J" pipe by hand, applying
force to the nut closest to the "J" pipe. Do not use the flexible shower
arm as a handle to tighten this connection.
3. Attach the showerhead to the flexible shower arm by hand tightening
the shower arm collar to the threaded end of the shower head.
4. Be sure to properly align threads before tightening.
5. Slowly turn on cold water and check for leaks. If leaks occur, retighten
all connections.
6. Do not use excessive force in
positioning the showerhead and/
or arm.
7. If the showerhead is not main-
taining its position, re-tighten the
showerhead collar and shower
arm nut.
Operation
To select a spray setting, turn the
control ring to any of the shower
settings at any time.
DO NOT USE EXCESSIVE FORCE IN
POSITIONING THE SHOWERHEAD
AND/OR ARM.
DATE: 30 May 2010
FILENAME: FN20010911-FAC-FlexInst.indd
FILE TYPE: Adobe InDesign CS4
SIZE FLAT: 8.4375" x 12.75"
DIELINE: N/A
NOTES: No embedded color profile.
Troubleshooting Guide
Problem
No water flow from
installed shower head:
Low water pressure or
missing spray patterns
Leaking at pipe pivot
ball connection:
Showerhead and/or
bracket stiff to change
angle
Manual
Care and Cleaning
Clean the filter screen at least once a year, or when you notice a drop
in water pressure. To remove, unscrew the nut from the pipe. Remove
Showerhead
the screen by turning it counter-clockwise (pliers may be used) and
rinse.
If you remove the flow regulator, be sure you reinstall it with the black
O-ring facing out.
• Cleaning is required when mineral deposits appear on the spray
holes to maintain proper working conditions. Clean by soaking in
household vinegar.
• Clean the flexible nozzles by rubbing with a finger or soft bristled
toothbrush.
• Do not clean or rinse any part with harsh chemicals, heavy-duty cleaners
or abrasives. This may damage parts or finish and will void the warranty.
Limited Lifetime Warranty
Water Pik, Inc. warrants to the original purchaser of this product that
it is free from defects in material and workmanship for as long as
the original purchaser owns this product. Water Pik, Inc. will replace
any part of the product which in our opinion is defective, provided
Nut
that the product has not been abused, misused, altered or damaged
F
low Regulator
after purchase. (This includes damage due to use of tools or harsh
(black O-ring faces out)
chemicals). In the event an item has been discontinued we will replace
with what we deem to be the closest product. Water Pik, Inc. is not
responsible for labor charges, installation, or other consequential
cost. The responsibility of Water Pik, Inc. shall not exceed the original
purchase price of the product. This warranty gives you specific legal
rights. You may also have other rights that vary where you reside. Save
your receipt as proof of purchase is required for warranty action.
Have any questions or need assistance?
If in the U.S., call our toll-free
Customer Assistance Line,
1-800-525-2774
8:00 a.m. to 4:00 p.m.,
Mountain Time, Monday-Friday
www.waterpik.com
Waterpik
®
(stylized) is a trademark of Water Pik, Inc. registered in Canada, EU,
Mexico, Switzerland, and the United States.
Turn this nut
clockwise to tighten.
The Flexible Shower Massage
Canada and the United States.
The Original Shower Massage
United States.
Elements
™
is a trademark of Water Pik, Inc.
Support
this end
© 2010 Water Pik, Inc.
Printed in China Showerhead made in China
Water Pik, Inc.
1730 East Prospect Road
Fort Collins, CO 80553-0001
www.waterpik.com
CLIENT: Water Pik, Inc.
SIZE FOLDED: 2.8125" x 4.25"
Solution
a Confirm previous shower washer is
not in the j-pipe.
b Confirm the hose is properly
installed, try switching ends.
c Confirm there is only one washer in
the pivot ball.
a Clean shower head in vinegar/water
solution. (See care section).
b Clean screen and flow regulator.
a Confirm one single washer is seated
on top of the screen.
b Grate bar of soap across the j-pipe
threads to act as a sealant.
a Immerse pivot ball and large nut
of the bracket in hot water or use
a blow dryer for several minutes
and then use a towel to loosen the
large nut.
For Fixed Mount: install FM shower
head to provide additional leverage
to change angle of spray. (Contact
Water Pik for further assistance).
In Canada, call our toll-free
Customer Assistance Line,
1-888-226-3042
8:00 a.m. to 4:00 p.m.,
MT, Monday-Friday
www.waterpik.com
®
is a trademark of Water Pik, Inc. registered in
®
is a trademark of Water Pik, Inc. registered in the
DESCRIPTION: Waterpik Flexible Shower Massage Instruction Manual
PREPARED BY: Brian Colon
INK: Black
ESPAÑOL
NML-603
NSL-603
Brazo
Tuerca
Boquillas de salica de fácil limpieza
Flexionarlas para desprender el sarro
acumulado y limpiarlas con us paño suave.
Control de Flujo
El flujo máximo de 2.5 galones por minuto está limitado por el regulador
de flujo según la ley federal de EE. UU.
• Se puede quitar el regulador para limpiar o para
aumentar el flujo en caso de baja presión de agua.
• PRECAUCIÓN: Al quitar el regulador,
el flujo de agua y la fuerza
de la ducha aumentarán.
• Si quita el regulador, deberá
reemplazar la pantella del filtro y
la arandela para evitar fugas.
Instalación
• No se necesitan herramientas.
• No use cinta para tuberías dado que el producto podría aflojarse
durante el uso.
• El ajuste a mano es suficiente para asegurar la rosca de la ducha.
• Cerciórese que la arandela esté en el lado de la tuerca.
1. Quite la boquilla de la ducha vieja. Limpie meticulosamente
la rosca del tubo.
2. Apriete a mano el brazo flexible de
la ducha en el tubo "J", aplicando
fuerza a la tuerca que esté más
cerca del tubo "J". No use el brazo
flexible de la ducha como una
manija para apretar esta conexión.
3. Sujete el cabezal de ducha al
brazo flexible de la ducha a mano,
apretando el collar del brazo de la
ducha en el extremo con rosca del
cabezal.
4. Asegúrese de alinear correcta-
mente las roscas antes de apretar.
5. Abra el agua fría lentamente
y verifique si hay fugas. Si hay fugas, vuelva a apretar todas las
conexiones.
6. No use fuerza excesiva al ubicar la boquilla de ducha y/o el brazo.
7. Si la boquilla de la ducha no se mantiene en posición, vuelva a
apretar el collar de la boquilla de la ducha y la tuerca del brazo de la
ducha.
Funcionamiento
Para elegir un tipo de chorro o salida
de agua, puede girar en cualquier
momento el aro de regulación a la
posición que corresponda.
NO USE FUERZA EXCESIVA AL
UBICAR LA BOQUILLA DE DUCHA
Y/O EL BRAZO.
Guía de solución de problemas
Problema
Solución
No hay flujo de agua
a. Revise que la arandela de la ducha
proveniente del cabezal
anterior no esté en el tubo en forma
de ducha instalado
de J.
b. Revise que la manguera esté
instalada adecuadamente. Pruebe
con intercambiar los extremos.
c. Revise que sólo haya una arandela
en la bola con pivote.
La presión de agua es
a. Limpie el cabezal de ducha en una
baja o faltan tipos de
solución de vinagre/agua. (Vea la
rociado
sección de cuidado).
b. Limpie el filtro y el regulador de flujo.
Hay pérdida de agua en
a. Revise que haya una sola arandela
la conexión de la bola
asentada sobre el filtro.
con pivote del tubo
b. Raspe una barra de jabón en las
roscas del tubo en forma de J para
que actúe como sellador.
El cabezal de ducha y/o
a Sumerja la bola con pivote y la
el soporte están duros
tuerca grande del soporte en agua
al cambiar el ángulo
caliente, o use un secador de cabello
durante varios minutos y luego use
una toalla para aflojar la tuerca
grande.
Para el montaje fijo: Instale el
cabezal de ducha de montaje fijo
para proveer mejor apalancamiento
al cambiar el ángulo de rociado.
(Póngase en contacto con Water Pik
para obtener asistencia adicional.)
FORM: 20010911-F AC
FOLDS: Indicated
Cabeza da ducha
Aro de
regulación
Tuerco
Regulador del flujo
(el anillo negro O
mira hacia fuera)
Pantalla del filtro
Arandela
Gire esta tuerca hacia
la derecha para ajustar.
Sostenga
este
exremo
Advertisement

Summary of Contents for Waterpik Flexible Shower Massage NML-603
- Page 1 (Póngase en contacto con Water Pik para obtener asistencia adicional.) DATE: 30 May 2010 CLIENT: Water Pik, Inc. FILENAME: FN20010911-FAC-FlexInst.indd DESCRIPTION: Waterpik Flexible Shower Massage Instruction Manual FILE TYPE: Adobe InDesign CS4 PREPARED BY: Brian Colon FORM: 20010911-F AC SIZE FLAT: 8.4375” x 12.75”...
- Page 2 Montaña, de lunes a viernes de Montaña, de lunes a viernes Département Service-client, Département Service-client, connexion. www.waterpik.com www.waterpik.com 1-800-525-2774 1-888-226-3042 3. Fixer la pomme de douche au 8 h – 16 h 8 h – 16 h...