
Related Manuals for Kidco G3000

Summary of Contents for Kidco G3000
- Page 1 U S E R G U I D E G3000 G3001 ® Auto Close Confi gureGate ™ C U S T O M F I T I N S T A L L A T I O N Fits openings 84” • Optional 9” and 24” extensions available for larger areas...
-
Page 2: Parts List
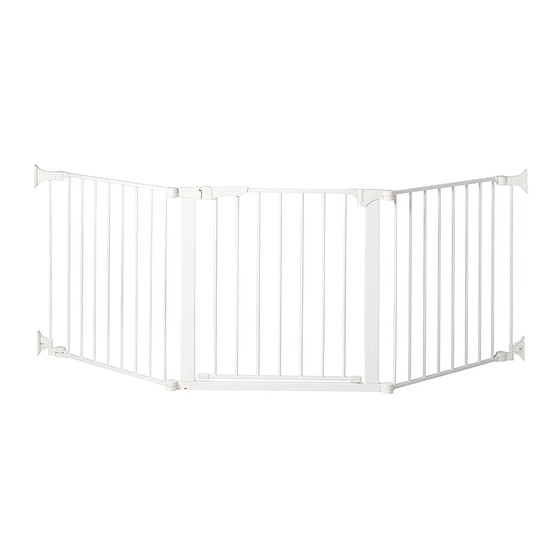
Parts list A 24” Section (2) B 30” Walk-Through Door Section C Upper Post Wall Bracket D Upper Receiver Wall Bracket E Lower Post Wall Bracket F Lower Receiver Wall Bracket G Sliding Wall Bracket Assembly (2) H Wall Plate (4-assembled to parts C, D, and G) I Wood Screw (8) (1 ”) J Wall Mount Bar (2) -
Page 3: Maintenance
Check the stability of the gate child unattended • and tighten all hardware and Use only spare parts available • mountings regularly from KidCo ® To prevent serious injury or death, • Never allow child to climb or • securely install gate or enclosure... - Page 4 Assembly To connect two sections, place hinge posts over the center of the next section’s hinge receivers and press down until a click is heard. Continue adding more sections the same way. Optional 9” and 24” sections are available for purchase for larger areas or to construct a free standing enclosure.
- Page 5 Attach bar assembly to receiver of end gate section. Insert wall mount bar into upper receiver bar bracket. The wall plate is already attached to the upper receiver bar bracket. Insert bar into sliding wall bracket assembly with locking tabs lined up on right side and arrows facing up.
-
Page 6: Installation
Installation NOTE: Move ConfigureGate to desired location. Sections may need to be adjusted again for proper fit. Lift locking caps and rotate upper and lower wall brackets until flush against mounting surface and lower bar housing is aligned with the upper bracket assembly. NOTE: Sliding wall bracket assembly is adjustable for uneven walls and should be installed as low as possible. -
Page 7: Operation
Operation Slide back the locking button (a) and lift door to open in either direction (b). Door will automatically close and the lock will re-engage with an audible “click”. NOTE: The door section must be placed on a level surface for the auto close function to work properly, if not, the door will need to be manually pushed shut. - Page 8 This warranty extends only to the original retail purchaser and is only valid when supplied with proof of purchase. KidCo will either repair, or at our option replace, free of charge, any parts necessary to correct defects in material or workmanship during the warranty period.