Advertisement
Quick Links
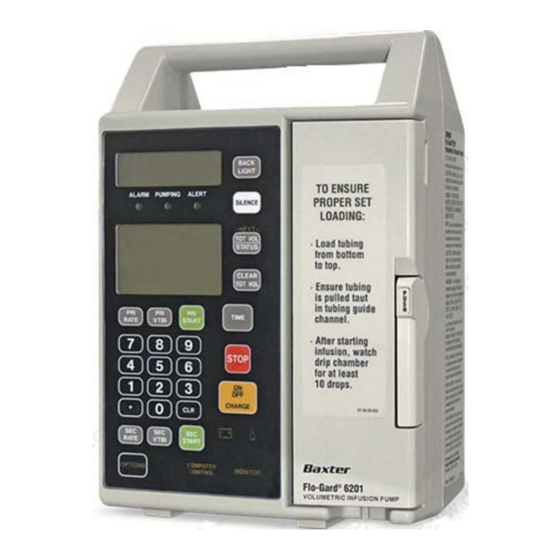
Baxter 6201 and 6301
Tips to Avoid Nuisance Alarms
Tip #3: To Avoid Nuisance Occlusion Alarms
If you've been using the tubing for a while, try using a fresh section of the tubing by
moving the clip down and loading this new section of tubing.
Tip #4: To Avoid Nuisance Occlusion Alarms
Occasionally the occlusion sensors get "sticky." Pushing on the occlusion sensors
often loosens them back up. (See illustrations 1 & 2)
Tip #5: To Avoid Tubing Misload Alarms and Potential for Cut Tubing
When installing the tubing, run your finger from the point where the clip is installed all the
way up to the top. This will ensure the tubing is fully inserted into the sensors. See illustration 1
Rev. B
Tip #1: To Ensure Door is Closed Correctly
You should hear 2 clicks when closing the door.
1.) The metal pin pushing in (part of the slide
clamp assembly)
2.) The blue clip "popping" out
Tip #2: To Avoid Occlusion Alarm/Pinched
Tubing
If you heard 2 clicks after closing the door (so you
know the clip popped out successfully), you can also
gently tug the tubing that is coming out at the
bottom, down and away from you, toward the back
of the pump.
(See arrow for where to tug tubing.)
- This will ensure an occlusion was not created
when closing the door and will also make sure the
tubing isn't being pinched at all by the clip.
Call 1-708-449-7600 x 335 for troubleshooting assistance.
P a g e
| 1
Advertisement

Summary of Contents for UNITED Baxter 6201
- Page 1 P a g e Baxter 6201 and 6301 Tips to Avoid Nuisance Alarms Call 1-708-449-7600 x 335 for troubleshooting assistance. Tip #1: To Ensure Door is Closed Correctly You should hear 2 clicks when closing the door. 1.) The metal pin pushing in (part of the slide clamp assembly) 2.) The blue clip “popping”...
- Page 2 P a g e Proper Loading Instructions 1. Plug the pump in. (The plug icon lights whenever the pump is plugged in. When the pump is not plugged in and is battery-powered, the battery icon will light.) 2. Prepare solution. Prime the set. Ensure all air is expelled from the set. 3.
- Page 3 (Illustration 1) Error Codes If you have a Baxter 6201 or Baxter 6301 with an error code F49 or F94, you can usually reset that error code quickly and easily with the process detailed on pages 5 & 6 of this document - so you won’t have to send in your pump!
- Page 4 P a g e Pump Head Features (Illustration 2) Pump Head Features ITEM FUNCTION 1. Upstream occlusion Detects a complete tubing restriction upstream of the pump. sensor 2. Pumping fingers Cam-driven pumping fingers which manipulate the tubing against the back plate, resulting in fluid movement in a downward direction. 3.
- Page 5 P a g e How to Correct Common Failures F-94 and F-49 Why do these errors occur? These two error codes are interrelated in the sense that the method for correcting them both is identical. These errors are typically caused by a total power loss to the pump that has forced the programing to revert back to the manufacturer’s default settings and will require a re- programing in order to resume normal operation.
- Page 6 P a g e 19. Once the date is inputted correctly in the bottom screen, press the “Pri Start” key and you should see the date move from the bottom screen to the top screen and will display as: 11/19/11. 20.