Advertisement
Quick Links
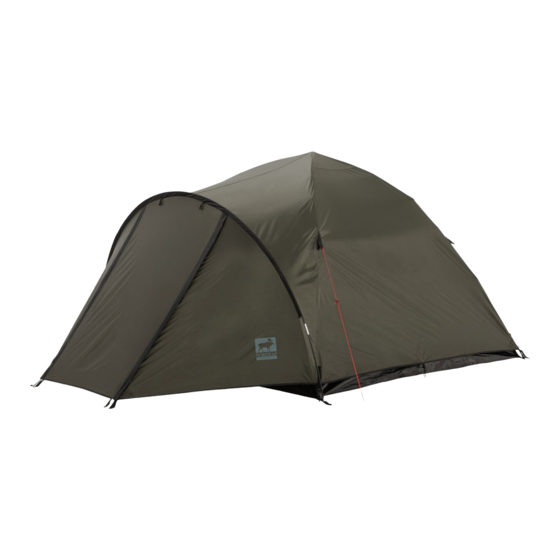
SVELVIK
Aufbauanleitung· Build-up instructions· Instructions de montage
1.
AUFBAU
1. Breiten Sie das Zelt auf einem möglichst glatten und
sauberen Untergrund aus. Achten Sie darauf, dass der
zentrale Kontenpunkt aufrecht steht und die Stangen
vollständig ausgeklappt sind.
2. Stellen Sie sich nah an den Knotenpunkt und heben Sie
ihn bis auf Kopfhöhe an. Drücken Sie dann beide Teile des
Knotenpunktes mit etwas Druck zusammen (a). Wenn
beide Teile sich annähern, wird der Widerstand steigen
und das Zelt wird sich aufrichten. Achtung: Befestigen Sie
den Haken an der Oberseite des Zeltes am Knotenpunkt
des Gestänges (b).
3. Werfen Sie das Außenzelt über das Innenzelt. Achten
Sie darauf, dass die jeweiligen Eingänge von Innen- und
Außenzelt übereinander liegen (a). Nehmen Sie die bei-
liegende Stange, um die Apsis aufzustellen (b). Befestigen
Sie danach das Außenzelt an der Kabine (c) und nutzen
Sie die Erdnägel, um das Außenzelt sowie die Abspannlei-
nen am Boden zu fixieren (d).
ABBAU
4. Entfernen Sie alle Erdnägel und lösen Sie den Haken
an der Oberseite des Zeltes aus der Öse am Gestänge.
Trennen Sie nun mit etwas Druck die beiden Teile des
Knotenpunktes und senken Sie beides ab (a) und lösen
Sie die Gestängeverbindungen, indem Sie die Gestänge-
teile vorsichtig auseinanderziehen (b). Halten Sie nun den
Knotenpunkt aufrecht und legen Sie die Stangen in des-
sen Richtung zusammen (c).
5. Lassen Sie beim Zusammenlegen den Zeltstoff lose
auffächern (a) und legen Sie das Zelt auf die Seite (b).
Achten Sie dabei darauf, dass das gesamte Gestänge eng
zusammen liegt. So vermeiden Sie Beschädigungen am
Gestänge. Nehmen Sie jetzt den losen Zeltstoff und rol-
len Sie ihn fest um das Gestänge (c).
3b.
2b.
2a.
SET UP
1. Unfold your tent on a clean and even ground with the
central hub upright. Make sure that the poles are fully ex-
tended.
2. Stand close to the hub and lift it up to head height. Then,
firmly press the upper and lower part of the hub together
(a). As both parts get closer to each other, the resistance
will grow and the body of the tent will bow out. Important:
Attach the hook to the loop on the central hub (b).
3. Unfold the Flysheet over the inner tent. Please pay at-
tention to the alignment of the entrances (a). Take out the
pole and use it to errect the apsis (b). Attach the flysheet to
the cabine (c) and fix the flysheet and the guyropes to the
ground with the pegs (d).
FOLD DOWN
4. Remove all stakes and release the top hook from the cen-
tral hub. Applying some pressure, separate the lower part
from the upper part of the hub and lower the whole hub
down (a). Then unlock the pole joints by slightly pulling the
pole sections apart (b). While holding the central hub up-
right, fold the tent poles carefully to the centre (c).
5. When folding the poles towards the centre, please allow
the lose fabric to flower out (a). Now lay the tent on its side
(b). The poles should be packed tight together in order to
avoid any damage. Bring the excess fabric together and roll
it tightly around the poles (c).
3d.
3a.
3c.
MONTAGE
1. Placer la tente à plat en tenant l'armature centrale à la
verticale. S'assurer que les arceaux sont complètement
déployés.
2. En se tenant près de l'armature centrale, soulever le
sommet de l'armature à hauteur de la tête. Lorsque les
deux parties de l'armature se rapprochent (a), presser
fermement la partie inférieure et la partie supérieure,
la résistance augmente alors et le corps de la tente se
tend. Important : Enfiler le crochet à travers la boucle
sur l'armature centrale (b).
3. Placez la tente extérieure par-dessus la tente inté-
rieure. Assurez-vous que l'entrée est correctement
orientée (a). Assemblez l'arceau et passez-le précaution-
neusement à travers le canal. Fixez les extrémités de
l'arceau dans les dispositifs au niveau des coins à l'avant
du sol de la tente (b). Fixez ensuite tous les quatre points
de fixation de la tente extérieure aux fixations respec-
tives au sol de la tente intérieure (c). Fixez la tente en
plantant les piquets dans le sol (d).
DéMONTAGE
4. Retirer tous les piquets. Détacher le crochet du
haut de l'armature centrale. Exercer une pression pour
séparer la partie inférieure et la partie supérieure de
l'armature (a). Abaisser l'armature centrale. Détacher
les raccords des arceaux en tirant légèrement sur les
sections des arceaux (b). Plier les arceaux de la tente
en direction de l'armature centrale tout en maintenant
cette dernière à la verticale (c).
5. Plier les arceaux en direction de l'armature centrale,
la toile lâche peut alors se déployer (a). Mettre la tente
sur le côté. Serrer fermement les 4 arceaux contre l'ar-
mature centrale afin d'éviter tout dommage (b). Réunir
toute la toile qui dépasse puis l'enrouler bien fermement
en direction de l'armature centrale (c).
4a.
4b.
4c.
5c.
5b.
5a.
Inhalt · Contents · Équipement fourni :
Außenzelt / flysheet / tente extérieure ................... 1
Kabine / cabine / chambre ........................................... 1
Gestänge / poles / arceaux .......................................... 1
Abspannleinen / guy ropes / haubans ........................ 4
Erdnägel / pegs / piquets de tente ........................... 13
Packsack / carrying bag / sac de transport .............. 1
Exklusiv-Vertrieb:
Detlev Louis Motorradvertriebs GmbH
Rungedamm 35 · 21035 Hamburg
00 49 (0) 40 - 73 41 93 60
www.louis.de · order@louis.de
Advertisement

Related Manuals for Nordkap SVELVIK

Summary of Contents for Nordkap SVELVIK
- Page 1 SVELVIK Aufbauanleitung· Build-up instructions· Instructions de montage AUFBAU SET UP MONTAGE 1. Breiten Sie das Zelt auf einem möglichst glatten und 1. Placer la tente à plat en tenant l’armature centrale à la 1. Unfold your tent on a clean and even ground with the sauberen Untergrund aus.