Advertisement
Available languages
Available languages
Quick Links
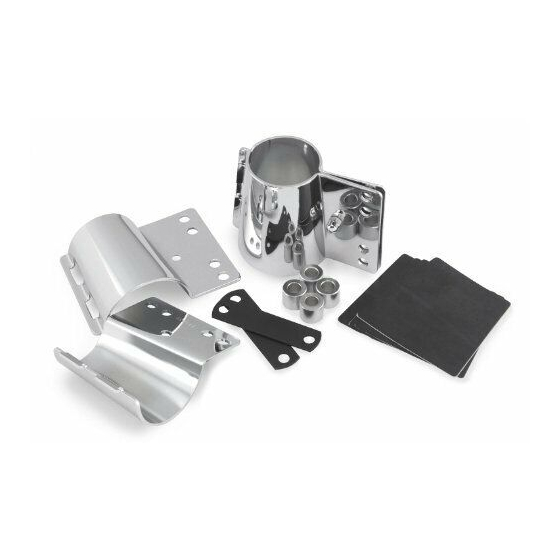
Installation of Spacers and Clamps
Diagram A.
1
9
1. Install die cut Rubber Clamp Spacers to each clamp
half. Diagram A.
NOTE: Kawasaki Classic VN1500D
and VN800B additional strip is required at LOWER EDGE
of clamp. Diagram B. NOTE: VN900 place additional
strip at UPPER EDGE of clamp. Diagram B.
Note: 2a. instruction is for installation of National Cycle Chrome Lowers (optional.)
Installation of Windshield
5
8
Diagram B.
10
2a. Instruction for Chrome Lower installation.
A. Use the M6 x 12 Screws and Acorn Nuts thru
the two inner holes. Tighten to 10ft. lbs.
3
4
7
INSTALLATION AND OWNER'S MANUAL
National Cycle Windshield Mount Kit
Note: Kawasaki VN900A
place additional strip on top
of die cut piece at upper
edge of one side of each
pair of clamps.
Kawasaki
VN 1500D and VN800B
Classics; Place extra strip
on top of die cut piece at
lower edge of clamp. (One
side of each pair of clamps
only.)
2. Put Clamps on fork.
Diagram D.
3. Install windshield onto brackets using chrome
spacers and flat plate, as shown in diagram D.
6
10-113999 English Page 1 of 6 01/00 Rev. A 04/06 Rev B 1106 /
JE, JF, JG, and JH
A. Must hit upper triple clamp.
B. Use M6 x 12 Screw and Acorn nut to
clamp together. Tighten to 10 ft. lbs.
Diagram C.
Diagram C.
3
4
Advertisement

Related Manuals for National Cycle JE

Summary of Contents for National Cycle JE
- Page 1 Tighten to 10 ft. lbs. strip at UPPER EDGE of clamp. Diagram B. Diagram C. Note: 2a. instruction is for installation of National Cycle Chrome Lowers (optional.) 2a. Instruction for Chrome Lower installation. A. Use the M6 x 12 Screws and Acorn Nuts thru the two inner holes.
- Page 2 Warning / Caution / Maintenance WARNING National Cycle windshields and fairings are designed to provide wind protection and increased riding comfort, but not protection in the event of a collision with another vehicle, the road, birds, or any other object.
- Page 4 Löcher der Klammer und ziehen Sie diese mit den Hutmuttern Handfest an. (Abbildung C) Anmerkung: 2a. Anleitung ist für die Montage von National Cycle Chrom Windabweiser (Extra) 2a. Plazieren Sie die Windabweiser an die Gabelklammern und befestigen Sie diese mit den M6x12mm langen Innensechskantschrauben und den Hutmuttern Dargestellt in Abbildung 2a.
- Page 5 Warnhinweis / Pflege WARNHINWEIS National Cycle Windschutzscheiben und Verkleidungen sind dazu bestimmt, Windschutz und erhöhten Fahrkomfort zu ver- mitteln, nicht jedoch Schutz im Falle eines Zusammenstoßes mit einem anderen Fahrzeug, der Straße, Vögeln oder irgen- deinem anderen Objekt. Unsere Produkte nutzen gewisse patentierte und andere Merkmale, die Verletzungen bei bes- timmten Unfällen verringern können.