
Related Manuals for Philips MCM277/98


Summary of Contents for Philips MCM277/98
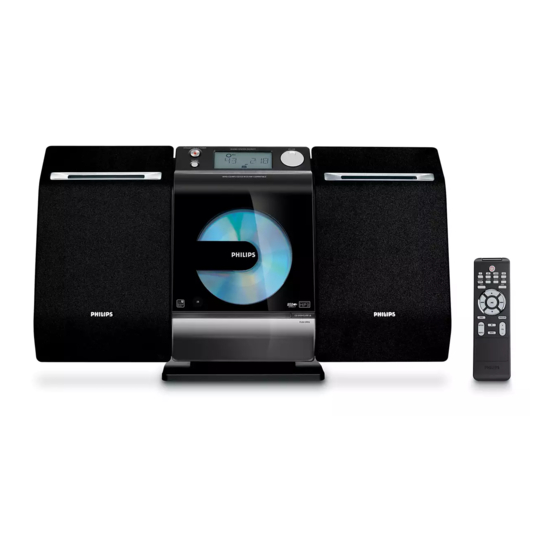
- Page 1 MCM277 Micro Hi-Fi System Register your product and get support at www.philips.com/welcome...
- Page 3 Index English ------------------------------------------------ 4 -------------------------------------------------------- 27...
-
Page 4: Table Of Contents
Contents General Information Supplied accessories ... 5 Environmental Information ... 5 Safety Information ... 5 Controls Controls on the set (illustrations on page 3) 5 Remote control ... 6 Installation Placing MCM277 ... 8 Mounting stand onto the set ... 8 Mounting MCM277 onto walls ... -
Page 5: General Information
Congratulations on your purchase and welcome to Philips! To fully benefit from the support that Philips offers, register your product at www.philips.com/ welcome. Supplied accessories – 2 speaker boxes including 2 speaker cables – remote control (with 1 x CR2025 battery) –... -
Page 6: Controls
Controls Controls on the set (illustrations on page 3) STANDBY-ON – press briefly to switch the set on or off; SOURCE selects sound source CD, USB, TUNER or – – In standby: switches the set on and selects sound source CD, USB, TUNER or AUX –... -
Page 7: Remote Control
Remote control PDISPLAY TIMER SLEEP RDS/NEWS CLOCK PROG OPEN/CLOSE REPEAT SHUFFLE MUTE Notes for remote control: – First select the source you wish to control by pressing one of the source select keys on the remote control (for example CD, TUNER). –... -
Page 8: Installation
Controls VOL +/- – adjusts the volume level – Clock/Timer: adjusts the hours and minutes – CD/USB: stops playback; erase a program OPEN/CLOSE – opens/closes the CD door 3 / 4 – CD/USB: selects the next/previous album (for MP3/WMA only) –... -
Page 9: Rear Connections
FM wire antenna Speaker (right) Rear connections Warning: – Never make or change connections with the mains supply switched on. – Install your set near the AC outlet and where the AC power plug can be reached easily. Speaker connections Use the supplied speakers only. -
Page 10: Connecting An Additional Appliance
Insert the loop antenna into the slot on the set Fit the plug of the loop antenna to AM (MW) ANTENNA as shown below Adjust the position of the antenna for optimal reception (as far away as possible from the TV, VCR or other radiation sources) ANTENNA FM antenna... -
Page 11: Connecting A Non-Usb Device
Connecting a non-USB device It is possible to use an additional appliance, e.g. TV, VCR or CD recorder with the set. On MCM277, you can playback music from an external source. Follow the Step 1 under Connecting a USB device or memory card Insert one plug of the audio cable (not supplied) to the socket AUX IN on the set ‘s foldable control panel... -
Page 12: Preparation
Preparation Using the remote control IMPORTANT! – Remove the protective plastic tab before using the remote control. – Always point the remote control directly towards IR area. Remove the plastic protective sheet Notes for remote control: – First select the source you wish to control by pressing one of the source select keys on the remote control (for example CD, TUNER). -
Page 13: Basic Functions
Switching on/off the set and selecting functions To switch on, press STANDBY-ON or SOURCE on the set (or y on the remote control) ➜ The set switches to the last source selected On the remote control, press the source button (e.g. -
Page 14: Sound Control
Basic Functions Sound control Digital Sound Control enables you to select predefined sound settings. ● Press DSC repeatedly to select the desired sound setting: ROCK, JAZZ, POP, CLASSIC ● Press DBB (Dynamic Bass Boost) once or more to switch bass enhancement on or off. ➜... -
Page 15: Discs For Playback
Discs for playback With this system, you can play – all pre-recorded audio CDs (CDDA) – all finalized audio CD-Rs and CD-RWs – MP3/WMA-CDs (CD-Rs/CD-RWs with MP3/WMA files) IMPORTANT! – This system is designed for regular discs. Therefore, do not use any accessories such as disc stabilizer rings or disc treatment sheets, etc. -
Page 16: Selecting And Searching
Helpful hints: – If you have not organized MP3/WMA files into any albums on your disc, an album “00” will be automatically assigned for all those files. Press ÉÅ to start playback ➜ Display shows current track number and elapsed playing time To pause playback, pressÉÅ. -
Page 17: Programming Tracks
Programming tracks You may store up to 40 tracks in the desired sequence. If you like, store any track more than once. In the stop position, press PROG to start programming ➜ flashes ➜ Audio CD: Display shows PROG and current track number MP3/WMA: Display shows current album/ track number... -
Page 18: Different Play Modes: Repeat, Shuffle
Different play modes: REPEAT, SHUFFLE REPEAT TRACK– plays the current track continuously REPEAT ALL– plays the entire disc/program continuously SHUFFLE – plays all the tracks in random order During playback, press once or more REPEAT or SHUFFLE to select play modes To return to normal playback, press REPEAT or SHUFFLE repeatedly until the various modes are no longer displayed... -
Page 19: Tuner
Tuning to radio stations Press SOURCE once or more to select TUNER (or TUNER on the remote control) Press TUNER on the remote control repeatedly to select your desired waveband, FM or MW ➜ Display shows: , radio station frequency, waveband and if programmed, a preset number Press and hold 4 / ¢... -
Page 20: Usb
Using a USB mass storage device By connecting a USB mass storage device to the Hi-Fi system, you can enjoy the device’s stored music through the powerful speakers of Hi-Fi system. Playing a USB mass storage device Compatible USB mass storage devices With the Hi-Fi system, you can use –... -
Page 21: Aux
Check the USB device has been properly connected. (See Installation: Connecting an additional appliance) Press SOURCE once or more to select USB (or USB on the remote control) ➜ The icon appears – NO AUDIO appears if no audio file is found in the USB device Play the USB’s audio files as you do with the albums/tracks on a CD (See CD) -
Page 22: Timer
Timer Setting the timer The set can be used as an alarm clock, whereby the selected source (CD, TUNER or USB) star ts playback at a preset time. Make sure the clock is set before using the timer. Press and hold TIMER on the remote control until SET TIMER appears ➜... -
Page 23: Specifications
Cleaning the disc lens ● After prolonged use, dirt or dust may accumulate at the disc lens. To ensure good playback quality, clean the disc lens with Philips CD Lens Cleaner or any commercially available cleaner. Follow the instructions supplied with cleaner. -
Page 24: Troubleshooting
Do not open the system as there is a risk of electric shock. If a fault occurs, first check the points listed below before taking the system for repair. If you are unable to remedy a problem by following these hints, consult your dealer or Philips for help. - Page 25 The remote control does not function properly. The timer is not working. The Clock/Timer setting is erased. Troubleshooting ✔ Select the source (CD or TUNER, for example) before pressing the function button (É Å,4 , ¢). ✔ Reduce the distance between the remote control and the system.
-
Page 26: Appendix
Appendix How to mount your MCM277 onto walls IMPORTANT! – The wall mounting instructions are for the use of the qualified wall mounting person only! – Ask a qualified person to help you with the wall mounting, which includes drilling holes on the wall and mounting the set onto walls. - Page 27 Meet Philips at the Internet http://www.philips.com MCM277 CLASS 1 LASER PRODUCT Printed in China PDCC-JS-JW-0801...