Philips MC147/12 User Manual
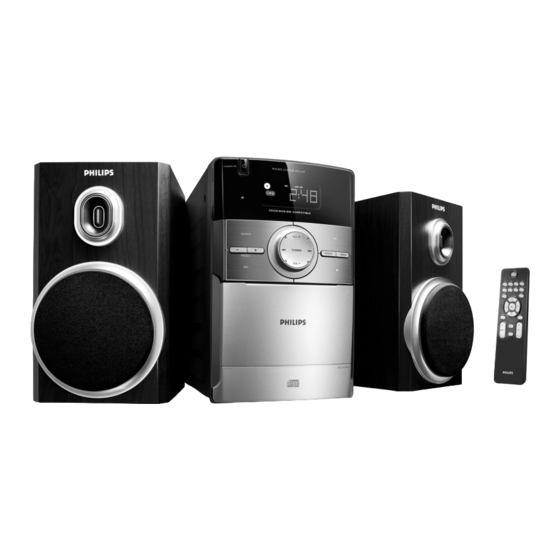
Philips classic micro music system mc147 tape
Hide thumbs
Also See for MC147/12:
- Quick start manual (4 pages) ,
- Service manual (30 pages) ,
- Service manual (29 pages)
Table of Contents
Advertisement
Advertisement
Table of Contents
Troubleshooting

Related Manuals for Philips MC147/12


Summary of Contents for Philips MC147/12
- Page 1 Micro Hi-Fi System Register your product and get support at www.philips.com/welcome User manual Manuel d'utilisation Manual de usuario Benutzerhandbuch Gebruikershandleiding Manuale dell'utente Användarhandbok Brugervejledning Käyttöopas Manual do usuário MC147...
-
Page 2: Mains Plug
See Copyright Act 1956 and The Performer’s Protection Acts 1958 to 1972. Italia DICHIARAZIONE DI CONFORMITA’ Si dichiara che l’apparecchio MC147 Philips risponde alle prescrizioni dell’art. 2 comma 1 del D.M. 28 Agosto 1995 n. 548. Fatto a Eindhoven... - Page 3 PULL TO OPEN STANDBY-ON M I C RO S Y S T E M M C 1 4 7 CD/CD - R/CD - RW COMPATIBLE SOURCE TUNING REPEAT PROG PRESET PULL TO OPEN ¡ &...
- Page 4 Advarsel: Usynlig laserstråling ved åbning når sikkerhedsafbrydere er ude af funktion. Undgå utsættelse for stråling. Bemærk: Netafbryderen er sekundært indkoblet og ofbryder ikke strømmen fra nettet. Den indbyggede netdel er derfor tilsluttet til lysnettet så længe netstikket sidder i stikkontakten. Klass 1 laseraparat Varning! Om apparaten används på...
- Page 5 Index English ------------------------------------------------ 6 Français -------------------------------------------- 23 Español --------------------------------------------- 40 Deutsch --------------------------------------------- 57 Nederlands ---------------------------------------- 74 Italiano ---------------------------------------------- 91 Svenska ------------------------------------------- 108 Dansk --------------------------------------------- 125 Suomi --------------------------------------------- 142 Português ---------------------------------------- 159 ----------------------------------------- 176...
-
Page 6: Table Of Contents
Contents General Information Supplied accessories ... 7 Environmental Information ... 7 Safety Information ... 7 Hearing Safety ... 8 Preparations Rear connections ... 9 Inserting batteries into the Remote Control ..10 Using the Remote Control to operate the system ... -
Page 7: General Information
Congratulations on your purchase and welcome to Philips! To fully benefit from the support that Philips offers, register your product at www.philips.com/ welcome. This product complies with the radio interference requirements of the European Community. Supplied accessories – 2 speaker boxes –... -
Page 8: Hearing Safety
General Information Hearing Safety Listen at a moderate volume. ● Using headphones at a high volume can impair your hearing. This product can produce sounds in decibel ranges that may cause hearing loss for a normal person, even for exposure less than a minute. -
Page 9: Preparations
FM wire antenna speaker (right) Rear connections The type plate is located at the rear of the system. For users in the U.K.: please follow the instructions on page 2. Power – Before connecting the AC power cord to the wall outlet, ensure that all other connections have been made. -
Page 10: Inserting Batteries Into The Remote Control
Preparations Inserting batteries into the Remote Control Open the battery compartment. Insert two R03 or AAA batteries following the indications (+/-) inside the compartment. Close the cover. Using the Remote Control to operate the system Aim the Remote Control directly at the remote sensor (IR) on the front panel. -
Page 11: Controls Available On The Remote Control Only
Controls on the system and remote control STANDBY-ON2 (POWER) – switches the system to standby or on. iR SENSOR – infrared sensor for remote control. SOURCE – selects the respective sound source for CD/ TUNER/TAPE/AUX. – switches on the system. PRESET +/- for radio ... -
Page 12: Basic Functions
Basic Functions STANDBY-ON M I C RO S Y S T E M M C 1 4 7 CD/CD - R/CD - RW COMPATIBLE SOURCE TUNING PRESET IMPORTANT: Before you operate the system, complete the preparation procedures. Switching the system on ●... -
Page 13: Cd Operation
STANDBY-ON M I C RO S Y S T E M M C 1 4 7 CD/CD - R/CD - RW COMPATIBLE SOURCE TUNING PRESET IMPORTANT: The lens of the CD player should never be touched. Loading a disc This CD player plays Audio Discs including CD- Recordables and CD-Rewritables. -
Page 14: Different Play Modes: Shuffle And Repeat
CD Operation Different play modes: SHUFFLE and REPEAT You can select and change the various play modes before or during playback. The play modes cannot be combined with PROGRAMME. SHUF ... tracks of the entire disc are played in random order. REP ALL ... -
Page 15: Radio Reception
STANDBY-ON M I C RO S Y S T E M M C 1 4 7 CD/CD - R/CD - RW COMPATIBLE SOURCE TUNING PRESET Tuning to radio stations Press SOURCE on the set repeatedly or press TUN on the remote control repeatedly until the desired waveband (FM or MW) is displayed. -
Page 16: Tape Operation / Recording
Tape Operation / Recording Tape playback Select TAPE source. ➜ Display: shows “tAPE” throughout tape operation. Open the tape key flap marked “PULL TO OPEN” on the front panel. Press STOP•OPENÇ0 to open the tape door. Insert a recorded tape and close the tape door. ●... -
Page 17: Recording From The Radio
Tape Operation / Recording Recording from the radio Tune to the desired radio station (see Tuning to radio stations). Press STOP•OPENÇ0 to open the tape door. Insert a suitable tape into the deck and close the tape door. Press RECORD● to start recording. To interrupt playback press PAUSE;. -
Page 18: Maintenance
Cleaning the disc lens ● After prolonged use, dir t or dust may accumulate at the disc lens. To ensure good playback quality, clean the disc lens with Philips CD Lens Cleaner or any commercially available cleaner. Follow the instructions supplied with cleaner. -
Page 19: Clock/Timer
STANDBY-ON M I C RO S Y S T E M M C 1 4 7 CD/CD - R/CD - RW COMPATIBLE SOURCE TUNING PRESET Setting the clock In standby mode, press and hold CLOCK/ DISPLAY on the remote control set for 2 seconds. -
Page 20: Specifications
Specifications AMPLIFIER Output power ... 2 x 2W RMS Signal-to-noise ratio ... ≥ 60 dBA (IEC) Frequency response ... 125 – 16000 Hz Impedance loudspeakers ... 8Ω CD PLAYER Frequency range ... 125 – 16000 Hz Signal-to-noise ratio ... 65 dBA TUNER FM wave range ... -
Page 21: Troubleshooting
Do not open the system as there is a risk of electric shock. If a fault occurs, first check the points listed below before taking the system for repair. If you are unable to remedy a problem by following these hints, consult your dealer or Philips for help. -
Page 22: Troubleshooting
Troubleshooting Problem The remote control does not function properly. The time is not working. The Clock/Timer setting is erased. Solution ✔ Select the source (CD or TUNER, for example) before pressing the function button (É,í,ë). ✔ Reduce the distance between the remote control and the system. - Page 23 Meet Philips at the Internet http://www.philips.com MC147 © 2010 Koninklijke Philips Electronics N.V. All rights reserved. MC147_12_UM_V3.0...