
Related Manuals for Astra Mega I

Summary of Contents for Astra Mega I
- Page 1 Operation Manual Astra Traditional Machines & Steamers U.S.A,. CANADA, CENTRAL & SOUTH AMERICA, EUROPE INDONSIA, CHINA, JAPAN...
-
Page 2: Table Of Contents
A . Introduction to your ASTRA Espresso Ma chine ... 2 B . Required Connections ........3 1. -
Page 3: Introduction To Your Astra Espresso Machine
Read the ASTRA manual and follow the instructions closely, and you will be enjoying espresso and cappuccino in minutes. If you need any help or have any questions, please call your local... -
Page 4: Required Connections
A WATER PRESSURE REGULATOR IS SUGGESTED IF THE WATER PRESSURE EXCEEDS 50 PSI. 2. Power: All ASTRA machines must be connected according to the local and national electrical and plumbing codes. For a 110-Volt machine, a separate circuit with ground is required. A 220-Volt machine must be connected to a single phase power (2 hot and ground ) and the equipment must be grounded. -
Page 5: Grinders
D. Grinders CAUTION: Never put any fingers or any foreign objects into the grinder without first unplugging it. Never put ground coffee into the grinder, and please use ONLY whole beans. The automatic and semi-automatic grinders are divided into three main parts: 1. -
Page 6: Setting The Dosing (Automatic & Semi-Automatic)
Please ensure that you are operating the grinder with whole beans only and that the hopper is in the OPEN position. On the left side of the grinder collar, there is a spring-loaded, push-lock pin. This locks the setting in place and prevents the grinder from losing that setting. -
Page 7: Automatic Espresso Machine (Gold)
Take the single portafilter and put it in the yoke of the grinder. Pull the lever once for a single dose and ensure the coffee is level. It is NOT necessary to tamp the portafilter because ASTRA espresso machines come with self-tamping group heads. To put the portafilter on the group head, hold the handle level at 7 o’clock and... - Page 8 CAUTION: Make sure that both of the portafilter wings are securely aligned and that the portafilter has created a tight seal with the group head gasket. If a tight seal is not created, a potentially dangerous situation exists as hot water under pressure could escape from the group head causing burn injuries.
-
Page 9: Brew/Stop Button
Brew/ Stop Button The Brew/Stop button is a manual override for all selections. If you should push the wrong selection, press the Brew/Stop button to cancel that selection. If you need to extract an amount not programmed, put the cup under the portafilter and push the Brew/Stop button for extraction to begin. -
Page 10: Automatic Espresso Machine (Silver)
Take the single portafilter and put it in the yoke of the grinder. Pull the lever once for a single dose and ensure the coffee is level. It is NOT necessary to tamp the portafilter because ASTRA espresso machines come with self-tamping group heads. To put the portafilter on the group head, hold the handle level at 7 o’clock and... -
Page 11: Brew/Stop Button
CAUTION: Make sure that both of the portafilter wings are securely aligned and that the portafilter has created a tight seal with the group head gasket. If a tight seal is not created, a potentially dangerous situation exists as hot water under pressure could escape from the group head causing burn injuries. -
Page 12: Steam Wand
G. Steam Wand Programming the Automatic Steam Option This procedure is used to program the desired temperature for optional automatic steam wands on espresso machines. Ensure that the machine is ON and the LED displays the current temperature. Each steam wand can be programmed and operated INDEPENDENTLY as follows: 1. - Page 13 • Adjust the temperature between 2-40 degrees Fahrenheit using the up or down arrows • Once you have selected the desired temperature, press the “Set” button • The display will read “St.2” • Press “Set” button again • Display will show the selected temperature from step 1 •...
-
Page 14: Operating The Steam Wand (Automatic & Manual)
Operating the Automated Steam Wand 1. Using the Automatic Steaming Option • Move the switch located underneath the display to the “manual” position • Let the steam blow out for a few seconds • Move the switch to the “automatic” position, this will turn the steam wand off. -
Page 15: Semi-Automatic Espresso Machine
H. Semi -Automatic Espresso Machine The following applies to ALL ASTRA Semi-Automatic machines and steamers: Open any steam valve and leave it open by turning the knob counter-clockwise. Turn the machine on using the On/Off switch on the front panel. The green and amber lights will come on. Once the steam begins to disperse from the steam wand, close the valve. -
Page 16: Pourover Espresso Machine
“On” regardless of whether it is in use or not. I. Pourover Espresso Machine and Steamers All ASTRA machines are available in a pourover model. The water reservoir cover is located on top of the machines. Lift the cover and fill with water. -
Page 17: Steamers
J. Steamer s Standard Steamer Prior to operation, ensure that the boiler pressure has reached the green area on the gauge (Boiler pressure). The manual steam valves have a factory set safety mechanism that prohibits accidental release of steam. This feature provides a greater level of control to the operator. - Page 18 2. Setting the Accuracy Parameters • Press and hold the “Set” button • Display will read “Cor” • Press “Set” button again • Adjust the temperature between 0-20 degrees Fahrenheit using the up or down arrows (default is set for 0 degrees Fahrenheit) •...
-
Page 19: Operating The Steam Wand (Automatic & Manual)
• Adjust the temperature between 0-150 degrees Fahrenheit using the up or down arrows (suggested temp. 100 degrees Fahrenheit). • Once you have selected the desired temperature, press the Set” button. • The display will show the room temperature and programming is finished. -
Page 20: Foaming Or Frothing The Milk
L. Cup Rack The top of the ASTRA espresso machine has a cup rack for keeping espresso cups warm. If your ASTRA machine has a dome on top, it is recommended that you warm the espresso cups prior to use. -
Page 21: Knockout Box
M. Knockout Box The knockout box (wall or counter-top model) has a padded bar that lays across the opening of the box. By knocking the portafilter against the padded bar, it knocks out the grounds and prevents the edge of the portafilter from becoming damaged. Nicks and cuts on the portafilter can damage the rubber gasket on the group head that seals the portafilter basket. -
Page 22: Portafilters
Place the portafilter back on the machine and repeat the process WITHOUT any cleaning solution. When the backflush water becomes clear, remove the blank filter and replace it with a regular filter. If you have a two or three-group machine, repeat this process with each group. -
Page 23: Basic Espresso Drinks
P. Basic Espresso Drinks Espresso Fill the smaller filter with a dose of freshly-ground coffee or the large filter with two doses. Place the portafilter into the group head and press either the 1 or 2-cup button as appropriate. Basic Cappuccino Froth the milk while making the basic espresso recipe. -
Page 24: Warranty Conditions
All parts shall be sent to ASTRA by prepaid shipping, and warranty replacement parts will be sent with collect shipping. In no event shall ASTRA be liable to ASTRA’s Customer or any user for any damages resulting from or relating to any failure of the Product. -
Page 25: R . Figure 1 - Mega Ii Automatic Machine
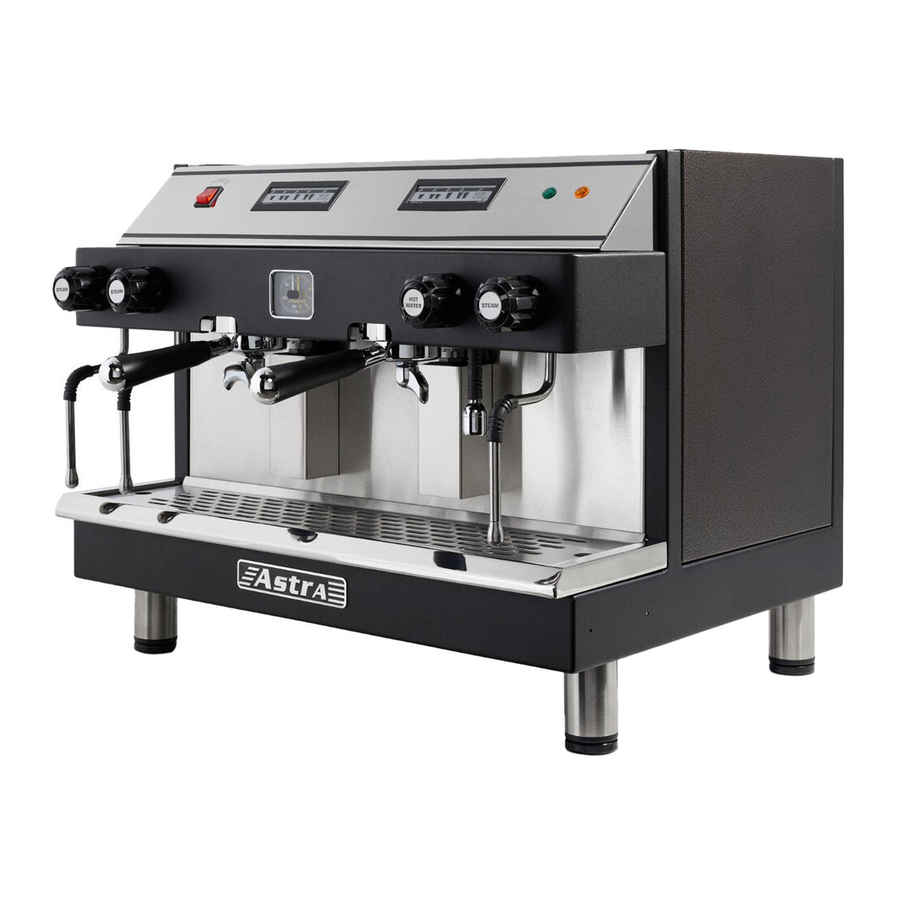
R. Figure 1 - Mega II Automatic Machine... -
Page 26: S. Figure 2 - Automatic Steamer
S. Figure 2 - Automatic Steamer... -
Page 27: T. Figure 3 - Water Softener Regeneration
T. Figure 3 - Water Softener Regeneration In 45 minutes, TASTE water for saltiness. W H E N WAT E R N O L O N G E R TA S T E S SALTY TURN VALVE (B) TO THE LEFT. -
Page 28: Wiring Diagram
U. Figure 4A - Automatic Espresso Machine Wiring Diagram Manufactured BEFORE January 1st, 2014 with GOLD color touch pad. - Page 29 U. Figure 4B - Automatic Espresso Machine Wiring Diagram Manufactured AFTER January 1st, 2014 with SILVER color touch pad.
- Page 30 W. Figure 5 - Semi-Automatic Espresso Machines & ALL Steamers Wiring Diagram...
-
Page 31: Checklist For Yearly Maintenance
X. Checklist For Yearly Maintenance On All Traditional Machines and Steamers (WHERE APPLICABLE) 1. Make sure that the water softener has been regenerated on a regular basis. The factory recommends recharging the softener every 45–60 days. If you are busy recharge it every 30 days. 2. - Page 32 Y. Figure 6...
- Page 34 AUTHORIZED EXCLUSIVE DISTRIBUTOR P.O. Box 572140 Tarzana, CA 91357 Tel: (818) 340-1800 Fax: (818) 340-5830 www.astramfr.com Made in the U.S.A., Los Angeles, CA...