
Related Manuals for YMGI 584 Series


Summary of Contents for YMGI 584 Series
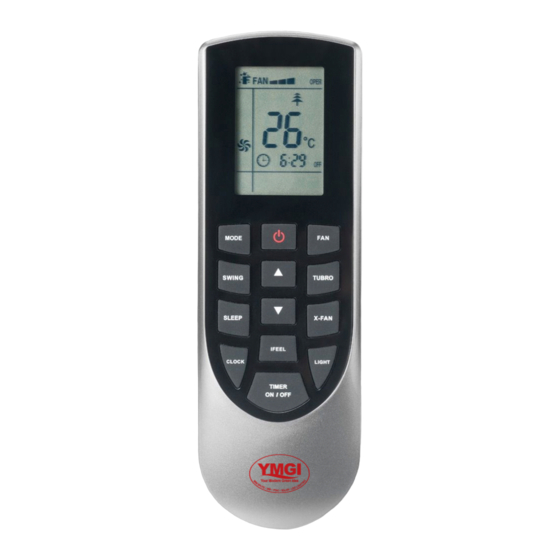
- Page 1 Remote Control YMGI Features & Functions Your Modern Green Idea (58)4 & (59)4 Series YAN1F1F Remote Control USERS GUIDE YMGI Group 601 Arrow Ln, O’Fallon, MO 63366 • info@ymgigroup.com • ymgigroup.com • 866-833-3138...
-
Page 2: Introduction For Icons On Display Screen
YMGI Your Modern Green Idea Introduction for icons on display screen YMGI Group • 601 Arrow Ln, O’Fallon, MO 63366 • info@ymgigroup.com • ymgigroup.com • 866-833-3138... -
Page 3: Introduction For Buttons On Remote Controller
“ or “ “ button to adjust set temperature. Press “FAN” button to adjust fan speed. Press “SWING” button to adjust fan blowing angle. • After selecting dry mode, the air conditioner will operate at low speed. The dry (dehumidify) icon “ “ on indoor unit will be ON. Under dry mode, fan speed cannot be adjusted. Press “SWING” button to adjust fan blowing angle. • When selecting fan mode, the air conditioner will only run the fan, with no cooling or heating. All indicators are OFF. Press “FAN” button to adjust fan speed. Press “SWING” button to adjust fan blowing angle. • When selecting heating mode, the air conditioner operates under heat mode. Heat indicator “ “ on indoor unit will be ON. Press “ “ or “ “ button to adjust set temperature. Press “FAN” button to adjust fan speed. Press “SWING” button to adjust fan blowing angle. (Cooling only units will not respond to heating mode signal. If you set the heat mode with the remote control, pressing ON/OFF button will start up the unit). Notes: • To prevent cold air from blowing, after starting up heating mode, indoor unit will delay 1~5 minutes before blowing air (actual delay time is depend on indoor ambient temperature). • Set temperature range available on the remote controller is 61~86 °F. YMGI Group • 601 Arrow Ln, O’Fallon, MO 63366 • info@ymgigroup.com • ymgigroup.com • 866-833-3138... - Page 4 “ icon will disappear. button • Press “ “ or “ “ button once increase or decrease set temperature 1°C (1°F). Holding “ “ or “ “ but- ton, 2s later, set temperature on remote controller will change quickly. Release the button after finished adjusting the setting, the temperature indicator on indoor unit will change accordingly. (Temperature canot be adjusted under auto mode) • When setting TIMER ON, TIMER OFF or CLOCK, press “ “ or “ “ button to adjust time. (Refer to CLOCK, TIMER ON, TIMER OFF buttons) When setting TIMER ON, TIMER OFF or CLOCK, press “ “ or “ “ button to adjust time. (Refer to CLOCK, TIMER ON, TIMER OFF buttons) SLEEP button Under COOL, HEAT or DRY mode, press this button to start up sleep function. “ “ icon is displayed on re- mote controller. Press this button again to cancel sleep function and “ “ icon will disappear. YMGI Group • 601 Arrow Ln, O’Fallon, MO 63366 • info@ymgigroup.com • ymgigroup.com • 866-833-3138...
- Page 5 LIGHT button Press this button to turn off display light on indoor unit. “ “ icon on remote controller disappears. Press this button again to turn on display light. “ “ icon is displayed. CLOCK button Press this button to set clock time. “ “ icon on remote controller will blink. Press “ “ or “ “ button within 5s to set clock time. Each pressing of “ “ or “ “ button, clock time will increase or decrease 1 minute. If hold “ “ or “ “ button, 2s later, time will change quickly. Release this button when reaching your required time. Notes: • Clock time adopts 24-hour mode. • The interval between two operations cannot exceeds 5s. Otherwise, remote controller will quit setting status. Operation for TIMER ON/TIMER OFF is the same. YMGI Group • 601 Arrow Ln, O’Fallon, MO 63366 • info@ymgigroup.com • ymgigroup.com • 866-833-3138...
- Page 6 Energy-saving function Under cooling mode, press “TEMP” and “CLOCK” buttons simultaneously to start up or turn off energy- saving function. When energy-saving function is started up, “SE” will be displayed on the remote controller, and air conditioner will adjust the set temperature automatically according to factory settings to reach to the best energy-saving effect. Press “TEMP” and “CLOCK” buttons simultaneously again to exit energy-saving function. Notes: • Under energy-saving function, fan speed is defaulted to auto speed and it cannot be adjusted. • Under energy-saving function, set temperature cannot be adjusted. Press “TURBO” button and the remote controller won’t send signal. • Sleep function and energy-saving function cannot operate at the same time. If energy-saving function has been set under cooling mode, press sleep button will cancel energy-saving function. If sleep function has been set under cooling mode, start up the energy-saving function will cancel sleep function. 8 °C Heating Function Under heating mode, press “TEMP” and “CLOCK” buttons simultaneously to start up or turn off 8°C heating function. When this function is started up, “ “ and “8°C” will be shown on remote controller, and the air conditioner keep the heating status at 8°C.Press “TEMP” and “CLOCK” buttons simultaneously again to exit 8°C heating function. YMGI Group • 601 Arrow Ln, O’Fallon, MO 63366 • info@ymgigroup.com • ymgigroup.com • 866-833-3138...
- Page 7 3. Insert two new AAA1.5V dry batteries, and pay attention to the polarity. (As show in figure) 4. Attach the back cover of wireless remote control. (As show in figure) NOTE: • During operation, point the remote control signal sender at the receiving window on indoor unit. • The distance between signal sender and receiving window should be no more than 8m, and there should be no obstacles between them. • Signal may be interfered easily in the room where there is fluorescent lamp or wireless telephone; remote controller should be close to indoor unit during operation. • Replace new batteries of the same model when replacement is required. • When you don’t use remote controller for a long time, please take out the batteries. • If the display on remote controller is fuzzy or there’s no display, please replace batteries. NOTE: When changing the batteries, do not use the old or different batteries, otherwise, it can cause the remote control to malfunction. The operation should be in its receiving range. It should be placed 36 inches away from a TV set or stereo. If the wireless remote control cannot operate normally, please take the batteries out, wait 30 seconds and reinsert them. If the remote still doesn’t operate normally, please change the batteries. If the wireless remote control will not be used for an extended period, it is recommended to remove the batteries. Leaving the batteries in could cause them to leak. This will cause damage to the remote control. YMGI Group • 601 Arrow Ln, O’Fallon, MO 63366 • info@ymgigroup.com • ymgigroup.com • 866-833-3138...
- Page 8 YMGI Your Modern Green Idea YMGI is dedicated to designing, manufacturing and distributing the highest quality, energy saving and environmentally friendly air conditioner and heat pump products, while providing the best service and support to all of our customers. Our mission is to help build a sustainable, efficient and green world.