Sony StorStation LIB-81 Operating Instructions Manual
Sony ait library operating instructions
Hide thumbs
Also See for StorStation LIB-81:
- Quick start manual (10 pages) ,
- Quick start manual (44 pages)

Related Manuals for Sony StorStation LIB-81


Summary of Contents for Sony StorStation LIB-81
- Page 1 AIT Library Operating Instructions Before operating the unit, please read this manual thoroughly and retain it for future reference. LIB-81 © 2002 Sony Corporation 4-663-202-81(1)
- Page 2 All interface cables used to connect peripherals must be shielded in order to comply with the limits for a digital device pursuant to Subpart B of Part 15 of FCC Rules. If you have any questions about this product, please contact the Sony Support Center written on the warranty card. Trade Name: SONY Model No.:...
- Page 3 ATTENTION According to the EU Directives related to product safety, EMC and R&TTE the manufacturer of this product is Sony Corporation, 1-7-1 Konan Minato-ku Tokyo, 108-0075 Japan. The Authorised Representative is Sony Deutschland GmbH, Hedelfinger Strasse 61,70327 Stuttgart, Germany. For any service or guarantee matters please refer to the addresses given in separate service or guarantee documents.
-
Page 4: Table Of Contents
Table of Contents Chapter 1 Introduction Chapter 2 Installation Chapter 3 Basic Usage Overview...7 Product Features and Functions ...8 Front ... 8 Rear ... 9 Bottom... 10 System Structure...10 Compatible Data Cartridges ...11 AIT Cartridges ... 11 Cleaning Cartridges... 12 Software ...12 Precautions ...12 Overview...13... - Page 5 Chapter 4 Operating the AIT Library Chapter 5 Operating the AIT Drive Chapter 6 Using the Library Administration Menu Basic Settings...43 Disabling the Life Warning Display ... 43 Setting the Bar Code ... 44 Setting the R-MIC Function... 44 Adjusting the Brightness of the LCD Panel... 45 Using the Sequential Mode ...
- Page 6 © 2002 Sony Corporation. All rights reserved. Trademarks • Sony, StorStation and Advanced Intelligent Tape are trademarks or registered trademarks of Sony Corporation in this country, other countries, or both. • Other product names are trademarks or registered trademarks of their respective owners in this country, other countries, or both.
-
Page 7: Overview
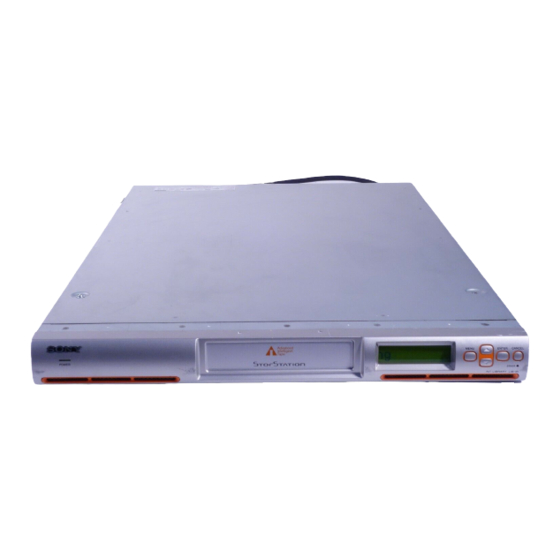
Overview Introduction The LIB-81 is an AIT (Advanced Intelligent Tape) library with a built-in AIT drive. Up to 8 cartridges can be set and used. The unit can also be connected to, and used with, a workstation or server. Up to 8 cartridges can be set Up to 8 AIT cartridges can be set. -
Page 8: Product Features And Functions
LVD SCSI compliant The LIB-81/A5, LIB-81/A4, LIB-81/A3X, and LIB-81/A3 models are Ultra 160 LVD SCSI-compliant, whereas the LIB-81/A2 and LIB-81/A1 models are Wide Ultra LVD SCSI-compliant. Suitable for rack mounting With the ACY-RK81 rack mounting kit (sold separately), the AIT library can be installed on an EIA-standard, universal pitch 19-inch rack. -
Page 9: Rear
A Front Panel There are two shapes for the front panel. B Power Indicator LED This LED light is on when the power is turned on. C Cartridge Dock Load and exchange cartridges in the cartridge dock. When the cartridge dock is specified using the control buttons, its shutter opens automatically. -
Page 10: Bottom
Control the library. SCSI Host computer LIB-81 Notes • A SCSI host adapter card must be installed in the host computer. • In order to configure and maintain the library through a browser, browser software must be installed in the computer. The following operating systems and browsers are compatible with the library. -
Page 11: Compatible Data Cartridges
Built-in AIT-5 drive (LIB-81/A5 models) AIT-5 mark AIT-4 mark Built-in AIT-4 drive (LIB-81/A4 models) AIT-4 mark AIT-3 Ex mark Built-in AIT-3 Ex drive (LIB-81/A3X models) AIT-3 Ex mark AIT-3 mark AIT-1 Turbo mark* AIT-1 mark* * Only supports read operations... -
Page 12: Cleaning Cartridges
Cleaning Cartridges Software Precautions Built-in AIT-1 drive (LIB-81/A1 models) AIT-1 mark Caution • Do not use 8 mm video tapes sold at stores. An 8 mm video tape looks a lot like an AIT cartridge, but has different specifications. Do not use any cartridge other than those listed above. -
Page 13: Overview
Overview Unpacking Installation This chapter explains general procedures for positioning the AIT library, connecting it to the host computer and turning on the library power. This chapter also explains initial setup. Installation and setup steps may vary depending on your system. After turning on the power, make settings required to use the unit as explained in “Initial Setup”... -
Page 14: Checking The Package Contents
Operation position After opening the package, make sure all of the following items are present. Contact your dealer if anything is missing. • LIB-81 AIT Library (1) • Power cable (1) • SCSI terminator (1) • Quick Start Guide (1) •... -
Page 15: Installing The Ait Library
Installing the AIT Library The library weighs about 13.5 kg (29.8 lb.) and has the following dimensions. Before installing the library, make sure that the surface on which you are placing it is large and strong enough. Also, set the library horizontally so that its front and sides are inclined by no more than ±1 degree in any direction. -
Page 16: Connecting The Power Cable
Connecting the Power Cable With the ACY-RK81 rack mounting kit (sold separately), the AIT library can be installed on an EIA-standard, universal pitch 19-inch rack. Contact your dealer for information about the rack mounting kit. Note Install the AIT library on a horizontal surface near an AC power outlet. Also, leave a gap of about 150 mm (5.9 in.) behind the rear of the unit to allow air to circulate. -
Page 17: Connecting To The Host Computer
Connecting to the Host Computer Connect the AIT library and the host computer with a SCSI cable. This section explains general connecting steps. Connect the library with the appropriate SCSI cable, depending on the AIT drive. • When the library is equipped with the AIT-5, AIT-4, AIT-3 Ex, or AIT-3 drive, use a generic Ultra 160 cable. -
Page 18: Setting The Dip Switches
Setting the DIP Switches 2 Attach the provided terminator to the other connector. Host computer DIP switch settings determine whether electric power is supplied to the SCSI terminator (when multiple SCSI devices are connected). DIP Switches for Setup Bottom The default factory setting of the DIP switches is as follows. 1-7: On (Do not change this default setting.) Used for expansion purposes 8: On... -
Page 19: Connecting Scsi Peripheral Devices
Connecting SCSI Peripheral Devices SCSI Connector 2 SCSI Connector 1 Turning the Power On/Off Turn the Power On Press the power switch to turn off the power. Use a pointed object such as a machinist’s screwdriver to change the settings of the DIP switches. Press the power switch to turn on the power. - Page 20 [CANCEL] button. For details about the date and time settings, see “Setting the Date and Time” (page 22). Once the library is started, the status display on the right appears. LIB-81 Initializing Jan/01/2001 12:00:00 [ENTER]...
- Page 21 Turn the Power Off Notes • The date and time cannot be updated when the AIT library is off. For this reason we recommend that you set the date and time each time you turn on the library. • If the library is left idle for five minutes, the status display appears automatically.
-
Page 22: Initial Setup
Initial Setup Setting the Date and Time • After turning the AIT library power off, wait at least 10 seconds before turning it on again. • Before transport make sure that you turn off the AIT library using the procedure above, and that the transport screw is in the Shipping position. Note To avoid pressing the control buttons by accident, you can disable the control buttons. -
Page 23: Setting The Scsi Id
Setting the SCSI ID SCSI Connector 2 SCSI Connector 1 Set the month, day, and year. 1 When the month digits flash, use the V and v buttons to set the month, then press the [ENTER] button. 2 When the day digits flash, use the V and v buttons to set the day, then press the [ENTER] button. - Page 24 About SCSI parity When the SCSI parity function is enabled, parity checks are performed on all data passing through the SCSI bus. The factory default settings for SCSI parity are as follows: • Library: Enabled (YES) • AIT Drive: Enabled (YES) Caution Do not duplicate SCSI IDs.
-
Page 25: Setting The Cartridges
The type of bar code is fixed to Code 39 with check digit for models equipped with a bar code reader. We recommend that you use Sony bar code labels for the AIT library (sold separately). If you use other types of bar code labels, you may encounter recognition problems. - Page 26 Setting the Cartridge Check whether the erase-protection tab is set to the write-enable position. If the tab is orange, data can be written to the cartridge. AIT-1 AIT-5, AIT-4, AIT-3 Ex, AIT-3, AIT-2 Turbo, AIT-2, AIT-1 Turbo, AIT-E Turbo If the tab is moved to the left, data can be written to and erased from the cartridge.K If the tab is moved to the right, data...
- Page 27 When “[ENTER] to activate” appears, press the [ENTER] button. The cartridge dock shutter opens. Insert the cartridge in the slot. Be sure to insert it all the way. Slot [ENTER] to activate Chapter 2 Installation...
- Page 28 If you selected “1. Single Mode” in step 4, press the [CANCEL] button. Note Even if you selected “1. Single Mode” in step 4, you can insert a different cartridge by using the V and v buttons to select the slot element address, and then pressing the [ENTER] button.
-
Page 29: Connecting To The Network
Connecting to the Network Setting the Network When “[ENTER] to activate” appears, press the [ENTER] button. If you selected “1. Single Mode” in step 4, the display on the right appears. If you selected “2. Multiple Mode” in step 4, the display on the right appears. - Page 30 - Enter the domain name up to 63 alphanumeric characters and symbols ( - . ). - To delete a character, use space (“ ”). Menu 12:34 4.SCSI 5.Configuration 6.Network Network 12:34 1.Host 2.Domain 3.IP Address Host ■ Host LIB-81 [ENTER] to activate Chapter 2 Installation...
- Page 31 When [[ENTER] to activate] appears, press the [ENTER] button. The display returns to “Network”. When you want to set the IP address, select “3.IP Address”, then press the [ENTER] button. • Select “YES” to use the IP address assigned to the DHCP server. Then proceed to step 12.
- Page 32 Connecting a Network Cable Accessing the AIT Library From a Browser Select “2. Shutdown”, then press the [ENTER] button. When “[ENTER] to activate” appears, press the [ENTER] button. The system performs the shutdown procedure When the message on the right appears, turn off the library by pressing the power switch on the rear.
- Page 33 (Example) When using Microsoft Internet Explorer Chapter 2 Installation...
-
Page 34: Overview
For details on the menu and how to configure the settings, see each related reference. Caution This document contains explanations for all LIB-81 models (A5, A4, A3X, A3, A2, and A1). We have used LIB-81/A3 displays to illustrate the explanations. The display of models other than the LIB-81/A3 differs slightly, but operation is similar to the LIB-81/A3. -
Page 35: Viewing The Status Display
Viewing the Status Display During the normal active state, the status information is displayed on the LCD panel of the AIT library. READY AIT3 A Current operation of the library and AIT drive The meanings of the messages displayed for the AIT library are: “READY”: Waiting “PICK”: The picker has gone after the cartridge... -
Page 36: Menu Items
Menu Items Information Menu Note The status information can be viewed through a browser. Refer to Chapter 6, “Library Administration Menu” (page 67). The following menus are in the control panel. MENU Information System Down Eject / Insert Password Move Tape Tape Inventory SCSI Network... -
Page 37: Eject/Insert Menu
Eject/Insert Menu Move Tape Menu SCSI Menu Use this menu to set and replace the cartridges. t “Replacing the Cartridges” (page 53) in Chapter 4, “Operating the AIT Library”. The following submenus are in the Eject/Insert Menu. MENU Eject / Insert ENTER Eject From Library... -
Page 38: Configuration Menu
Activate the sequential mode. Caution There exist LIB-81 AIT library models without bar code or R-MIC readers. Make sure that your library is equipped with a bar code and/or R-MIC reader before modifying the “Barcode” or “R-MIC” setting. Modifying these settings when using LIB-81 AIT library models that are not equipped with the appropriate readers generates errors. -
Page 39: Control Buttons
Network Menu Tape Inventory Menu Password Menu System Down Menu Control Buttons Necessary settings can be configured in order to connect to the network. t “Connecting to the Network” (page 29) in Chapter 2, “Installation”. Information related to the cartridges can be displayed. t “Viewing Cartridge Information”... - Page 40 Host name is now set, and the display returns to “Network”. Press the [CANCEL] button twice to return to the status display. Menu 12:34 4.SCSI 5.Configuration 6.Network Network 12:34 1.Host 2.Domain 3.IP Address Host LIB-81 Host MACHINE-NAME HOST MACHINE_NAME [ENTER] to activate Chapter 3 Basic Usage...
-
Page 41: Warnings
Messages” (page 100). “FanX trouble”: An anomaly has occurred at fan X (where X is the fan number). Contact your nearest Sony Service Support Center. “Cleaning Tape at EOM”: The spent cleaning cartridge is set. Replace the spent cleaning cartridge with a new one. -
Page 42: Setting Or Changing The Password
Setting or Changing the Password A password can be set on the AIT library. The password is used when accessing certain menus via Ethernet. This section explains the steps required to set or change the password from the control panel. The password is extremely important to the security of the library. -
Page 43: Basic Settings
Configuration Menu on the control panel. Caution There exist LIB-81 AIT library models without bar code or R-MIC readers. Make sure that your library is equipped with a bar code and/or R-MIC reader before modifying the “Barcode” or “R-MIC” setting. Modifying these settings when using LIB-81 AIT library models that are not equipped with the appropriate readers generates errors. -
Page 44: Setting The Bar Code
Configuration Menu if you use AIT-5, AIT-4, AIT-3 Ex, or AIT-3 cartridges, or AIT cartridges with R-MIC. Before modifying this setting, make sure that your LIB-81 AIT library is equipped with an R-MIC reader. Caution If your library is not equipped with an R-MIC reader, you are using AIT-2 cartridges without R-MIC, or using AIT-1 cartridges, leave this setting to “NO”. -
Page 45: Adjusting The Brightness Of The Lcd Panel
Adjusting the Brightness of the LCD Panel If you change this setting to “YES”, it will take longer for the inventory to be completed when the AIT library starts or when you set a cartridge. Note The R-MIC function can also be set through a browser. At the status display, press the [MENU] button for two seconds. -
Page 46: Using The Sequential Mode
Using the Sequential Mode When “[ENTER] to activate” appears, press the [ENTER] button. The brightness of the LCD panel is now set. The display returns to the menu. Press the [CANCEL] button twice to return to the status display. Depending on your software, you can elect to activate the sequential mode in “Sequential Mode”... -
Page 47: Disabling The Buttons On The Front Panel
Disabling the Buttons on the Front Panel To prevent accidentally pressing the control buttons, you can disable the buttons on the front panel. Use a browser to disable the buttons in the Library Administration Menu. For details on the Library Administration Menu, refer to Chapter 6, “Library Administration Menu”... -
Page 48: Assigned Element Addresses
Assigned Element Addresses Handling the Cartridges Handling An element is a physical location where a cartridge can be kept. Applications use element addresses to differentiate between the elements of the AIT library. In this library, the element addresses are assigned to the cartridge slots and the AIT drives in the following manner. -
Page 49: Storing
Storing Daily Maintenance • Store cartridges in an appropriate environment. Store cartridges according to the temperature and other surrounding conditions written on the package. Also, try to keep the temperature and humidity of the environment constant. Store cartridges out of the direct sun rays. -
Page 50: Chapter 4 Operating The Ait Library
Operating the Overview Using the Cartridges Taking Out the Cartridges AIT Library This chapter explains how to take out, change and move the cartridges, how to view information about the AIT library, cartridges and errors, and how to test the hardware. This section explains steps to take out, change and move the cartridges. - Page 51 Select the cartridge ejection method, then press the [ENTER] button. • When you want to specify one slot and eject its cartridge, select “1. Single Mode”. • When you want to eject several cartridges consecutively, select “2. Multiple Mode”. In this case, you only need to specify the first slot.
- Page 52 Remove the cartridge from the slot. Raise the cartridge about 1 mm and pull it out. If you selected “1. Single Mode” in step 4, press the [CANCEL] button. Note Even if you selected “1. Single Mode” in step 4, you can remove a different cartridge by using the V and v buttons to select the slot element address, and then pressing...
-
Page 53: Replacing The Cartridges
Replacing the Cartridges Two or more inserted cartridges The element address of the front slot appears on the first line. The element address of the next slot appears on the second line. 1 Eject the cartridge and press the [ENTER] button. 2 The slot moves to the next. - Page 54 To replace a cartridge set in the AIT library: At the status display, press the [MENU] button for two seconds. Use the V and v buttons to select “2.Eject/Insert”, then press the [ENTER] button. “Eject/Insert” appears. Select “1.Eject From Library”, then press the [ENTER] button.
- Page 55 Raise the cartridge about 1 mm and pull it out. If you selected “1. Single Mode” in step 4, press the [CANCEL] button. Note Even if you selected “1. Single Mode” in step 4, you can remove a different cartridge by using the V and v buttons to select the slot element address, and then pressing the [ENTER] button.
- Page 56 Only one inserted cartridge The element address of the front slot appears on the first line. (Nothing appears on the second line.) 1 Eject the cartridge and press the [CANCEL] button. Caution Do not put your fingers in the slot when it is moving, as this could result in injuries.
- Page 57 When “[ENTER] to activate” appears, press the [ENTER] button. The cartridge dock shutter opens. Insert the cartridge into the slot. Be sure to insert it all the way. If you selected “1. Single Mode” in step 13, press the [CANCEL] button.
- Page 58 If you selected “2. Multiple Mode” in step 4, perform the following depending on the number of open slots. Two or more open slots The slot moves to the next one. When it stops, insert another cartridge and press the [ENTER] button again.
-
Page 59: Moving The Cartridges
Moving the Cartridges Viewing Information Related to the AIT Library It is possible to move a cartridge from a slot to the AIT drive or vice versa. Set the cartridge in the slot before performing the procedure below. When moving a cartridge, specify the slot with the element address. -
Page 60: Viewing Cartridge Information
[ENTER] button. “Tape Inventory” appears. To view the bar code information, select “1.Barcode”, then press the [ENTER] button. Information 12:34 1.Library 2.Drive V/ID SONY Name LIB-81 12345678 Version 0100 Tape Inventory 12:34 1.Barcode 2.R-MIC Chapter 4 Operating the AIT Library... - Page 61 When the AIT library is equipped with a bar code reader, the bar code information is only displayed when the bar code setting is “YES” or “Enable”. • When a cartridge is not set, “No Tape” is displayed. • If a cartridge with no bar code information is set, nothing is displayed.
-
Page 62: Chapter 5 Operating The Ait Drive
Select “2.Drive”, then press the [ENTER] button. The AIT drive information is displayed. Press the [CANCEL] button three times to return to the status display. Chapter Information 12:34 1.Library 2.Drive V/ID SONY Name SDX-700C 12345678 Version 0100 Chapter 5 Operating the AIT Drive... -
Page 63: Cleaning The Ait Drive
Cleaning the AIT Drive When the AIT drive needs to be cleaned, the following message appears on the LCD panel: Warning 12:34 Cleaning request Clean the drive by setting the Cleaning cartridge (sold separately) in the AIT drive. To set the cleaning cartridge, specify the slot and the AIT drive with an element address. - Page 64 The shutter of the cartridge dock opens. Insert the cleaning cartridge into the slot. Be sure it insert it all the way. Press the [CANCEL] button. When “[ENTER] to activate” appears, press the [ENTER] button. The shutter closes and the initialization is performed.
- Page 65 When the initialization ends, press the [CANCEL] button twice to return to the menu, select “7.Move Tape”, then press the [ENTER] button. Use the V and v buttons to set the element address of the slot where the cleaning cartridge is set, then press the [ENTER] button.
-
Page 66: Chapter 6 Using The Library Administration Menu
Using the Library Administration Menu Overview This chapter explains what you can do with the Library Administration Menu, and how you can operate it. It also explains details about menus. Use the Library Administration Menu through a browser to manipulate objects and configure settings related to the system, the network and the SCSI IDs. -
Page 67: Library Administration Menu
Library Administration Menu Accessing Library Administration Menu When the Library Administration Menu is accessed using a browser, the following objects can be accomplished through the browser: • Configure system-related settings • Configure network-related settings • Configure SCSI ID-related settings • Set or change the password •... - Page 68 (Example) When using Microsoft Internet Explorer Click the button of the menu to operate. The page corresponding to the selected menu appears. (Example) “System Configuration” page Chapter 6 Using the Library Administration Menu...
-
Page 69: Menu Items
Menu Items System Configuration Menu To return to the top page, click Note When accessing the Library Administration Menu, we strongly recommend that you change the password before configuring the settings. For information about how to set the password, refer to “Password” (page 75) of “System Configuration Menu”. -
Page 70: Configuration
Configuration In “Configuration”, such objects of the system as the date and time, the life warning display and the R-MIC function can be configured. Note In “Configuration”, some of the items can be set in the Configuration Menu of the control panel. Click “System Configuration”... -
Page 71: Network
Network Key Operation Click to select whether or not to enable the buttons (the power standby switch and control buttons) on the front panel. If “Disable” is selected, the buttons will not function. Note If the library power is turned off, the “Key Operation” setting is returned to “Enable”. - Page 72 “Password” (page 75). By default, the password is “LIB-81A”. When the following screen appears, enter “LIB81” for “User Name” and “SONY” for “Password”, then click “OK”. Note This screen appears only when you start you browser and access the Library Administration Menu.
- Page 73 The “Network” page appears. Set the following items. Host Name Enter the host name up to 63 alphanumeric characters and symbols ( - ). (However, the AIT library does not support DNS.) Domain Name Enter the domain name up to 63 alphanumeric characters and symbols ( - .). (However, the AIT library does not support DNS.) DHCP Click to choose whether or not to use an IP address assigned by the network...
-
Page 74: Scsi Id
SCSI ID When “Reboot now?” appears, click “OK”. The settings become effective when the library restarts. After the library has restarted, if the screen displayed by your browser is not correct, click “Refresh”. Note If the IP address assigned by a DHCP server is being used, enter the current IP address in the “Address”... -
Page 75: Password
Password Set the following items. Library Enter whether or not to enable SCSI ID and SCSI parity of the AIT library. Drive Enter whether or not to enable SCSI ID and SCSI parity of Drive. Click “Submit”. When “Reboot now?” appears, click “OK”. The settings become effective when the library restarts. -
Page 76: Maintenance Menu
Maintenance Menu In the “Current Password” box, enter the current password. If you are setting the password for the first time, enter “LIB-81A”. In the “New Password” box, enter the new password up to eight alphanumeric characters and symbols (! @ # $ % ( ) - { } ~ "). In the next “Confirm New Password”... -
Page 77: Life Count
Life Count In “Life Count”, the number of times a specific part has been operated is displayed. In the Library Administration Menu, click “Maintenance”. You can also directly click “Life Count”, which is located above “Maintenance”. Enter the password, then click “OK”. Note Each access to the Maintenance Menu requires the password to be entered. -
Page 78: Error Count
Error Count The “Life Count” page appears. In the “Life Count” page, the numbers of times the following specific parts have been operated are displayed. • Slider • Picker • Turn Table • Shutter • Fan (During operation) • Drive •... -
Page 79: Sensor
Sensor The “Error Count” page appears. In the “Error Count” page, the number of times an operation was tried or an error occurred in the following specific parts are displayed. • Slider • Picker • Turn Table • Shutter • Fan •... - Page 80 The “Sensor” page appears. In the “Sensor” page, information about the following specific parts are displayed. Sensor • Turn Table Ref • Turn Table Index • Slider Ref • Slider Pos • Picker Open • Picker Close • Shutter Open •...
-
Page 81: History
History In “History”, the following logs can be viewed. • Mechanical log • SCSI log • Error log In the Library Administration Menu, click “Maintenance”, then click “History”. You can also directly click “History”, which is located above “Maintenance”. Note Each access to the Maintenance Menu requires the password to be entered. -
Page 82: Diagnostic
Diagnostic (Example) When the “Mechanical” page is selected • Click to display the next log, and • Click to return to the [History] page. In “Diagnostic”, you can check whether or not the AIT library is functioning normally. In the Library Administration Menu, click “Maintenance”, then click “Diagnostic”. -
Page 83: Firmware Upload
Firmware Upload The “Diagnostic” page appears. Click “Execute”. Starts diagnosing the library. When diagnosing is completed, the result of the diagnosis is displayed on “Result”. In “Firmware Upload”, the firmware of the AIT library can be uploaded. Please consult your dealer about uploading firmware. In the Library Administration Menu, click “Maintenance”, then click “Firmware Upload”. - Page 84 Each access to the “Maintenance” requires the password to be entered. For information about the password, refer to “Password” (page 75). When the following screen appears, enter “LIB81” for “User Name” and “SONY” for “Password”, then click “OK”. Note This screen appears only when you start you browser and access the Library Administration Menu.
- Page 85 The “Firmware Upload” page appears. In the “File Name” box, enter the file name (in full path) of the firmware. Also, you can click the “Browse” button to specify the file. Click “Upload”. A confirmation message appears. Click “OK”. Starts to upload the firmware. When the upload is finished, the AIT library restarts automatically.
-
Page 86: Information Menu
Information Menu Information When the AIT library has restarted, click “Refresh” in your browser, and then make sure that the Library Administration Menu appears normally. If the Library Administration Menu appears normally, the upload is complete. When the firmware upload is finished, it is recommended to restart the library. -
Page 87: Inventory
Inventory The “Information” page appears. In “Inventory”, the following information related to the cartridges is displayed: • The setting condition of the cartridges You can find out in which slot or AIT drive the cartridge is set. • Bar code information When the AIT library is equipped with a bar code reader, you can view the bar code information about the set cartridges by slots and AIT drives. - Page 88 The “Inventory” page appears. • For the slots and AIT drives that have cartridges, is displayed. • When the AIT library is not equipped with a bar code reader or a cartridge with no bar code information is set, nothing is displayed. •...
-
Page 89: If You Forget The Password
If You Forget the Password Changing the Air Filter 1 Appendix If you forget the password, you will not be able perform configurations and operations that require the password. If you forget the password, contact the Service and Support Center. •... - Page 90 Use something thin like a precision screw driver to press button on the side of the library. Button The end of the air filter is slightly ejected. Insert a fingernail into the side groove and remove the filter. Groove Insert the new air filter. Push it in until it clicks into place.
-
Page 91: Changing The Air Filter 2
Changing the Air Filter 2 • Depending on the shape of the front panel, the air filter and method for changing the air filter may differ. • Once a year, change the air filter of the AIT library. Contact your dealer if you wish to buy additional air filters. -
Page 92: Troubleshooting
Troubleshooting Before contacting a Sony Service center, please check the following items. If the problem persists, contact a Sony Service center. The AIT library does not work. • Verify that the power switch is turned on. • Verify that the power cable is connected correctly. -
Page 93: Transporting The Ait Library
• Verify that the erase-protection tab of the cartridge is set to writable. t “Preparing the Cartridge” (page 25) in Chapter 2, “Installation”. • Use only Sony’s AIT cartridges. Also check whether the AIT drive supports the cartridges. • If a cartridge has been used for a long time or very frequently, replace it with a new cartridge. -
Page 94: Hardware Specifications
• When packing, perform the unpacking procedure on “Unpacking” (page 13) in Chapter 2 in reverse. Be sure to fasten the transport screw. AIT Drive LIB-81/A5: SDX-1100 series (1) LIB-81/A4: SDX-900 series (1) LIB-81/A3X: SDX-800 series (1) LIB-81/A3: SDX-700 series (1) -
Page 95: Data Storage Capacity
Data Storage Capacity LIB-81/A3 models Cartridge Transfer rate AIT-3 12 MB/s AIT-2 12 MB/s AIT-1 8 MB/s LIB-81/A2 models Cartridge Transfer rate AIT-2 6 MB/s AIT-1 4 MB/s LIB-81/A1 models Cartridge Transfer rate AIT-1 4 MB/s (Transfer rates depend on the operating system of the server to which the library is connected.) -
Page 96: Optional Accessories (Sold Separately)
Optional Accessories (sold separately) SCSI Cable and Terminator Specifications SCSI Cable SCSI Cable Length SCSI Specifications When using 8 cartridges, without compression • AIT-5 246 m cartridge: 3200 GB of data • AIT-4 246 m cartridge: 1600 GB of data •... -
Page 97: About Scsi Components
About SCSI Components About SCSI Bus LVD SCSI Wide SCSI SCSI ID SCSI Bus Termination The SCSI system is composed of the following components. • Initiator This is the host computer system used to transfer commands. The system consists of the application software, the operating system, the device driver, the SCSI adapter card, etc. -
Page 98: Error Code List
Error Code List When an error occurs in the AIT library, an error code appears on the LCD panel. The following is a list of error codes that are displayed on the LCD panel. When an error code appears, contact your dealer. Changer Manager Errors Error code Description... - Page 99 Mechanical Manager Error (Byte2:Axis, Byte1:Class, Byte0:SubClass) (Continued) Error code Description 03050402 TableAxis The Position Sensor is not normal. (Origin was not detected.) 03050501 TableAxis Destination not reached. 03050601 TableAxis Fine tuning not possible. 03060101 ShutterAxis Timeout occurred during Close Sensor High Wait.
-
Page 100: Other Messages
Other Messages Warning Message Description Cleaning Request The AIT drive needs cleaning. Refer to “Cleaning the AIT Drive” (page 63). Cleaning Tape at EOM The spent cleaning cartridge is set. Replace the spent cleaning cartridge with a new one. Clean failure Cleaning failed. -
Page 101: Index
Index Accessories ... 96 Air filter changing ... 89, 91 AIT Drive ... 62 AIT-1 ... 12 AIT-2 ... 11 AIT-3 ... 11 AIT-3 Ex ... 11 AIT-4 ... 11 AIT-5 ... 11 Application software ... 12 Bar Code ... 44 Browser ... - Page 102 For information about the AIT library, refer to your reseller. Sony Corporation...