
Related Manuals for FujiFilm KLASSE W


Summary of Contents for FujiFilm KLASSE W
- Page 1 Preparation Basic Advance Read before using Owner’s Manual this camera. Mode Thank you for purchasing this product. Please follow the instructions given in this manual carefully.
-
Page 2: Features
Features The 28mm F2.8 and 38mm F2.8 SUPER-EBC FUJINON lens delivers high quality images. The program AE mode offers beginners easy photo taking while the aperture AE mode widens the range of expression. High-speed shutter up to 1/500 sec. with aperture setting of F2.8 enables various photos to be taken. -
Page 3: Table Of Contents
Contents Mode Features ......... Important Safety Notice . -
Page 4: Important Safety Notice
Important Safety Notice Do not use this product and accessories for any purposes other than photographing. This product is designed with safety in mind. Read the contents of this manual carefully and use the product properly. After reading, keep this manual always at hand for future reference. Warning Caution Indicates information which, if ignored, could cause... - Page 5 Warning Do not use the camera close to a flammable gas, gasoline, benzine, or thinner. It may cause explosion, fire or burns. Keep the camera out of the reach of infants. If not, infants may inadvertently wrap the strap around the neck, causing suffocation.
-
Page 6: Part Names
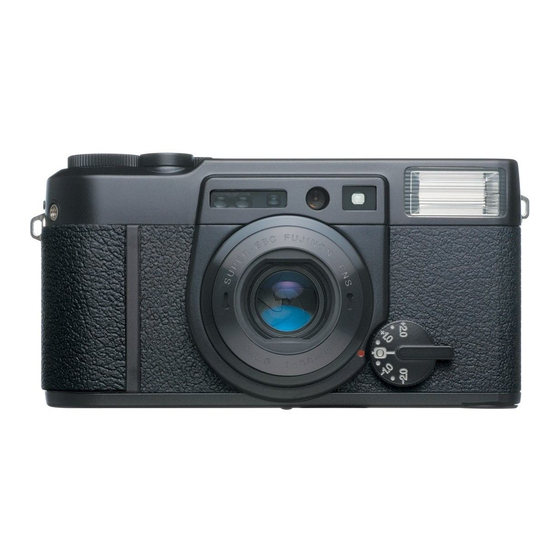
Part Names Details of each part are described in the page indicated. Mode button ( P .40 Mode dial ( P .41 Shutter button ( P .25 LCD light button ( P .15 Main dial Auxiliary AF light P .14, 22, 34 Flash ( P .26, 35, 44 AF Lock/OK button (... - Page 7 The image is KLASSE W. (date select) button ( P .16, 18 (date set) button ( P .16 Viewfinder eye-piece ( P .9, 24, 77 Mid-roll rewind button ( P .29 Film confirmation window ( P .20 Film compartment ( P .21...
- Page 8 Part Names Main Function of Each Part Operation Function Reference page Main dial Turning off the camera Program AE mode Aperture setting at the aperture AE mode Mode button Selecting a mode Mode dial Changeover of settings for each mode (Auto-focus/OK) button AF lock Finalizing the mode setting LCD light button...
- Page 9 Parallax correction guides Composing the picture within this mark when the distance to subject is around the range of approximately 0.3m to 0.7m in KLASSE W and 0.4m to 0.9m in KLASSE S. Manual Focus Displayed when the manual focus is selected.
- Page 10 Part Names Liquid Crystal Display (Appearance when all signs are displayed) AEB compensation amount Distance to the subject Date Bulb timer Reference Name Function page Film counter The number of shots is displayed. Aperture The aperture used in the program AE mode is displayed. When pressing the shutter button halfway Distance to the subject The distance to the subject is displayed.
- Page 11 Reference Name Function page Auto flash mode Automatically fires the flash when the background is dark. Flash-off Mode The flash does not fire. Fill-in flash Mode Fires the flash even when the background is blight. Red-eye reduction Pre-fires the flash just before a photo is taken to reduce the red- Flash flash mode eye effect.
-
Page 12: Preparation
Attach the strap to the strap lug. Approximately 400 photos can be taken with the lithium battery (under the test condition specified by Fujifilm). When using a commercially available strap, make sure When going to trip or taking many photos, carry a spare to check that the strength of the strap is suitable to battery in case of battery depletion. - Page 13 Rotate the battery cover toward “ ”, and Fit the red “ ” mark on the battery cover to remove it. “ ”. Load the battery in the correct direction Rotate the cover toward “ ” and lock the indicated by cover.
-
Page 14: Turning The Camera On
Turning the Camera ON Turning the Camera OFF Set the main dial to “ ” or an aperture value. Set the main dial to “ ”. The lens cover opens, and lens automatically The lens shifts back into the camera body, and the moves out to the front. -
Page 15: Checking The Battery
Checking the Battery Turning the LCD Light Button ON/OFF Ample charge in the battery The battery power is low. Prepare a new battery. The battery is depleted. The shutter button cannot be pressed. Blinking Replace the battery. Turn the camera on and check the battery status on When button is pressed, the backlight of the LCD. -
Page 16: Setting Date And Time
Setting Date and Time (Year-Month-Day /Hour-Minute) (Set it when loading or replacing the battery) Set “Year” Move to “Month” Move to “Hour” More than seconds Turn the camera on and press the Press the button to modify the blinking button for more than 2 seconds. number. - Page 17 Set “Month” Move to “Day” Set “Day” Set “Hour” Move to “Minute” Set “Minute” When “Minute” is set, press the button to complete the date setting. To set the time by the time signal, press the button when the time signal points at 0. To modify the date after the date setting is completed Press the button for more than 2 seconds.
-
Page 18: Selecting The Date Mode
Selecting the Date Mode Year Month Day Month Day Year Day Month Year Day Hour Minute Date not imprinted The date mode selected is imprinted on the lower When the button is pressed, the date mode right side of the photo. is changed in order shown in the figure above. -
Page 19: Loading A Film
Loading a Film Use 135 film with a DX coding mark on the film box and the cassette. Number of exposures DX mark Film speed Film speed (ISO) Number of rolls rating to be used 36EXP 24EXP 12EXP ISO 25 to 3200 36 exp. - Page 20 Loading a Film Check the film confirmation window to see Unlock the camera back lock. there is no film loaded. Open the camera back. Do not open the back when partly used film is loaded. To unload film, see P.28 of this manual. Do not apply unreasonable force to the camera back.
- Page 21 Insert a film. Check the number on the film counter. While holding the film cassette, pull the end of FILM TIP the film out to the mark, and place it on top of the spool. Close the camera back. The film advances to the first frame automatically. If the film cassette is not set properly, the camera back cannot be closed completely.
-
Page 22: Start Photographing
Start Photographing This section describes the method of full-auto photography which is activated by setting the main dial to “ ”. In the full-focus photography, you can take photos casually without setting any preference. The full-auto photography settings are, Exposure mode : Program AE mode Flash mode Auto flash mode... - Page 23 Go to in the next page. Distance to the subject KLASSE W : 0.3m to KLASSE S : 0.4m to Make sure that a finger or strap does not come in front of the lens, flash, AF window and AE light sensor.
- Page 24 Start Photographing <KLASSE W> <KLASSE S> Make sure that the subject is fully covering the entire area of the AF frame. KLASSE W:Approximately 0.3m to 0.7m Close-up Photography Distance to the subject KLASSE S :Approximately 0.4m to 0.9m <KLASSE W>...
- Page 25 You need to have distance of 0.3m or more when AF mode is not working. Use the AF lock feature using KLASSE W and 0.4m or more for KLASSE S to Focus mark to position the AF frame to an object whose bring the subject in the AF frame into focus.
- Page 26 AE mode). When using the flash with the program AE mode, keep your subject within the range of flash distances indicated in the following chart. Flash distance Film speed (ISO) KLASSE W KLASSE S ISO 50 0.3m to 2.3m 0.4m to 2.8m...
- Page 27 Subject not suitable for AF In some cases as described below, the camera may not be able to bring the subject into focus. In such a case, photograph the subject with the AF lock ( P.30, 32) or in the manual-focus mode ( P.52). When facing toward a bright light source such as sunlight or reflected light such as from a windshield or the sea When there is a reflective surface such as a mirror or metallic surface at the center of the frame When the background is brighter than the subject...
-
Page 28: Unloading A Film / Removing A Film In Mid-Roll
Unloading a Film / Removing a Film in Mid-Roll Unloading a film When the last frame is exposed, the camera Unlock the camera back lock. rewinds the film automatically. Open the camera back. When the entire roll is rewound, “ ” is showing on Unload the film. - Page 29 Removing a film in mid-roll Be careful with film loaded in the camera Do not open the camera back when partly used film is loaded. When the camera back is opened accidently when partly used film is loaded, close the back immediately without disturbing the film inside.
-
Page 30: Advance
Advance AF (Auto-Focus) Lock Photography <KLASSE W> <KLASSE S> In the compositions above, the subject (person Move the camera to bring the subject into the in the example above) is out of the AF frame. AF frame for focusing. Therefore, the camera cannot bring the... - Page 31 Focus mark With the focused composition, press the Move the camera back to the original shutter button halfway (AF Lock). composition while pressing the shutter button halfway (AF Lock). Make sure the focus mark in the viewfinder is lit. At this time, the exposure is also locked (AE Lock). Press the shutter button.
-
Page 32: Button
AF (Auto-Focus) Lock Photography Using Button Instead of pressing the shutter button halfway, the <KLASSE W> focusing position can be locked by pressing the button. <KLASSE S> Move the camera to bring the subject into the AF frame for focusing. - Page 33 More than second Distance to the subject Press the button for more than 1 second. Move the camera back to the original composition you wish to photograph. The focus position is locked. The sign “ ” blinks on the LCD, and the distance to the Press the shutter button.
-
Page 34: Aperture Ae Photography
Aperture AE Photography With the aperture AE mode, when the aperture is set, the camera automatically selects the shutter speed for correct exposure. The aperture settings and its effects are described below. Decreasing the numbers in the aperture scale Increasing the numbers in the aperture scale (opening up the aperture) (closing the aperture) E n a b l e s t o d e f o c u s t h e... - Page 35 The distance the flash reaches = Aperture value of focus. The range is called “depth of field.” Guide number Film speed (ISO) KLASSE W KLASSE S ISO 50 ISO 100 ISO 200 12.8 15.5...
- Page 36 Aperture AE Photography Shutter Focus mark speed Turn the main dial to set the aperture. Press the shutter button halfway, and make sure that the focus mark in the viewfinder is lit. Set the scale of the main dial to the point it clicks. If it is set in the middle of the scale, the exposure may See the charts on P.75 and 76 for details on the correlation become faulty.
- Page 37 Marks in the viewfinder When pressing the shutter button half way Slow blinking Fast blinking Flash The flash It is too bright and overexposed. The flash is charging. mark will fire. S e l e c t t h e f l a s h - o f f The shutter button cannot be mode (...
-
Page 38: Exposure Compensation
Exposure Compensation Exposure compensation means to purposefully change the exposure specified by the camera. It is used when the background is either too bright or too dark. + Compensation When taking a photo with an extremely The compensation brightens the entire bright background such as a lot of snow. - Page 39 Turn the exposure compensation dial to set Decide on the composition and press the an exposure compensation value. shutter button. “ ” is displayed on the LCD. Viewfinder ( When pressing the shutter button half way) “ ” is displayed. To cancel the exposure compensation, turn the exposure compensation dial to return the position to...
-
Page 40: Mode
Mode Selecting Modes With the mode button, various modes such as the flash mode, AEB, manual-focus, bulb mode, and self timer can be selected. Bulb mode Flash mode AEB mode Focus mode Self timer mode Film sensitivity mode Press the mode button. Each time the mode button is pressed, the setting changes in the order of Flash mode AEB mode Focus... - Page 41 (When selecting a flash mode) Night Portrait Auto flash mode (Slow synchro.) mode Flash-off mode Night (Slow synchro.) mode Red-eye Reduction mode Fill-in Flash mode Press the button to finalize the setting for each mode. You can proceed to select other modes. Turn the mode dial to display the settings for each mode.
- Page 42 Selecting Modes When the film sensitivity mode ( mode when the film is ISO800 or higher) is selected, the camera is ready to take photos with the selected mode. The selected mode settings are displayed on the LCD. When it is not operated for 5 seconds or more, the mode is automatically set and the camera becomes operable.
-
Page 43: List Of Modes
List of Modes Reference Name Function page Automatically fires the flash when the background is dark. P .45 Flash Auto flash mode mode The flash does not fire. P .46 Flash-off mode Fill-in Flash mode Fires the flash even when the background is bright. P .46 Red-eye Reduction mode Pre-fires the flash before photographing to reduce the red- P .47... -
Page 44: Selecting Flash Mode
Selecting Flash Mode This camera has six types of the flash modes. You can choose the flash mode suitable for each subject. Night Portrait Auto flash mode (Slow synchro.) mode Flash mode Flash-off mode Night (Slow synchro.) mode Fill-in Flash mode Red-eye Reduction mode Press the mode button and activate the flash Turn the mode dial to display the mode to be... - Page 45 The selected flash mode is retained even after photographing one shot. Mode The custom setting available The selected mode is, however, canceled when the power is turned off. P .70 Retaining/Canceling Auto flash mode Used for general photography. Press the button to finalize the setting.
- Page 46 Selecting Flash Mode Flash-off mode Fill-in Flash mode Used when photographing a subject under room Used when photographing a subject against lighting or outside of a flash range such as in a backlight such as a window or in shade like under theater or a stadium.
- Page 47 Red-Eye Reduction mode Night (Slow synchro.) mode Reduces the red-eye effect. Used in night scene photography. Pre-fires the flash four times before firing the flash for The fill-in flash mode at slow shutter speed. shooting. Night Portrait (Slow synchro.) mode About Red-Eye Effect Used when taking a portrait in a night scene.
-
Page 48: Aeb (Auto Exposure Bracketing) Photography
AEB (Auto Exposure Bracketing) Photography In the AEB (Auto Exposure Bracketing) mode, the camera takes the consecutive shots for each frame in combination of correct exposure and under or/and overexposure. It is effective when depicting subtle tones or when using reversal film. Available Setting Range ±0.5/±1.0 Takes three consecutive shots in order of correct exposure... - Page 49 The AEB mode is retained even after photographing one shot. Mode The mode is, however, canceled when the power is turned off. Retaining/Canceling +1.0 -1.0 None AEB mode Flash mode +0.5 ±0.5 ±1.0 -0.5 Press the mode button to display the AEB Turn the mode dial to display the AEB compensation amount.
- Page 50 AEB (Auto Exposure Bracketing) Photography Press the button to finalize the setting. When the film sensitivity mode ( mode when the film is ISO800 or higher) is selected, You can proceed to select other modes. the camera is ready to take photos with the selected mode.
- Page 51 The AEB mode is retained even after photographing one shot. Mode The mode is, however, canceled when the power is turned off. Retaining/Canceling To take consecutive shots Keep the shutter button pressed until all shots are taken. The shutter is released consecutively. To take each frame Press the shutter button for each frame.
-
Page 52: Manual-Focus Photography
Manual-Focus Photography The manual-focus mode is used when the subject cannot be focused in the AF mode or when fixing the distance to the subject. Flash mode AEB mode Focus mode Photographing after adjusting the distance to the subject (distance to the dog from the camera) Press the mode button to display “... - Page 53 The manual-focus mode is retained even after photographing one shot. Mode Retaining/Canceling The mode is, however, canceled when the power is turned off. 10.0 m 7.0 m 5.0 m KLASSE W KLASSE S 3.0 m 0.3 m 0.4 m 0.5/0.6/0.7/0.8/0.9m 0.4 m 2.0 m...
- Page 54 Manual-Focus Photography Press the button to finalize the setting. When the film sensitivity mode ( mode when the film is ISO800 or higher) is selected, You can proceed to select other modes. the camera is ready to take photos with the selected mode.
- Page 55 The manual-focus mode is retained even after photographing one shot. Mode Retaining/Canceling The mode is, however, canceled when the power is turned off. Decide on the composition and press the shutter button.
-
Page 56: Bulb Photography
Bulb Photography The bulb mode is used when photographing a night scene which needs a long exposure. Flash mode AEB mode Focus mode Bulb mode In this mode, the camera can keep the shutter open longer than for the normal exposure. - Page 57 Mode The bulb mode is canceled after each shot. Retaining/Canceling 30 sec. 60 sec. 15 sec. 8 sec. No set time 4 sec. 1 sec. 2 sec. Turn the mode dial to display the exposure time to be selected. The long exposure time can be selected from no set time or 1/2/4/8/15/30/60 seconds. When the bulb mode is selected, the flash mode is set to the flash-off mode automatically.
- Page 58 Bulb Photography Press the button to finalize the setting. When the film sensitivity mode ( mode when the film is ISO800 or higher) is selected, You can proceed to select other modes. the camera is ready to take photos with the selected mode.
- Page 59 Mode The bulb mode is canceled after each shot. Retaining/Canceling When the bulb time is not set. The camera keeps the shutter open while the shutter button is being pressed. When the bulb time is specified The camera opens the shutter for the time specified, Decide on the composition and press the and then closes it automatically.
-
Page 60: Self Timer Photography
Self Timer Photography This mode is used when including yourself in the photo or to avoid camera shake in certain scenes. Set the timer to 10 seconds, and position When taking a photo with the slow shutter yourself with the subject to be taken. s p e e d ( f o r e x a m p l e , i n n i g h t s c e n e p h o t o g r a p h y ), c a me r a s h a ke c a n b e avoided by setting the self timer to 2... - Page 61 Mode The custom setting available The self timer mode is canceled after each shot. P .70 Retaining/Canceling Flash mode AEB mode Focus mode Bulb mode 2 sec. 10 sec. Self timer mode Press the mode button to display “ ”. Turn the mode dial to display the time for the self timer.
- Page 62 Self Timer Photography Press the button to finalize the setting. When the film sensitivity mode ( mode when the film is ISO800 or higher) is selected, You can proceed to select other modes. the camera is ready to take photos with the selected mode.
- Page 63 Mode The custom setting available The self timer mode is canceled after each shot. P .70 Retaining/Canceling Decide on the composition and press the shutter button. The self timer lamp lights up and starts blinking. When the specified time is lapsed, the shutter is automatically released. The self timer mode can be used in the AF lock photography ( P.30 and 32).
-
Page 64: Film Sensitivity Setting
Film Sensitivity Setting The Film sensitivity setting is used to increase or decrease the film speed. Flash mode AEB mode Focus mode Bulb mode Self timer mode Film sensitivity Press the mode button to display “ ”. For example, the film speed increases if you select ISO400 in this mode while using a ISO100 film. - Page 65 ISO 2000/2500 ISO 1000/1250 ISO 500/640 ISO 1600 ISO 800 ISO 3200 ISO 400 AUTO ISO 250/320 ISO 200 ISO 25 ISO 100 ISO 50 ISO 125/160 ISO 32/40 ISO 64/80 Turn the mode dial to display the film speed to be selected. The film speed (ISO) can be set from the range of ISO25 to 3200.
- Page 66 Film Sensitivity Setting Press the button to finalize the setting. When the film sensitivity mode ( mode when the film is ISO800 or higher) is selected, You can proceed to select other modes. the camera is ready to take photos with the selected mode.
- Page 67 Mode Retaining/Canceling The film sensitivity setting is retained until resetting it. To reset the sensitivity to “AUTO”, select “ ”. If the camera is turned off while selecting the film speed, the film speed displayed on the LCD is blinking when the camera is turned on again.
-
Page 68: Mode Setting
Mode Setting mode emphasizes the capability of an ultra-high sensitivity film. When using a film of ISO800 or higher, with this mode, the camera detects the brightness of the subject, and matches the aperture (from 0 to +2EV) according to the brightness. In particular, this mode enables shooting a subject and background brighter even in night scenes, indoor scenes, or in the flash-off mode. - Page 69 The mode is retained until canceling it. Mode To cancel the mode, press the button while the dial is on “ OFF” Retaining/Canceling NP mode OFF NP mode ON Turn the mode dial to display Press the button W h e n t h e m o d e i s “...
-
Page 70: Custom Setting
Custom Setting The camera settings can be customized personally. Custom Setting The settings described in bold are the factory default settings. Operation Retention/canceling of The selected mode T h e s e l e c t e d mode is canceled. the flash mode when the is retained. - Page 71 Retention/canceling of the selected flash mode when the camera is turned off. Canceled when the power is Retained after the power is turned off turned off Retention/canceling of the self timer mode Canceled at each shooting Retained after shooting When rewinding a film, leaving the end of film out of film cassette / rolling the end into the cassette Rolling the end of film inside...
- Page 72 Custom Setting Press the button to finalize the setting. When the mode is selected, the camera is ready to take photos. You can proceed to select other modes. When it is not operated for 5 seconds or more, the mode is automatically set and the camera becomes operable.
-
Page 73: Connecting A Cable Release
Connecting a Cable Release A commercially available cable release can be connected to this camera. After turning the camera off, Turn the screw of the cable release clockwise until it stops. Insert the cable release into the release socket. When using a cable release, the AE metering by pressing the shutter button halfway cannot be performed. -
Page 74: Reference Data
Reference Data Program Line Chart When photographing in the flash mode or in low brightness conditions as well as when the shutter speed is slower than 1/45 sec., the camera fires the At the Program AE [ ] mode flash regardless of the film sensitivity of the film in use. 4"... - Page 75 Exposure Control Line Chart When photographing in the flash mode or in low brightness conditions At the aperture AE mode as well as when the shutter speed is slower than 1/45 sec., the camera fires the flash regardless of the film speed of the film in use. 16"...
- Page 76 Reference Data Depth of field chart ● KLASSE W 0.3 m 0.4 m 0.7 m 1.0 m 1.5 m 2.0 m 3.0 m 5.0 m 7.0 m 10.0 m F2.8 0.29 ∼0.31 0.38 ∼0.42 0.65 ∼0.76 0.90 ∼1.12 1.30 ∼1.79 1.65 ∼ 2.55 2.27 ∼4.42 3.26 ∼10.8 4.00 ∼28.0 4.83 ∼...
-
Page 77: Displays In Viewfinder And Lcd
The distance to the subject is too close. You need to have a distance of 0.3m or more when using Distance to the KLASSE W and 0.4m or more for KLASSE S to fit the subject subject into the AF frame. -
Page 78: Troubleshooting
Troubleshooting Troubleshooting for operation Phenomenon Possible causes Countermeasure Reference page P .15 Unable to release “ ” on the LCD is blinking. Replace the battery. P .14 the shutter Camera is turned off. Turn the main dial to turn the camera P .21 “... - Page 79 The subject is too close to the Make a distance of 0.3m or more when ( I n t h e a u t o - lens. using KLASSE W and 0.4m or more for focus mode, the KLASSE S. P .30, 32,...
- Page 80 Troubleshooting Troubleshooting for printing Phenomenon Possible causes Countermeasure Reference page P .23 The print is blurred. The AF window was blocked Do not block the AF window. Hold the during shooting. camera properly. P .24, 30, The subject was not focused Use the AF frame, or the AF lock to correctly.
- Page 81 Phenomenon Possible causes Countermeasure Reference page P .23 The print is dark. When taking a photo with flash, Do not block the flash unit with your the flash unit is blocked by finger. finger. P .46 The photo was taken against Take a photo with the mode.
-
Page 82: Common Sense Camera Care
Common Sense Camera Care The camera is a precision instrument. To handle the Moisten a cleaning paper with a lens cleaner, camera properly, take the following measures. and wipe the lens gently starting from the center outward. 1. Cleaning the camera After wiping off dirt on the lens, wipe off traces Do not use solvent such as thinner or alcohol to of the lens cleaner with dry cleaning paper... - Page 83 4. Battery Inspect repellent containing naphthalene is The performance of the battery deteriorates in a harmful to both the camera and film. Do not store low temperature. The performance recovers the camera in a drawer with inspect repellent. when the temperature returns to normal. Use a new battery when photographing under a low 7.
-
Page 84: Main Specifications
Main Specifications KLASSE W KLASSE S Model 35mm Lens Shutter Camera Screen size 24mm×36mm Film 36EXP 24EXP 12EXP 135 film Rolls 36 exp. 24 exp. 12 exp. Exposure lens SUPER-EBC FUJINON lens 6 elements/5 groups 4 elements/3 groups f = 28 mm f = 38 mm 1:2.8... - Page 85 KLASSE W KLASSE S Film sensitivity DX Auto Set ISO25 − 3200 (1/3 step increments) Manual setting available Film loading Automatic Automatically sets the first frame When a film is not loaded correctly, “ ” blinks on the shutter lock and LCD.
-
Page 86: After-Sales Service
Fujifilm film cameras mentioned in the last page of this manual disassembled or repaired by personnel other than one in the repair inquiry center for Fujifilm or the Fujifilm service station near you. film cameras or the Fujifilm service station. - Page 87 3. If the part to be repaired is not specified by that repair parts are no longer available. For the customer, Fujifilm inspects all parts of this details, contact the repair inquiry center for product and repairs the all parts determined Fujifilm film cameras or the Fujifilm service station.
- Page 88 ※Closed: Saturday, Sunday, National holidays, Summer holiday, during the year-end through New Year holidays and May 1st. Fujifilm Website http://fujifilm.jp ※To understand the inquiry accurately, Fujifilm may record the telephone conversation. ※The personal information acquired from the inquiry may be used when requesting a questionnaire about the inquiry at a later date.