Philips MCM277 Service Manual
Hide thumbs
Also See for MCM277:
- Specifications (3 pages) ,
- User manual (29 pages) ,
- Quick start manual (4 pages)
Table of Contents
Advertisement
Quick Links
See also:
User Manual
Micro System
Service
Service
Service
Service
Service
Service Manual
From week 0913 onwards, ALI solution(decode IC) has been adopted
to replace ROHM solution(decode IC), accordingly new Main Board &
Display/MCU Board & AC Power Board, etc. were used to match with
new solution.
.
Please refer chapter 1 to 9 for sets produced before week 0913 and
chapter 10 & chapter 15 for changed contents for sets produced in or
after week 0913.
Ali solution starting S/N: EF2A0913000001.
©
Copyright 2010 Philips Consumer Electronics B.V. Eindhoven, The Netherlands
All rights reserved. No part of this publication may be reproduced, stored in a retrieval system or
transmitted, in any form or by any means, electronic, mechanical, photocopying, or otherwise
without the prior permission of Philips.
Published by SL1020 Service Audio
Version 1.6
Printed in The Netherlands
Subject to modification
MCM277
/05/12/98
COMPACT
DIGITAL AUDIO
CLASS 1
LASER PRODUCT
GB
3141 785 32376
Advertisement
Table of Contents

Related Manuals for Philips MCM277


Summary of Contents for Philips MCM277
- Page 1 LASER PRODUCT © Copyright 2010 Philips Consumer Electronics B.V. Eindhoven, The Netherlands All rights reserved. No part of this publication may be reproduced, stored in a retrieval system or transmitted, in any form or by any means, electronic, mechanical, photocopying, or otherwise without the prior permission of Philips.
- Page 2 VERSION VARIATIONS Type /Versions: MCM277 Service policy Board in used: MAIN BOARD CD/MCU BOARD HEADPHONE JACK BOARD DISPLAY BOARD AC POWER BOARD KEY BOARD TUNER BOARD Type /Versions: MCM277 Features Feature diffrence in used: Line Out Video Out Surround Out...
-
Page 3: Specifications
SPECIFICATIONS GENERAL: Mains voltage : 127/240V -15%+10% Switchable for /98 Dynamic Bass Boost (DBB) : ON / OFF 120V ± 10% for /37 Input sensitivity 230V ± 10% for /05/12 Aux in (at 1kHz) : 500mV at 600 Ω Mains frequency : 50/60Hz USB : Host Clock accuracy... -
Page 4: Measurement Setup
MEASUREMENT SETUP Tuner FM Bandpass LF Voltmeter 250Hz-15kHz e.g. PM2534 e.g. 7122 707 48001 RF Generator e.g. PM5326 S/N and distortion meter e.g. Sound Technology ST1700B Use a bandpass filter to eliminate hum (50Hz, 100Hz) and disturbance from the pilottone (19kHz, 38kHz). Tuner AM (MW,LW ) Bandpass LF Voltmeter... - Page 5 SERVICE AIDS WARNING All ICs and many other semi-conductors are susceptible to electrostatic discharges (ESD). Careless handling during repair can reduce life drastically. When repairing, make sure that you are connected with the same potential as the mass of the set via a wrist wrap with resistance. Keep components and tools also at this potential.
- Page 6 INSTRUCTIONS ON CD PLAYABILITY Customer complaint "CD related problem" Set remains closed! check playability playability ok ? For flap loaders (= access to CD drive possible) "fast" lens cleaning cleaning method is recommended check playability playability ok ? Play a CD for at least 10 minutes check playability playability...
- Page 7 INSTRUCTIONS ON CD PLAYABILITY PLAYABILITY CHECK LIQUID LENS CLEANING Before touching the lens it is advised to clean the surface of the lens by blowing clean air over it. For sets which are compatible with CD-RW discs This to avoid that little particles make scratches on use CD-RW Printed Audio Disc ....7104 099 96611 the lens.
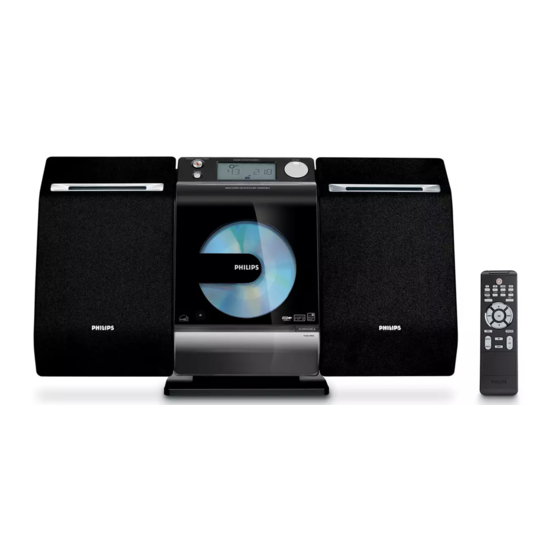
- Page 8 PREPARATIONS AND CONTROLS...
- Page 9 PREPARATIONS AND CONTROLS...
- Page 10 1-10 CONTROLS & INSTALLATIONS...
- Page 11 1-11 CONTROLS & INSTALLATIONS...
- Page 12 1-12 TROUBLESHOOTING English...
- Page 13 DISMANTLING INSTRUCTIONS Dismantling the Rear Portion and PCBs Dismantling the Rear Portion and PCBs 1) Press the 2 juts and pull out the Stand as shown in figure 5) Loosen 2 screws E to remove the Bracket Jack Board as shown in Figure 4.
-
Page 14: Figure
Dismantling of the CD Module & CD Door Carrier Service pos A 1) Loosen 5 screws J mounting the Key Board to the Front Cabinet to remove the Key Board as shown in figure 8. 2) Loosen 4 screws H and 3 screws G to CD Module as shown in figure 8. - Page 15 SERVICE TEST PROGRAM * Door switch is ignored → CD door can be opened. To enter Service Testprogram hold PLAY & Door Open/Close buttons depressed while plugging mainscord in. Display shows the MCU version V refers to Version "MCU-Vyy" yy refers to Software version number of the uProcessor (Main menu) (counting up from 01 to 99) DISPLAY...
- Page 16 SET BLOCK DIAGRAM BR24L02F-WE2 IC104 IC701 IC801 E01J 468D IC601 IC103 UR11 IC401 DAYANG M93BGP-BF CF91D IC100 IC501 AP34063A IC300 IC102 IC301 BR24L02F-WE2 IC504 W27C512-45Z IC302...
- Page 17 SET WIRING DIAGRAM...
- Page 18 BLOCK DIAGRAM - RDS/RBDS PRE-PROCESSOR SAA6588T BLOCK DIAGRAM MAIN BOARD TABLE OF CONTENTS Internal IC Diagram ..........6-1 to 6-5 Main Board(5757) Layout Top View ........ 6-6 Main Board(5757) Layout Bottom View ......6-7 Circuit Diagram - Main Board(5757) ....... 6-8 Main Board(5762) Layout Top View ........
- Page 19 PIN DESCRIPTION - RDS/RBDS PRE-PROCESSOR BLOCK DIAGRAM - POWER AMPLIFIER SAA6588T TDA1517 BLOCK DIAGRAM PINNING SYMBOL DESCRIPTION SYMBOL DESCRIPTION PSWN pause s ve LOW) MPTH slav non-inverting mute switch TCON AFIN input 1 OSCO 5 V) 0 V) OSCI output 1 digital g 0 V) multiple...
-
Page 20: Table Of Contents
PIN DESCRIPTION - POWER AMPLIFIER BLOCK DIAGRAM - SELF TUNED RADIO TDA1517 TEA5757 PINNING BLOCK DIAGRAM supply voltage c t i handbook, halfpage INV1 SGND SVRR OUT1 PGND TDA1517 OUT2 M/SS INV2 MLC352 Pin configuration for SOT110-1 and SOT352-1. - Page 21 PIN DESCRIPTION - SELF TUNED RADIO PIN DESCRIPTION - SELF TUNED RADIO TEA5757 TEA5757 PINNING t i c l a i t i c l e l l e l l l i l e l l l i supply voltage e l l l l i l i p...
- Page 22 BLOCK DIAGRAM - SELF TUNED RADIO PIN DESCRIPTION - SELF TUNED RADIO TEA5762 (FOR /12/05) TEA5762 (FOR /12/05) PINNING t i c l e l l l i supply voltage e l l l l i l i p AFC negative output AFC positive output supply voltage for tuning digital supply voltage...
- Page 23 LAYOUT DIAGRAM - MAIN BOARD (5757) for /37/98 TOP SIDE...
- Page 24 LAYOUT DIAGRAM - MAIN BOARD (5757) for /37/98 BOTTOM SIDE...
- Page 25 CIRCUIT DIAGRAM - MAIN BOARD (5757) for /37/98...
- Page 26 LAYOUT DIAGRAM - MAIN BOARD (5762) for /05/12 TOP SIDE...
- Page 27 6-10 6-10 LAYOUT DIAGRAM - MAIN BOARD (5762) for /05/12 BOTTOM SIDE...
- Page 28 6-11 6-11 CIRCUIT DIAGRAM - MAIN BOARD (5762) for /05/12...
-
Page 29: Hp Jack Board
6-12 6-12 LAYOUT DIAGRAM - HP JACK BOARD LAYOUT DIAGRAM - HP JACK BOARD TOP SIDE BOTTOM SIDE CIRCUIT DIAGRAM - HP JACK BOARD... - Page 30 6-13 6-13 Q631 9940 000 02642 TRANSISTOR, 3CA8550 Q803 9940 000 04218 TRANS PHP20N06T 4236 RF401 9940 000 04237 FM MODULE FE450-G11. 4236 T401 9940 000 04518 AM IFT 7MM C712KC-004 T402 9940 000 04518 AM IFT 7MM C712KC-004 T403 9940 000 01213 AM IFT 7MM T404...
-
Page 31: Electrical Parts List
CD & MCU BOARD This board isn’t intend to repair. Only for orientation. TABLE OF CONTENTS Main Board Layout Top View ........... 7-2 Main Board Layout Bottom View ........7-3 Circuit Diagram - CD Part ..........7-4 Circuit Diagram - MCU Part ..........7-5 Layout Diagram - SW Board ........... - Page 32 LAYOUT DIAGRAM - CD&MCU BOARD TOP VIEW...
- Page 33 LAYOUT DIAGRAM - CD&MCU BOARD BOTTOM VIEW...
- Page 34 CIRCUIT DIAGRAM - CD&MCU BOARD CD PORTION...
- Page 35 CIRCUIT DIAGRAM - CD&MCU BOARD MCU PORTION...
- Page 36 LAYOUT DIAGRAM - SW BOARD ELECTRICAL PARTS LIST - CD & MCU BOARD ( FOR CDM _ DAYANG M93 ) TOP SIDE D128 994000004422 SCHOTTKY, PMEG2010 D165 994000004422 SCHOTTKY, PMEG2010 D302 996510000271 DIODE RLS4148 LL-34 D303 994000004285 ZENER DIODE UDZS6.8B UMD2 D304 994000004285 ZENER DIODE UDZS6.8B UMD2...
- Page 37 IC BLOCK DIAGRAM - LCD DRIVER HT1622 Block Diagram AC POWER & DISPLAY & KEY BOARD PIN DESCRIPTION - LCD DRIVER HT1622 Pad Description TABLE OF CONTENTS Chip selection input with Pull-high resistor. When the CS is logic high, the data and command read from or written to the HT1622 Internal IC Diagram ............
-
Page 38: Out1
LAYOUT DIAGRAM - AC POWER BOARD LAYOUT DIAGRAM - AC POWER BOARD BOTTOM SIDE TOP SIDE... - Page 39 CIRCUIT DIAGRAM - AC POWER BOARD...
-
Page 40: Out2
LAYOUT DIAGRAM - AC SOCKET BOARD LAYOUT DIAGRAM - RC BOARD TOP SIDE TOP SIDE LAYOUT DIAGRAM - AC SOCKET BOARD LAYOUT DIAGRAM - RC BOARD BOTTOM SIDE BOTTOM SIDE LAYOUT DIAGRAM - DOOR MOTOR BOARD LAYOUT DIAGRAM - DOOR MOTOR BOARD TOP SIDE BOTTOM SIDE CIRCUIT DIAGRAM - RC BOARD... -
Page 41: M/Ss
LAYOUT DIAGRAM - DISPLAY BOARD CIRCUIT DIAGRAM - DISPLAY BOARD TOP SIDE LAYOUT DIAGRAM - DISPLAY BOARD BOTTOM SIDE... - Page 42 LAYOUT DIAGRAM - KEY BOARD CIRCUIT DIAGRAM - KEY BOARD TOP SIDE LAYOUT DIAGRAM - KEY BOARD BOTTOM SIDE...
- Page 43 LAYOUT DIAGRAM - SP & ANT BOARD CIRCUIT DIAGRAM - SP & ANT BOARD TOP SIDE LAYOUT DIAGRAM - SP & ANT BOARD BOTTOM SIDE...
- Page 44 SET MECHANICAL EXPLODED VIEW & ¡ ™ £ ‡ § • ª º › · ‹...
- Page 45 996510010720 CABINET REAR FOR /12/05 996510012870 CABINET REAR /98 19-21 996520032987 STAND PORTION OF MCM277 9940 000 04323 CD DAMPER (BLACK) 20DEG 996510010437 CD MECHANISM M93BGP-BF 9940 000 01664 DAMPER GEAR ASSEMBLY 9940 000 03384 SPRING TORSION LEFT 994000004304...
- Page 46 & SP & ANT & DISPLAY & KEY & RC & AC SOCKET & DOOR MOTOR BOARD VR701 9940 000 04258 ROTARY ENCODER 9940 000 04251 EC TERMINAL 1P F901 9940 000 04243 FUSE PTU 1A 250V 3.9X10.5MM /37/98 RL901 9940 000 04246 RELAY DC6V AC10A /05/12/37 T901...
-
Page 47: Electrical Parts List
ELECTRICAL PARTS LIST CF401 994000004236 FM CERAMIC FILTER 10M7 IC402 994000004234 VAR. CAP DIODE HN-1V02H CF402 994000004236 FM CERAMIC FILTER 10M7 IC501 996510006486 IC MN101CF91D MCU TQFP048 D100 996510010718 DIODE BZX79-C4V3 IC504 994000005674 IC BR24L02F-WE2 D128 994000004422 SCHOTTKY, PMEG2010 EA IC601 996500041701 IC TDA7468D SOUND SO28... - Page 48 ELECTRICAL PARTS LIST Q303 996510000939 TRANSISTOR BC807-25 PNP X300 994000004284 XTAL 14.318MHZ +/-20PPM 20PF Q501 996510006954 CH-TRANSISTOR,BC817-25 X401 994000004231 X'TAL 75KHZ +/-20PPM DT381 TRANSISTOR MPS8050S Q502 994000004267 X501 994000005671 XTAL 32.768KHZ +/-20PPM 12PF Q503 996510006954 CH-TRANSISTOR,BC817-25 X502 994000004266 X'TAL 4.194304MHZ 30PF Q504 996510006954 CH-TRANSISTOR,BC817-25...
- Page 49 10-1 10-1 SOFTWARE VERSION CHECKING How to check Software Version on set Front Panel Check software version: (1)Plug in the set; (2)Hold "PROGRAM" and "DBB" buttons together when set on "ECO Power" mode (LED light is on); (3)The LCD will display the software version as " Mxxx xxx" To clear all program station of tuner mode: (1)Plug in the set;...
- Page 50 11 - 1 11 - 1 SET BLOCK DIAGRAM...
- Page 51 11 - 2 11 - 2 SET WIRING DIAGRAM...
- Page 52 12-1 12-1 PCB LAYOUT - MAIN BOARD (TOP VIEW)
- Page 53 12-2 12-2 PCB LAYOUT - MAIN BOARD (BOTTOM VIEW)
- Page 54 12-3 12-3 CIRCUIT DIAGRAM - MAIN BOARD...
- Page 55 13-1 13-1 PCB LAYOUT - CD & CD DOOR MOTOR & LIMIT SWITCH BOARD (TOP VIEW)
- Page 56 13-2 13-2 PCB LAYOUT - CD & CD DOOR MOTOR & LIMIT SWITCH BOARD (BOTTOM VIEW) - ONLY FOR REFERENCE...
- Page 57 13-3 13-3 CIRCUIT DIAGRAM - CD & LIMIT SW BOARD ONLY FOR REFERENCE...
- Page 58 14-1 14-1 PCB LAYOUT - AC POWER & HP JACK & SP & ANT JACK & RC BOARD (TOP VIEW)
- Page 59 14-2 14-2 PCB LAYOUT - AC POWER & HP JACK & SP & ANT JACK & RC BOARD (BOTTOM VIEW)
- Page 60 14-3 14-3 PCB LAYOUT - KEY BOARD (TOP VIEW) PCB LAYOUT - KEY BOARD (BOTTOM VIEW)
- Page 61 14-4 14-4 CIRCUIT DIAGRAM - KEY BOARD & AC POWER BOARD...
- Page 62 14-5 14-5 CIRCUIT DIAGRAM - HP JACK & SP & ANT & RC BOARD...
- Page 63 15-1 15-1 SET MECHANICAL EXPLODED VIEW...
- Page 64 FMANT 996510000308 FM ANT WIRE 75R L1.0M MAIN PCB ASSY 996510028568 REMOTE CONTROL SPKBOX 996510019466 SPK BOX FOR MCM277/12 IN PAIR AUDIO PROCESSOR PORTION CD/USB PCB ASSY (ONLY FOR REFERENCE) AMANT 996510026334 AM ANT ASSEMBLY OF MCM277 AD02 996510026339 DIODE MMBD4148W...
- Page 65 15 - 3 15 - 3 (FOR ALI SOLUTION) ELECTRICAL PARTS LIST ELECTRICAL PARTS LIST ELECTRICAL PARTS LIST Loc. 12NC Description Loc. 12NC Description Loc. 12NC Description MAIN PCB ASSY MAIN PCB ASSY KEY PCB ASSY KEY PCB ASSY AC POWER ASSY AC POWER ASSY F602 996510026357...
- Page 66 16-1 REVISION LIST 1.0 Manual 3141 785 32370 Initial Service Manual released. 1.1 Manual 3141 785 32371 In this version, version /05 added. 1) P9-1 Mechanical and Accessories Partslist updated. 1.2 Manual 3141 785 32372 In this version, version /98 added. 1) P9-2 Mechanical and Accessories Partslist updated.