JVC KD-G401 Instructions Manual
Cd receiver
Hide thumbs
Also See for KD-G401:
- Service manual (53 pages) ,
- Installation & connection manual (4 pages) ,
- Manual (155 pages)
Table of Contents
Advertisement
Quick Links
CD RECEIVER
CD-RECEIVER
RECEPTEUR CD
CD-RECEIVER
KD-G402/KD-G401
• This unit is equipped with the display demonstration. To cancel it, see page 6.
• Dieses Gerät ist mit einer Demonstrationsfunktion für das Display ausgestattet. Auf
Seite 6 wird beschrieben, wie Sie diese Demonstrationsfunktion deaktivieren können.
• Cet appareil est équipé d'une fonction de démonstration des affichages. Pour l'annuler,
référez-vous à la page 6.
• Dit toestel heeft een display-demonstratiefunctie. Zie bladzijde 6 voor het annuleren van
deze functie.
For installation and connections, refer to the separate manual.
Für den Einbau und die Anschlüsse siehe das eigenständige Handbuch.
Pour l'installation et les raccordements, se référer au manuel séparé.
Bijzonderheden over de installatie en aansluiting van het apparaat vindt u in de
desbetreffende handleiding.
INSTRUCTIONS
BEDIENUNGSANLEITUNG
MANUEL D'INSTRUCTIONS
GEBRUIKSAANWIJZING
GET0195-001B
[E/EX]
Advertisement
Table of Contents

Related Manuals for JVC KD-G401


Summary of Contents for JVC KD-G401
- Page 1 CD RECEIVER CD-RECEIVER RECEPTEUR CD CD-RECEIVER KD-G402/KD-G401 • This unit is equipped with the display demonstration. To cancel it, see page 6. • Dieses Gerät ist mit einer Demonstrationsfunktion für das Display ausgestattet. Auf Seite 6 wird beschrieben, wie Sie diese Demonstrationsfunktion deaktivieren können. •...
-
Page 2: How To Reset Your Unit
IMPORTANT FOR LASER PRODUCTS 1. CLASS 1 LASER PRODUCT 2. CAUTION: Do not open the top cover. There are no user serviceable parts inside the unit; leave all servicing to qualified service personnel. 3. CAUTION: Visible and invisible laser radiation when open and interlock failed or defeated. Avoid direct exposure to beam. -
Page 3: Table Of Contents
Thank you for purchasing a JVC product. Please read all instructions carefully before operation, to ensure your complete understanding and to obtain the best possible performance from the unit. CONTENTS MP3 INTRODUCTION ...... 23 How to reset your unit ....... -
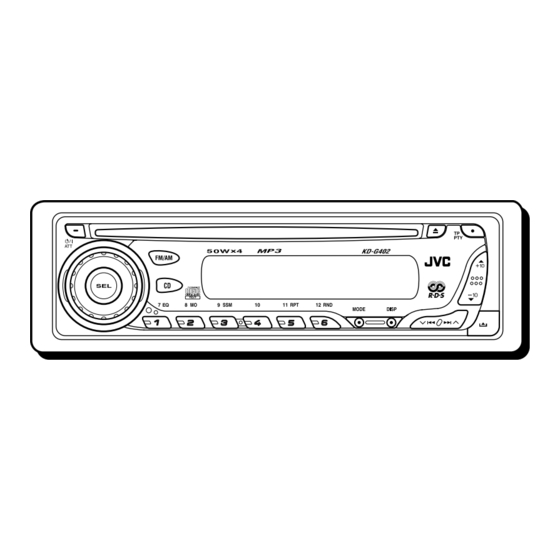
Page 4: Location Of The Buttons
LOCATION OF THE BUTTONS Control panel Display window s ∞ (down) button (standby/on attenuator) button 2 SEL (select) button –10 button 3 FM/AM button 4 CD button Display window 5 Loading slot d Tuner reception indicators 6 Display window MO (monaural), ST (stereo) 7 0 (eject) button f RDS indicators 8 TP PTY (traffic programme/programme type) -
Page 5: Basic Operations
BASIC OPERATIONS Turning on the power Adjust the sound as you want. (See pages 28 and 29.) Turn on the power. To drop the volume in a moment Press briefly while listening to any source. “ATT” starts flashing on the display, and Note on One-Touch Operation: the volume level will drop in a moment. -
Page 6: Canceling The Display Demonstration
Canceling the display Select “DEMO OFF.” demonstration When shipped from the factory, display DEMO OFF DEMO ON demonstration has been activated, and starts automatically when no operations are done for about 20 seconds. • It is recommended to cancel the display demonstration before you use the unit for the first time. -
Page 7: Setting The Clock
Setting the clock Finish the setting. You can also set the clock system to either 24 hours or 12 hours. Press and hold SEL (select) for more than 2 seconds so that one of the To check the current clock time or change the PSM items appears on the display. -
Page 8: Radio Operations
RADIO OPERATIONS Listening to the radio Start searching for a station. To search for stations of You can use either automatic searching or manual higher frequencies searching to tune in to a particular station. Searching for a station automatically: To search for stations of lower frequencies Auto search When a station is received, searching stops. - Page 9 Searching for a station manually: When an FM stereo broadcast is hard to receive Manual search Press MODE to enter the functions mode while listening Select the band (FM1 – 3, AM). to an FM stereo broadcast. Each time you press the button, the band changes as Press MO (monaural), while follows:...
-
Page 10: Storing Stations In Memory
Storing stations in memory Local FM stations with the strongest signals are searched and stored automatically in the band number you have selected (FM1, FM2, or FM3). You can use one of the following two methods to These stations are preset in the number store broadcasting stations in memory. -
Page 11: Tuning In To A Preset Station
Tuning in to a preset station Press and hold the number button (in this example, 1) for more than You can easily tune in to a preset station. 2 seconds. Remember that you must store stations first. If you have not stored them yet, see “Storing stations in memory”... -
Page 12: Rds Operations
RDS OPERATIONS What you can do with RDS To use Network-Tracking Reception You can select the different modes of network- RDS (Radio Data System) allows FM stations to tracking reception to continue listening to the send an additional signal along with their regular same programme in its finest reception. -
Page 13: Using Ta Standby Reception
Using TA Standby Reception Press and hold SEL (select) for more than 2 seconds so that one of the TA Standby Reception allows the unit to switch PSM items appears on the display. temporarily to Traffic Announcement (TA) from (PSM: see page 31.) the current source (another FM station or CD). - Page 14 Using PTY Standby Reception Finish the setting. PTY Standby Reception allows the unit to switch temporarily to your favorite programme (PTY: Programme Type) from the current source (another FM station or CD). • PTY Standby Reception will not work if you are 7 When the current source is FM, the PTY listening to an AM station.
- Page 15 Searching your favorite programme Press and hold the number button for more than 2 seconds to store the You can search any one of the PTY codes. PTY code selected into the preset In addition, you can store your 6 favorite programme types in the number buttons.
- Page 16 To search for your favorite programme type Press ¢ 4 to start PTY search for your favorite programme. Press and hold TP PTY for more than 2 seconds while listening to an FM station. • If there is a station broadcasting a programme The last selected PTY code appears.
-
Page 17: Other Convenient Rds Functions And Adjustments
Other convenient RDS Setting the TA volume level functions and adjustments You can preset the volume level for TA Standby Reception. When a traffic programme is received, the volume level automatically changes to the Automatic selection of the station preset level. when using the number buttons •... - Page 18 PTY codes NEWS: News SOCIAL: Programmes on social AFFAIRS: Topical programmes expanding activities on current news or affairs RELIGION: Programmes dealing with any INFO: Programmes which impart aspect of belief or faith, or the advice on a wide variety of topics nature of existence or ethics SPORT: Sport events...
-
Page 19: Cd Operations
CD OPERATIONS Notes: Refer “MP3 OPERATIONS” on pages 24 to 27 for operating MP3 discs. • When a CD is inserted upside down, “EJECT” appears on the display and the CD automatically Playing a CD ejects. • If there is no CD in the loading slot, you cannot select CD as the source. -
Page 20: Locating A Track Or A Particular Portion On A Cd
Locating a track or a To go to a track quickly (+10 and –10 buttons) particular portion on a CD Press MODE to enter the functions mode while playing a CD. To fast-forward or reverse the track Press and hold ¢ , while playing a CD, to fast-forward the track. -
Page 21: Selecting Cd Playback Modes
Selecting CD playback modes To play back tracks repeatedly (Track Repeat Play) To play back tracks at random You can play back the current track repeatedly. (Disc Random Play) Press MODE to enter the functions mode while playing a You can play back all tracks on the CD at random. Press MODE to enter the functions mode while playing a Press RPT (repeat), while... -
Page 22: Playing A Cd Text
Playing a CD Text Prohibiting disc ejection In a CD Text, some information about the disc (its You can prohibit disc ejection and can lock a disc in the loading slot. disc title, performer, and track title) is recorded. This CD Text information will be shown While pressing CD, press and hold 0 for automatically when you play a CD Text. -
Page 23: Mp3 Introduction
MP3 INTRODUCTION What is MP3? How are MP3 files recorded and played back? MP3 is an abbreviation of Motion Picture Experts Group (or MPEG) Audio Layer 3. MP3 is simply a MP3 “files (tracks)” can be recorded in “folders” file format with a data compression ratio of 1:10 —in PC terminology. -
Page 24: Mp3 Operations
MP3 OPERATIONS Notes: Refer also to “CD OPERATIONS” on pages 19 to 22. • MP3 discs require a longer readout time. (It differs due to the complexity of the folder/file Playing an MP3 disc configuration.) • When playback starts, folder and file names (or ID3 tags) will automatically appear. -
Page 25: Locating A File Or A Particular Portion On A Disc
To change the display information Notes: • The display shows up to 8 characters at a time and While playing back an MP3 file, you can change scrolls if there are more than 8 characters. the disc information shown on the display. See also “To select the scroll mode—SCROLL”... - Page 26 To go to a particular file quickly within the To go to a particular folder directly current folder (+10 and –10 buttons) IMPORTANT: Press MODE to enter the functions mode To directly select the folders using the number while playing a disc. button(s), it is required that folders are assigned 2 digit numbers at the beginning of their folder names.
-
Page 27: Selecting Mp3 Playback Modes
To skip to the next or previous folder Active Mode Plays at random indicator Press 5 (up) while playing an FLDR RND RND and All files of the MP3 disc to skip to the next indicators current folder, then folder. light up. -
Page 28: Sound Adjustments
SOUND ADJUSTMENTS Selecting preset sound modes Indication pattern changes for each sound mode except for “USER.” (C-EQ: custom equalizer) You can select a preset sound mode (C-EQ: custom equalizer) suitable to the music genre. Ex.: When you select “ROCK” • There is a time limit in doing the following procedure. -
Page 29: Adjusting The Sound
Adjusting the sound When you adjust the bass, treble, or loudness, the adjustment you have made is stored for the currently selected sound mode (C-EQ) including You can adjust the sound characteristics to your “USER.” preference. If you are using a two-speaker system, set the fader level to “00.”... -
Page 30: Other Main Functions
OTHER MAIN FUNCTIONS Changing the general settings Repeat steps 2 and 3 to adjust the (PSM) other PSM items if necessary. Finish the setting. You can change the items listed in the table on page 31 by using the PSM (Preferred Setting Mode) control. - Page 31 Preferred Setting Mode (PSM) items • For detailed operations of each PSM items, refer to the pages listed in the table. Factory-preset See Indications Selectable values/items settings page DEMO Display demonstration DEMO OFF DEMO ON DEMO ON CLOCK H Hour adjustment 0 —...
- Page 32 To select the dimmer mode—DIMMER To turn the tag display on or off —TAG DISP You can dim the display at night (according to your preference). An MP3 file can contain file information called When shipped from the factory, dimmer is “ID3 Tag”...
-
Page 33: Detaching The Control Panel
Detaching the control panel Attaching the control panel Insert the left side of the control You can detach the control panel when leaving panel into the groove on the panel the car. holder. When detaching or attaching the control panel, be careful not to damage the connectors on the back of the control panel and on the panel holder. -
Page 34: Using The Remote Controller
USING THE REMOTE CONTROLLER This unit can be remotely controlled as instructed . Return the battery holder. here (with an optionally purchased remote Insert again the battery holder by pushing it controller). We recommend that you use remote until you hear a clicking sound. controller RM-RK50 or RM-RK60 with your unit. -
Page 35: Location Of The Buttons
Location of the buttons 3 • Selects the preset stations while listening to the radio. Each time you press the button, the preset station number increases, and the selected RM-RK60 station is tuned in. • Skips to the first file of the previous folder while listening to an MP3 disc. -
Page 36: Troubleshooting
TROUBLESHOOTING What appears to be trouble is not always serious. Check the following points before calling a service center. Symptoms Causes Remedies • Sound cannot be heard The volume level is set to the Adjust it to the optimum level. from the speakers. - Page 37 Symptoms Causes Remedies • Disc cannot be played No MP3 files are recorded on Change the disc. back. the disc. MP3 files do not have the Add the extension code extension code <.mp3> in their <.mp3> to their file names. file names.
-
Page 38: Maintenance
MAINTENANCE Handling discs When playing a CD-R or CD-RW Before playing back CD-Rs or CD-RWs, read This unit has been designed to reproduce CDs, their instructions or cautions carefully. CD-Rs (Recordable), CD-RWs (Rewritable), and • Use only “finalized” CD-Rs or CD-RWs. CD Texts. -
Page 39: Specifications
SPECIFICATIONS AUDIO AMPLIFIER SECTION CD PLAYER SECTION Maximum Power Output: Type: Compact disc player Front: 50 W per channel Signal Detection System: Non-contact optical Rear: 50 W per channel pickup (semiconductor laser) Continuous Power Output (RMS): Number of channels: 2 channels (stereo) 19 W per channel into 4 Ω, 40 Hz Front: Frequency Response: 5 Hz to 20 000 Hz...