Poly Savi 8240 Office User Manual
Hide thumbs
Also See for Savi 8240 Office:
- Quick start manual ,
- User manual (25 pages) ,
- User manual (20 pages)
Table of Contents
Advertisement
Advertisement
Table of Contents

Related Manuals for Poly Savi 8240 Office


Summary of Contents for Poly Savi 8240 Office
- Page 1 PLANTRONICS + POLYCOM. NOW TOGETHER AS Savi 8240/8245 Office User Guide...
-
Page 2: Table Of Contents
Contents DECT Information DECT Enhanced Security Overview Base and Headset Basics Accessories Hook up system Desk phone setup details Position Your Base Fit and charge Customize Your Headset Charge your headset and spare battery Talk time Headset battery status Pair Auto connect feature Load software Adjust headset microphone volume (softphone) -
Page 3: Dect Information
DECT Information DECT products should never be used outside the region in which they were originally purchased and intended to be used. The enclosed DECT 6.0 wireless product uses restricted wireless radio frequencies which vary by country. DECT 6.0 devices are generally authorized for use in the US/Canada/Mexico. Use of this DECT 6.0 product in unauthorized countries is a violation of law, may disrupt telecommunications networks and devices, and can subject you to fines and penalties by regulatory agencies. -
Page 4: Overview
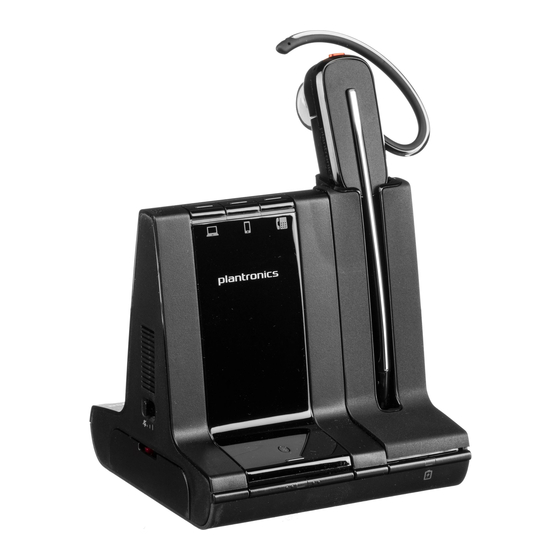
Overview Base and Headset Basics Base 8 9 10 11 12 Power jack Computer button Handset Iifter jack Mobile phone button Telephone interface cable jack Desk phone button USB port Bluetooth pairing button/LED Desk phone speaking volume Subscription button/LED Desk phone configuration switch Charging LED Desk phone listening volume Headset... -
Page 5: Hook Up System
Hook up system Using the diagram, connect your headset system. HEADSET PORT NO HEADSET PORT NOTE Base configuration settings Desk phone Setting (on base's side panel) Most phones Cisco phones Cisco phones with EHS cable Desk phone setup details Choose a desk phone setup A, B, C or D and connect cables. - Page 6 • Connect one end of the telephone interface cable to the back of the base • Connect the other end of the telephone interface cable into the dedicated headset port on the desk phone IMPORTANT Cisco phones use configuration on the bottom of the base. Most other phones use default configuration A.
-
Page 7: Position Your Base
IMPORTANT Cisco phones use configuration on the bottom of the base. Most other phones use default configuration A. Position Your Base The minimum recommended separation between your desk phone and the base is 6 inches. The minimum recommended separation between the base and computer is 12 inches. Incorrect position can cause noise and interference problems. -
Page 8: Fit And Charge
Fit and charge Customize Your Headset After you install the headset battery, choose one of the three headset wearing styles, over-the-ear, over-the-head or behind-the-head. Use the fit kit to assemble it and optimize the position of the microphone. Install the Headset Battery Position the battery as shown on the headset and slide into position until the battery snaps into place. - Page 9 To correctly position your headset, see Position Your Headset. Left Over-the-Ear Assembly Choose the size of earloop that fits most comfortably. Align the earloop as shown and insert it onto the headset. Rotate the earloop up 90°. 90º NOTE Ensure the earloop is flat against the headset before rotating. Choose the size and style of eartip that fits most comfortably.
- Page 10 Rotate the headset up. The headband can be worn on the right or left side. To optimize the position of the headset, push the headset in so the microphone is close to your mouth. Behind-the-Head Assembly Align the headband as shown. Ensure the headband sits flat against the headset, then rotate it up 90°.
- Page 11 NOTE Ensure the large end of the eartip points to the microphone. To position your headset correctly, first slide the stem of the headband so the headset fits comfortably. With a finger on the headset indicator light, push in until the microphone rests as close to your cheek as possible without touching.
-
Page 12: Charge Your Headset And Spare Battery
Charge your headset and Charge your headset spare battery Place the headset in the charge cradle. The base charging LED flashes green when charging the headset and turns solid green when the headset is fully charged. Charge for at least 20 minutes prior to the first use. -
Page 13: Pair
To pair your base and mobile phone, press and hold the Bluetooth pairing button on the base for 4 seconds until the Bluetooth LED flashes red and blue. Go to Bluetooth settings on your mobile phone and select PLT Savi/Poly Savi. Once successfully paired, the Bluetooth LED on the base turns solid blue. -
Page 14: Load Software
Load software IMPORTANT Some softphones require the installation of Plantronics Hub for Windows/Mac to enable headset call control (answer/end and mute) functionality. Download Plantronics Hub for Windows/Mac by visiting plantronics.com/software. Manage your headset settings on your computer with Plantronics Hub: •... - Page 15 Plantronics Hub Feature Advanced Anti-startle Noise exposure...
-
Page 16: The Basics
The basics Headset Controls Now that you’ve assembled your headset, installed the software and connected your phones, read this section to learn about the headset features, how to use the controls and more. Mute button During a call, press to mute and unmute Volume down Toggle the volume lower Volume up/Conference/Subscription... -
Page 17: Audio Streaming
To transfer a mobile call from your headset to your mobile phone, press the base mobile phone button for 3 seconds. The green LED turns off. To transfer a mobile call from your mobile phone to your headset, press the base mobile phone once. -
Page 18: More Features
More Features Base Subscription Button The headset and base that came in the box are subscribed (connected) to each other. However, if you wish to use a new headset or need to restore subscription to your current headset (base subscription button is red), the units can be subscribed to each other by the following methods. The subscription button is below the Bluetooth button on the front of the base. - Page 19 NOTE If the base subscription LED goes solid red, after flashing red/green, the subscription attempt has failed and should be repeated. End Subscription If the base is in subscription mode and you want to stop the base from searching for a headset, press the subscription button again.
-
Page 20: Troubleshooting
Troubleshooting Headset My headset is unstable. When you wear the headset, the microphone should rest as close to your cheek as possible without touching. The microphone can be adjusted inward by the pivoting earpiece to optimize the position of the headset. See Position Your Headset. -
Page 21: Desk Phone
People I talk to can hear a buzz in Move the base further away from your phone. See Position Your the background. Base. If the base power supply is plugged into a power strip, plug it into the wall directly. Desk Phone The handset lifter is installed but Be sure the handset lifter power cord is firmly pushed into the... - Page 22 • Go to Start > Control Panel > Sounds and Audio Devices > Audio > Sound Playback and change the default setting from your Savi headset to your PC speakers. Click “OK” to confirm your change. For Windows Vista and Windows 7 systems •...
-
Page 23: Support
Netherlands © 2020 Plantronics, Inc. All rights reserved. Poly and the propeller design are trademarks of Plantronics, Inc. The Bluetooth word mark and logos are registered trademarks owned by Bluetooth, SIG, Inc. and any use of such marks by Plantronics, Inc. is under license. All other trademarks are the property of their respective owners.