Table of Contents
Advertisement
Quick Links
このサービスマニュアルはエコパルプ
(ECF:無塩素系漂白パルプ)を使用しています。
PA
011843
200612-34650
SERVICE MANUAL
I CONTENTS (目次)
SPECIFICATIONS (総合仕様) ..................................................................... 3
DIMENSIONS (寸法図).............................................................................. 4
PANEL LAYOUT (パネルレイアウト) ......................................................... 5
CIRCUIT BOARD LAYOUT (ユニットレイアウト).................................... 6
DISASSEMBLY PROCEDURES (分解手順) ............................................... 7
CIRCUIT BOARDS (シート基板図) ........................................................... 11
INSPECTIONS (検査) ............................................................................... 13
BLOCK DIAGRAM (ブロックダイアグラム) ............................................ 15
CIRCUIT DIAGRAM (回路図) ................................................................... 16
Copyright (c) Yamaha Corporation. All rights reserved.
HAMAMATSU, JAPAN
06.11
Advertisement
Table of Contents

Related Manuals for Yamaha MSP Series


Summary of Contents for Yamaha MSP Series
-
Page 1: Table Of Contents
DISASSEMBLY PROCEDURES (分解手順) ..........7 CIRCUIT BOARDS (シート基板図) ............11 INSPECTIONS (検査) ................13 BLOCK DIAGRAM (ブロックダイアグラム) ..........15 このサービスマニュアルはエコパルプ (ECF:無塩素系漂白パルプ)を使用しています。 CIRCUIT DIAGRAM (回路図) ..............16 PARTS LIST 011843 200612-34650 HAMAMATSU, JAPAN Copyright (c) Yamaha Corporation. All rights reserved. 06.11... - Page 2 IMPORTANT NOTICE This manual has been provided for the use of authorized Yamaha Retailers and their service personnel. It has been assumed that basic service procedures inherent to the industry, and more specifically Yamaha Products, are already known and understood by the users, and have therefore not been restated.
-
Page 3: Specifications (総合仕様
MSP5 STUDIO SPECIFICATIONS (総合仕様) 総合仕様 General Specifications Type ........Biamp 2-way Powered speaker 形式 ....バイ・アンプ2 ウェイ パワード・スピーカー Crossover Frequency ..........2.5 kHz クロスオーバー周波数 ..........2.5 kHz LF:24 dB/oct、HF:24 dB/oct LF: 24 dB/oct, HF: 24 dB/oct 再生周波数帯域 ........ 50 Hz∼40 kHz ( -10 dB) Overall Frequency Response .. -
Page 4: Dimensions (寸法図
MSP5 STUDIO DIMENSIONS (寸法図) 179 (7-1/16") 110* * Non-skid pad positions. (ゴム脚貼付位置) 2-M5 (For mounting bracket (ブラケット用) ) Unit: mm 単位:mm... -
Page 5: Panel Layout (パネルレイアウト
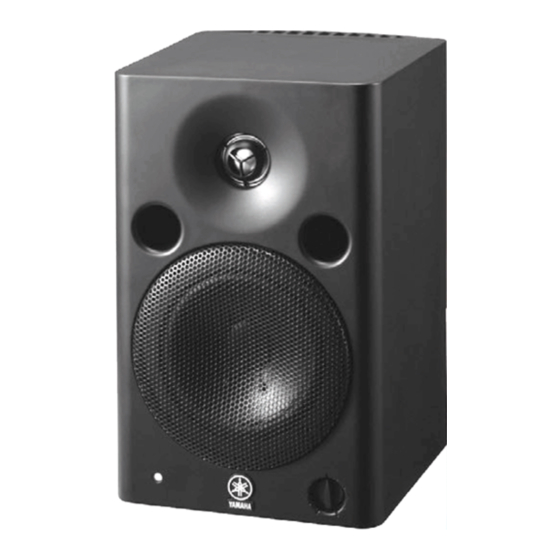
MSP5 STUDIO PANEL LAYOUT (パネルレイアウト) • Front Panel • Rear Panel (リアパネル) (フロントパネル) POWER indicator POWERインジケーター LEVEL control LEVELコントロール POWERスイッチ POWER switch AC IN connector AC IN端子 LOW TRIMスイッチ LOW TRIM switch HIGH TRIM switch HIGH TRIMスイッチ INPUT端子 INPUT 1/2 connector... -
Page 6: Circuit Board Layout (ユニットレイアウト
MSP5 STUDIO CIRCUIT BOARD LAYOUT (ユニットレイアウト) Tweeter Power (ツイータ) Transformer (電源トランス) Woofer (ウーファー) INPUT VOLUME... -
Page 7: Disassembly Procedures (分解手順
MSP5 STUDIO DISASSEMBLY PROCEDURE (分解手順) ウーファー (所要時間:約1分) Woofer (Time required: About 1 minute) Remove the metal grille. (Fig. 1) メタルグリルを外します。 (図 1) Remove the four (4) hexagonal socket screws marked [200] の6角穴付ネジ4本を外し、ウーファーを外しま [200]. The woofer can then be removed. (Fig. 1) す。... - Page 8 MSP5 STUDIO Power Transformer 電源トランス (所要時間:約3分) (Time required: About 3 minutes) リアパネルAss’ yを外します。 (2項参照) [B] のネジ3本、 [C] のネジを外し、電源トランスを外 Remove the rear panel assembly. (See procedure 2) します。 (図 4) Remove the three (3) screws marked [B] and screw marked [C]. The power transformer can then be removed. (Fig.
- Page 9 MSP5 STUDIO INPUT Circuit Board: INPUTシート: 5-5-1 Remove the four (4) screws marked [220A]. The bracket 5-5-1 [220A] のネジ4本を外し、シールド金具を外します。 shield can then be removed. (Fig. 7) (図 7) 5-5-2 Remove the three (3) screws marked [220B], the nut 5-5-2 [220B] のネジ3本、 [230] の6角ナットおよび [240] の marked [230], and the washer marked [240].
- Page 10 MSP5 STUDIO Heat Sink (Time required: about 6 minute) ヒートシンク (所要時間:約6分) Remove the rear panel assembly. (See procedure 2) リアパネルAss’ yを外します。 (2項参照) Remove the power transformer and the bracket trans. 電源トランスとトランス金具を外します。 (See procedure 5-2, 5-3) (5-2、5-3項参照) Remove the AMP circuit board. (See procedure 5-4) AMPシートを外します。...
-
Page 11: Circuit Boards (シート基板図
MSP5 STUDIO CIRCUIT BOARDS (シート基板図) • AMP Circuit Board to INPUT CN106A TWEETER WOOFER Component side (部品側) • INPUT Circuit Board INPUT HIGH TRIM LOW TRIM (-6~+4dBu) (-20~-10dBu) AC INLET to Power Transformer to VOLUME CN108 to Power SW Component side (部品側)... - Page 12 MSP5 STUDIO • VOLUME Circuit Board • LED Circuit Board to INPUT CN103 to AMP CN201 VOLUME Component side (部品側) Component side (部品側)...
-
Page 13: Inspections (検査
MSP5 STUDIO INSPECTIONS (検査) Measuring Voltage [測定電圧] AC100 V, 50/60 Hz (J) AC120 V, 60 Hz (U, C, T) AC240 V, 50 Hz (A) AC230 V, 50 Hz (B) AC230 V, 50 Hz (H) AC220 V, 60 Hz (K) AC230 V, 50 Hz (O) LF 4 Ω... - Page 14 MSP5 STUDIO 2. Muting operation (Muting動作) Turn ON or OFF the power switch and check the relay パワースイッチをON/OFFにした時のリレーの動作時間 operation time and the pop noise obtained at SP terminal と、SP端子間に現れるポップノイズはLF、HF共に下表の is within the range specified in the following table. 範囲であることを確認します。 Relay operation time Noise output voltage (...
-
Page 15: Block Diagram (ブロックダイアグラム
MSP5 STUDIO BLOCK DIAGRAM (ブロックダイアグラム) VOLUME +15V D51,52 -15V VR101 LEVEL – DRIVE GREEN Q52-54 IC205-2/2 IC205-1/2 CN108 (3P) CN103 (3P) +15V POWER AMP INPUT +Vcc JK101 +15V -15V -15V +15V TWEETER – TRIM IC201-1/2 IC202 – -1/2 – -15V –... -
Page 16: Circuit Diagram (回路図
MSP5 STUDIO CIRCUIT DIAGRAM (回路図) WOOFFER TWEETR 4Ω 6Ω OP AMP OP AMP Jumper INPUT VOLUME POWER AMP OP AMP OP AMP OP AMP J, U, T : 1.6 A H, B, A, K, O : 630 mA VH 3P POWER TRANSFOMER VH 4P REGULATOR +15V... -
Page 17: Parts List
MSP5 STUDIO PARTS LIST I CONTENTS (目次) OVERALL ASSEMBLY (総組立) ............2 ELECTRICAL PARTS (電気部品) ............4 Notes: DESTINATION ABBREVIATIONS Australian model South African model British model Chinese model Canadian model South-east Asia model German model Taiwan model European model U.S.A. - Page 18 MSP5 STUDIO OVERALL ASSEMBLY (総組立) JK102 JK101 Apply bond hear (接着剤) Non-skid pad(ゴム脚) Accessories of VOLUME (VOLUME付属品)...
- Page 19 MSP5 STUDIO PART NO. DESCRIPTION 部 品 名 REMARKS REF NO. RANK OVERALL ASSEMBLY 総 組 立 MSP5 STUDIO Overall Assembly MSP5 STUDIO J 総 組 立 Overall Assembly MSP5 STUDIO U 総 組 立 Overall Assembly MSP5 STUDIO H 総...
- Page 20 MSP5 STUDIO ELECTRICAL PARTS (電気部品) PART NO. DESCRIPTION 部 品 名 REMARKS REF NO. RANK ELECTRICAL PARTS 電 気 部 品 MSP5 STUDIO WJ269200 Circuit Board AMP (MAIN 1/5,3/5) A M P シ ー ト (WJ26900,WJ26970) (6482A-30_1/5,3/5) WJ269300 Circuit Board INPUT (MAIN 5/5) I...