Sign In
Upload
Manuals
Brands
Viessmann Manuals
Heat Pump
AWT 221.B16
Viessmann AWT 221.B16 Manuals
Manuals and User Guides for Viessmann AWT 221.B16. We have
2
Viessmann AWT 221.B16 manuals available for free PDF download: Installation And Service Instructions For Contractors, Installation And Service Instructions Manual
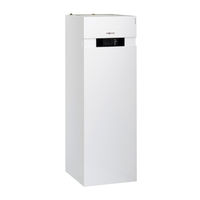
Viessmann AWT 221.B16 Installation And Service Instructions For Contractors (140 pages)
Compact heat pumps, split version for heating and cooling operation
Brand:
Viessmann
| Category:
Heat Pump
| Size: 17.49 MB
Table of Contents
Index Index
4
Table of Contents
4
Information Disposal of Packaging
6
Symbols
6
Intended Use
6
Product Information
7
Preparing for Installation Requirements for On-Site Connections
8
Recommended Power Cables
9
Installation Sequence Installing the Outdoor Unit
11
Installation Information
11
Installation Site
12
Minimum Clearances
12
Transport and Siting
13
Floorstanding Installation
14
Wall Mounting
14
Installing the Indoor Unit
14
Transport
14
Installation Room Requirements
15
Minimum Clearances
16
Removing the Cylinder Module
17
Assembly and Sealing Faces to Note
21
Connecting the Refrigerant Lines
23
Routing the Refrigerant Lines
23
Sound and Vibration Isolation When Line Entry Is above Ground Level
24
Connection to Outdoor Unit
25
Connection to Indoor Unit
26
Connecting the Secondary Circuit
29
Connecting the DHW Side
31
Safety Valve
31
Type AWT-AC Only: Connecting the Cooling Circuit
31
Electrical Connection
32
Indoor Unit: Routing Cables to the Wiring Chamber
33
Indoor Unit: Overview of Connections
34
Indoor Unit: Main PCB (230 V~ Components)
35
Indoor Unit: Expansion PCB on Main PCB (230 V~ Components)
37
Indoor Unit: Luster Terminals (Signal and Safety Connections)
37
Indoor Unit: Controller and Sensor PCB (LV Connections)
38
Indoor Unit: AVI PCB
39
Outdoor Unit: Overview of Connections
40
Connecting Indoor and Outdoor Units
41
Power Supply
41
Heat Pump Control Unit Power Supply 230 V
42
Outdoor Unit Power Supply 230 V~/400 V
42
Connecting Instantaneous Heating Water Heater Power Supply
44
Power Supply with Power-OFF: Without On-Site Load Disconnect
44
Power Supply with Power-OFF: with On-Site Load Disconnect
45
Mains Power Supply in Conjunction with On-Site Power Consumption
47
Smart Grid
47
Closing the Heat Pump
48
Fitting the Side Cover for the Outdoor Unit
48
Commissioning, Inspection, Maintenance Steps - Commissioning, Inspection and Maintenance
49
Commissioning, Inspec-Steps - Commissioning, Inspection and Maintenance
49
Opening the Heat Pump
50
Compiling Reports
50
Purging the Refrigerant Lines and Indoor Unit
50
Checking the Refrigerant Lines for Leaks
50
Evacuating the Refrigerant Lines and Indoor Unit
51
Charging the Refrigerant Lines and Indoor Unit
52
Checking the Refrigerant Circuit for Tightness
53
Filling and Venting the Secondary Side
53
Checking the Expansion Vessel and Heating Circuit Pressure
55
Cleaning the DHW Cylinder
55
Measuring the Anode Earth Current with an Anode Tester
56
Checking the Magnesium Anode
56
Replacing the Magnesium Anode
56
Checking the Indoor Unit Electrical Connections for Firm Seating
57
Checking the Fan in the Outdoor Unit Can Run Freely
57
Cleaning the Outdoor Unit Heat Exchanger (Evaporator)
57
Checking the Thermal Insulation of Flared Connections
58
Starting the Heat Pump
58
Commissioning the System
59
Ticking the Heat Pump Type
65
Switching on the Power Supply
58
Checking Electrical Connections of the Outdoor Unit for Firm Seating
58
Closing the Heat Pump
58
Checking the Heat Pump for Noise
65
Checking the System Function
65
Instructing the System User
66
Maintenance Overview of Electrical Components
67
Opening Programming Unit
67
Overview of Internal Components: Indoor Unit
69
DHW Cylinder Drain & Fill Valve Positions
70
Overview of Internal Components: Outdoor Unit
70
Outdoor Unit 4 Kw, Type AWT/AWT-AC 221.A04
71
Outdoor Unit 5 to 7 Kw, Type AWT/AWT-AC 221.A05/A07
72
Outdoor Unit 10 to 16 Kw, Type AWT/AWT-AC 221.A10/A13, 221.B10 to B16
73
Draining Secondary Side Heat Pump
73
Checking the Sensors
74
Indoor Unit: Viessmann NTC 10 K Ω
74
(Marked Blue)
74
Indoor Unit: Viessmann Pt500A (Green ID Label)
75
Outdoor Unit: NTC 10 K Ω
75
(Without ID)
75
Outdoor Unit: NTC 50 K Ω
76
Checking the Fuses
76
(Without ID)
76
Overview of Assemblies, Indoor Unit
78
Indoor Unit Parts Not Shown
79
Indoor Unit Casing
80
Indoor Unit Electrical Equipment
82
Indoor Unit Hydraulics
84
Indoor Unit Cylinder
88
Ordering Parts
91
Outdoor Unit Parts 230 V~, Type AWT/AWT-AC 221.A04
92
Ordering Parts
95
Outdoor Unit Parts 230 V~, Type AWT/AWT-AC 221.A05/A07
96
Overview of Assemblies 230 V~, Type AWT/AWT-AC 221.A10/A13
99
Outdoor Unit Casing 230 V~, Type AWT/AWT-AC 221.A10/A13
100
Outdoor Unit Electrical Equipment 230 V~, Type AWT
102
Awt-Ac 221.A10/A13
102
Outdoor Unit Hydraulics 230 V~, Type AWT/AWT-AC 221.A10/A13
104
Overview of Assemblies 400 V~, Type AWT/AWT-AC 221.B10/B13/B16
107
B10/B13/B16
107
Outdoor Unit Casing 400 V~, Type AWT/AWT-AC 221.B10/B13/B16
108
Outdoor Unit Electrical Equipment 400 V~, Type AWT/AWT-AC 221.B10/B13/B16
110
B10/B13/B16
110
Outdoor Unit Hydraulics 400 V~, Type AWT/AWT-AC 221.B10/B13/B16
112
Hydraulic Parameter Report
114
Control Parameter Report
115
Commissioning Order
129
13. Appendix Final Decommissioning and Disposal
129
Declaration of Conformity
130
Advertisement
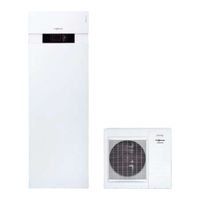
Viessmann AWT 221.B16 Installation And Service Instructions Manual (136 pages)
Compact heat pumps, split version for heating mode. Compact heat pumps, split version for heating and cooling operation
Brand:
Viessmann
| Category:
Heat Pump
| Size: 16.5 MB
Table of Contents
Index Index
3
Table of Contents
3
Symbols
5
Intended Use
5
Product Information
6
Recommended Power Cables
9
Installation Sequence Installing the External Unit
10
Installation Information
10
Installation Site
11
Minimum Clearances
11
Transport and Installation
12
Floorstanding Installation
13
Wall Mounting
13
Installing the Internal Unit
13
Transport
13
Installation Room Requirements
14
Minimum Clearances
15
Removing the Cylinder Module
16
Assembly and Sealing Faces to Bear in Mind
21
Routing Refrigerant Lines
22
Connecting Refrigerant Lines
22
Sound and Vibration Isolation When Line Entry Is above Ground Level
23
Connection to the External Unit
24
Connection to the Internal Unit
25
Connecting the Secondary Circuit
28
Connecting the DHW Side
30
Safety Valve
30
Connecting the Solar Circuit
30
Connecting a Cooling Circuit if Required
30
Electrical Connection
31
Internal Unit: Routing the Cables to the Wiring Chamber
32
Internal Unit: Overview of Connections
33
Internal Unit: Main PCB (230 V~ Components)
34
Internal Unit: Expansion PCB on Main PCB (230 V~ Components)
36
Internal Unit: Luster Terminals (Signal and Safety Connections)
36
Internal Unit: Controller and Sensor PCB (LV Connections)
37
Internal Unit: AVI PCB
39
External Unit: Overview of Connections
40
Connecting Internal and External Units
40
Power Supply
41
Heat Pump Control Unit Power Supply 230 V
42
External Unit Power Supply 230 V~/400 V
42
Connecting Instantaneous Heating Water Heater Power Supply
43
Power Supply with Power-OFF: Without On-Site Load Disconnect
44
Power Supply with Power-OFF: with On-Site Load Disconnect
44
Mains Power Supply in Conjunction with On-Site Power Consumption
46
Smart Grid
46
Closing the Heat Pump
47
Fitting Side Cover for External Unit
47
Commissioning, Inspection, Maintenance Steps - Commissioning, Inspection and Maintenance
48
Checking Tightness of the Refrigerant Lines
49
Compiling Reports
49
Opening the Heat Pump
49
Purging the Refrigerant Lines and the Internal Unit
49
Evacuating the Refrigerant Lines and Internal Unit
50
Charging the Refrigerant Lines and Internal Unit
51
Checking the Refrigerant Circuit for Tightness
52
Filling and Venting the Secondary Side
52
Filling and Venting the Solar Circuit
53
Checking Expansion Vessel and Heating Circuit Pressure
54
Cleaning the DHW Cylinder
54
Checking Electrical Connections of the Internal Unit for Firm Seating
55
Checking the Free Running of the Fan in the External Unit
55
Checking the Magnesium Anode
55
Measuring the Anode Earth Current with an Anode Tester
55
Replacing the Magnesium Anode
55
Checking Electrical Connections of the External Unit for Firm Seating
56
Checking Thermal Insulation of Flared Connections
56
Cleaning the External Unit Heat Exchanger (Evaporator)
56
Closing the Heat Pump
56
Switch on the Power
56
Commissioning the System
57
Starting the Heat Pump
57
Checking the Heat Pump for Noise
63
Ticking the Heat Pump Type
63
Checking the System Function
64
Instructing the System User
64
Opening Programming Unit
65
Overview of Internal Components: Internal Unit
67
DHW Cylinder Drain & Fill Valve Positions
68
Advertisement
Related Products
Viessmann AWT 221.A04
Viessmann AWT 221.A05
Viessmann AWT 221.A07
Viessmann AWT 221.A10
Viessmann AWT 221.A13
Viessmann AWT 221.B10
Viessmann AWT 221.B13
Viessmann AWT 241.A13
Viessmann AWT 241.B13
Viessmann AWT 241.B16
Viessmann Categories
Boiler
Toy
Control Unit
Heat Pump
Solar panel
More Viessmann Manuals
Login
Sign In
OR
Sign in with Facebook
Sign in with Google
Upload manual
Upload from disk
Upload from URL