Sign In
Upload
Manuals
Brands
Singer Manuals
Sewing Machine
XL-1000
Singer XL-1000 Manuals
Manuals and User Guides for Singer XL-1000. We have
3
Singer XL-1000 manuals available for free PDF download: Instruction Manual, Training Manual, List Of Parts
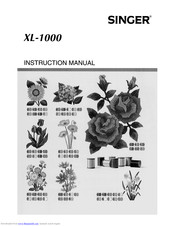
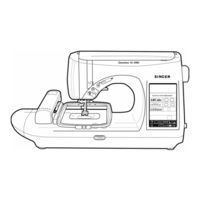
Singer XL-1000 Instruction Manual (119 pages)
Brand:
Singer
| Category:
Sewing Machine
| Size: 54.11 MB
Table of Contents
Important Safety Instructions
2
Please Use Following Foor Control
3
Contents
4
Various Types of Stitches
6
Principal Parts
7
Converting Machine to Free-Arm
8
Accessories
8
Connecting Machine
9
Running Machine
9
Running Machine Without Foot Speed Controller
9
Memory Buttons and Pattern Category Buttons
10
Welcome Screen
10
Adjusting Contrast of Touch-Screen
11
How to Use Option Key
12
Changing Presser Feet
13
Types of Feet and Their Applications
13
Winding Bobbin
14
Treading Machine
16
Trial Sewing!
18
How to Select Needle Position
19
How to Use the Thread Cutting Groove (How to Knot the Threads)
19
How to View Utility Patterns on LCD Touch-Screens
20
How to Select Pattern
20
How to Adjust Stitch Length of Utility Patterns
21
How to Use Stitch Length Manual Adjustment Touch-Screen Key
21
Stitch Length of each Stitch Pattern
21
How to Adjust Stitch Width of Utility Patterns
22
Automatic Computer Controlled Thread Metering (Tension) System
23
How to Modify Top Thread Supply
23
How to Shirr and Gather
23
Examples of Automatic Thread Metering
23
How to Use Operation Guidance. "Machine Usage"
24
Contents of Machine Usage
24
Example: Winding Bobbin Thread
24
How to Use Operation Guidance. "Advice"
25
Contents of Advice
25
Example: Improper Stitch Formation
25
Example: Sewing an Overlapped Section
25
How to Use Operation Guidance. "Sewing Method"
26
Example: Gathering
26
Contents of Sewing Method
26
Problem Indicators for Utility Stitches and Pattern Sewing
27
What to Do When Problem Indicator Appears
27
Fabric, Thread and Needle Table
28
How to Remove and Insert Needle
28
Straight Stitch
29
Automatic Backtack Sewing (Automatic Reverse Sewing)
30
Reverse Stitch
30
Changing Sewing Direction/Pivoting
31
Seam Guides
31
Free Arm Sewing
31
Application Examples
31
Zigzag Stitch
32
How to Adjust Stitch Width
32
Manually Adjusted Stitch Width Vs. Stitch Length
32
Overcasting (Overedging)
33
Automatic Buttonholes
34
Automatic Buttonhole Steps
35
Purl Stitch Buttonholes
36
Sewing Corded Buttonholes
36
Basting Stitch
36
Blindstitch
36
For Blindstitching General Fabrics or Heavy-Weight Materials
37
For Blindstitching Light-Weight Fabrics
37
How to Adjust Guide of Blindstitching Presser Foot
37
Attaching Buttons
38
Four Direction Sewing
39
Decorative Topstitching
39
Pattern Sewing
40
Pattern Category
40
Alphabet
40
How to View Pattern Touch-Screens
40
Pattern Modifier Keys
42
Balancing Shape of Pattern
42
Large Size Pattern Sewing
44
How to Select Large Size Pattern Touch-Screens
44
How to Select a Pattern
44
Single Pattern
44
Enlarge Pattern
45
Reduce Pattern
45
Mirror Pattern
45
2-Color Pattern
45
Fun-Face Pattern Sewing
46
Fun-Dlower Pattern Sewing
47
Animated Pattern Sewing
47
Single Regular Pattern Sewing
48
How to Use Pattern Modifier Keys of Regular Patterns
48
How to Adjust Tension and Stitch Length on Single Regular Patterns
49
Continuous Regular Pattern Sewing
49
Alphabet Stitch Sewing
50
How to Select Alphabet on LCD Touch-Screens
50
How to Select Letter of Aplhabet
50
15 And 25Mm Script Style
51
How to Change Size
51
7Mm Script Style
51
How to Combine Patterns
52
Combine Upper Case and Lower Case
52
Combination Fun-Face and Alphabet
52
Filing, Deleting and Recalling of Pattern/Alphabet Stitches
53
Filing in Long Term Memory
53
Deleting Long Term Memory
53
Filing in Long Term Memory When All Files Are Fully Occupied
54
To Recall Word or Pattern Sequence from Long Term Memory File
54
Circular Pattern Stitch
55
Heirloom Sewing (Using Wing Needle)
56
Quilting (Using Quilt Guide)
56
Patch Work
57
Overlapping Patch
57
Open Patch
57
Twin Needle Sewing
58
Pin Tucks
58
Darning/Free-Motion Embroidery
59
Rolled Hemming
60
Even Feeding
60
Inserting Zippers
61
Lapped Insertion
61
Centered Insertion
61
Inserting Invisible Zippers
62
Bartacking
63
Manual Buttonholes
64
Attaching Cords
65
Sewing One Cord
65
Sewing Three Cords
65
Optional Accessories
66
Ruffler Presser Foot
66
Attaching Ruffler
66
Ruffling
66
Pintuck Foot (Part No.386022)
67
Darning/Embroidery Foot (Part No.386017)
67
Open Toe Embroidery Foot (Part No.386023)
67
Quilter's Foot (Part No.386005)
67
Preparation for Embroidery Sewing
68
Precautions about Embroidery Bed and Embroidery Cards (Optional)
68
Attaching Embroidery Foot
68
Attaching Embroidery Bed
69
Removing Embroidery Bed
69
Before Removing Embroidery Bed
69
Embroidery
70
To Install and Remove Optional Embroidery Cards
71
Using Key
72
Selection/Kinds of Alphabet and Patterns
73
Example: Selecting "ROSE"
73
Selecting Other Alphabet Styles
74
Selecting Monogram
74
Selecting Patterns
75
Selecting Patterns When Using an Optional Embroidery Card
75
Embroidery Sewing Preparation
76
Foot Speed Controller
76
Fabric, Thread and Needle
76
Securing Material in Embroidery Frame
76
Attaching and Removing Embroidery Frame
77
Embroidery Procedure
77
Order of Pattern Sewing Steps
78
To Determine Location of Embroidery of Name, Word or Pattern
79
To Change Location of Embroider
79
For Easier Threading
80
To Confirm Location of Embroidery
80
Rotating Names, Words or Patterns and Changing Size
81
To Rotate Patterns
81
To Change Size of Alphabet
81
To Change Alphabet Spacing
82
How to Use Mirror Key
82
Embroidering a Combination of a Word and Pattern
83
Function of Displays on Screen
84
Zoom (Enlarging) Function
85
If Thread Breaks During Embroidery
86
To Embroider Interrupted Pattern from Point at Which Thread Has Broken
86
To Re-Embroider from Start of Interrupted Pattern
87
To Re-Embroider with Specific Designated Step
87
To Embroider Subsequent Step of Pattern after Turning Power off (Once)
87
Saving Combination Alphabet and Patterns in Long Term Files
88
Filing in Long Term Memory
88
Deleting Long Term Memory
88
Filing in Long Term Memory When All Files Are Fully Occupied
89
Filing in Long Term Complete Memory File #1 When It Is Already Occupied (Move)
89
To Recall Word or Pattern Sequence from Long Term Memory File
90
From Layout Screen
90
For Pattern Menu Screen
90
If Pattern Provided by Card Is Saved
90
To Embroider Small Material or Edge of Material
91
To Delete Pattern or Cancel Embroidery
91
Listing of Helpful Messages
92
Other Helpful Messages
93
Multiple Hoop Embroidery
95
Embroidery Frame: Large
95
First Designation
95
Preparation of Material
96
Using Touch-Screen to Establish Needle Entry Points A, B, C and D
96
Second Designation
97
Using Touch-Screen to Establish Needle Entry Points E, F, G and H
98
To Embroider Letters, Words, Patterns Beyond Sewing Area in 2Nd Part of Overall Design
100
Third Designation
100
Using Touch-Screen to Establish Needle Entry Points I, J, K and L
101
Multiple Hoop Embroidery
103
Preparation of Fabric
103
Select Floral Border Patterns and Position on Layout Screen
103
Select Alphabet Letter and Snter the Names "PINOCCHIO" and "CINDERELLA"
104
Adjust Size and Space of "PINOCCHIO" and "CINDERELLA"
104
Insert Optional Card No.16 into Slot of Sewing Machine
104
Select Pinocchio and Cinderella Patterns.
104
Position Embroidery Frame and Secure Material in Frame
105
Use Touch-Screen to Establish Needle Entry Points
105
Sew All Patterns in First Hooping Position
106
Position Embroidery Frame and Secure Material for 2Nd Hooping
106
Use Touch-Screen to Establish Needle Entry Points for 2Nd Hooping
106
Sew All Patterns in Second Hooping Position
107
Position Embroidery Frame and Secure Material for 3Rd Hooping
107
Use Touch-Screen to Establish Needle Entry Points for 1Rd Hooping
108
Sew All Patterns in Third Hooping Position
108
Position Embroidery Frame and Secure Material for 4Th Hooping
108
Use Touch-Screen to Establish Needle Entry Points for 4Th Hooping
108
Pattern/Alphabet Stitch List
109
Utility Patterns
109
Large Size Patterns
109
Fun-Face Patterns
109
Fun-Flower Patterns
110
Animated Patterns
110
Single Regular Patterns
110
Continuous Regular Patterns
111
Alphabet Patterns
111
Embroidery Pattern Stitch List
112
Floral Patterns
112
Floral Border Patterns
112
Aplhabet Patterns
113
Monogram Patterns
113
How to Replace Light Bulb
114
Cleaning
114
How to Replace Needle Threader Hook Holder (Optional Part)
114
Performance Checklist
115
Listing of Part Number of All Accessories Included with Machine, Optional Accessories and most Common Replacement Parts
117
Advertisement
Singer XL-1000 Training Manual (68 pages)
Brand:
Singer
| Category:
Sewing Machine
| Size: 29.39 MB
Singer XL-1000 List Of Parts (27 pages)
Solid-state electronic sewing machine
Brand:
Singer
| Category:
Sewing Machine
| Size: 1.21 MB
Advertisement
Advertisement
Related Products
Singer Professional XL-10
Singer Quantum XL-100
Singer Quantum XL-1
Singer XL-150
Singer XL-50
Singer XL-420
Singer XL-580
Singer Brother XL2600i
Singer XL-550
Singer FUTURA XL-400
Singer Categories
Sewing Machine
Iron
Vacuum Cleaner
Kitchen Appliances
Dehumidifier
More Singer Manuals
Login
Sign In
OR
Sign in with Facebook
Sign in with Google
Upload manual
Upload from disk
Upload from URL