Sign In
Upload
Manuals
Brands
CognitiveTPG Manuals
Printer
A776 ColorPOS
CognitiveTPG A776 ColorPOS Manuals
Manuals and User Guides for CognitiveTPG A776 ColorPOS. We have
4
CognitiveTPG A776 ColorPOS manuals available for free PDF download: Programming Manual, Specifications, Setup Manual
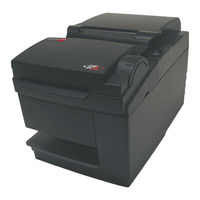
CognitiveTPG A776 ColorPOS Programming Manual (192 pages)
Two-Color Thermal/Impact Hybrid Printer
Brand:
CognitiveTPG
| Category:
Printer
| Size: 2.91 MB
Table of Contents
Table of Contents
3
Chapter 1: About this Guide
13
How to Use this Guide
13
Where to Find the Basics
13
Where to Find Advanced Technical Information
13
Support
13
Chapter 2: Printer Status and Indicators
15
Startup Diagnostics
15
Runtime Diagnostics
15
Remote Diagnostics
15
Ethernet Terms and Default Setup
16
Ethernet Terminology
16
Ethernet Default Setup
17
Indicators
18
Chapter 3: Migrating to A776 and B780
19
Migrating from Existing Cognitivetpg Printers
19
Moving from the A756 to the A776 (Thermal Printhead Differences)
20
Moving from the A756 to the A776 (Emulation Commands)
21
Moving from the A756, A758, or A760 to the A776 (Slip Differences)
21
A776 Emulation Commands
22
Set Printer ID Mode
22
Set A776 Printer ID
22
Set A776 Printer Emulation
22
A776 Configuration Commands
22
Select Slip Lines Per Inch
22
Select Number of Lines of Validation
22
Select A776 Narrow Slip Configuration Option to Ignore N Leading Spaces
23
Select A776 Narrow Slip 51-Column Compressed Print Option
23
Select A776 Delete Slip Trailing Spaces Option
23
Select A776 (21 and 25-Line) Rotated Slip Print Options
24
Select A776 First Line of Print Option in Text and Page Mode
24
Select Cover Open Option
24
Set Page Mode Margin Mechanical Adjustment
25
Select A776 Slip Eject Option
25
Select 45/60 Column Slip Option
25
Set Page Mode Option to Trim Full Dots
25
A776 Configurable Slip Commands
26
A776 Double High Slip Character Print
26
A776 Slip Character Spacing
26
A776 Slip Minimum Units
26
A776 Slip Left Margin and Print Width
26
A776 Slip Print Justification
26
Moving from A756/A758 to A776
27
Two-Color Commands
27
Logoez Colorization Commands
28
Migrating from the A721 (7221) Printer to the B780
29
B780 Emulation Commands
29
Set Printer ID Mode
29
Set B780 Printer Emulation
29
B780 Configuration Commands
29
Select B780 Slip Right Text Margin and Text Column Options
29
Select DH Pitch and Rotated Text Columns
30
Select Slip Lines Per Inch
30
Select Two - Sensor Option for B780
31
Select Number of Lines of Validation for B780
31
Select B780 Map User Character Option for B780
31
Select Slip Right Margin in Page Mode
31
Select B780 Map Logo Option for B780
32
Select Cover Open Option for B780
32
Select Concurrent Print to Receipt for B780
32
Select B780 with A776 Slip Functions
32
Select B780 Concurrent Print to Electronic Journal
32
Select Cover Open Option for B780
33
Set Page Mode Margin Mechanical Adjustment
33
Set Page Mode Option to Trim Full Dots
33
Chapter 4: Programming the Printer
35
Overview of Printing Characteristics
35
Character Appearance
36
Receipt Character Specification
36
Standard
36
Compressed
36
Print Zones
37
Print Zones for Receipt Station 80 MM Paper
37
Print Zones for Slip Station
38
Print Zones for Slip, Validation
39
Rotated Printing Commands
40
Chapter 5: Programming Commands
41
Commands Listed by Function
41
Printer Actions
41
Print and Paper Feed
42
Vertical and Horizontal Positioning
42
Text Characteristics
42
Graphics
43
Status
44
Batch Mode
44
Real-Time
44
Unsolicited Status Mode
44
Bar Codes
45
Page Mode
45
Macros
45
MICR Check Reader Commands
45
MICR Reading
45
MICR Parsing
45
User Data Storage
46
Flash Download
46
Ethernet Setup Commands
46
Image Commands
47
Command Conventions
48
Command Descriptions
48
Printer Actions
48
Clear Printer
48
Close Form
49
Open Form
49
Perform Partial Knife Cut
49
Generate Tone
49
Return Home
49
Select Peripheral Device (for Multi-Drop)
50
Initialize Printer
50
Set Slip Paper Eject Length
50
Set Unidirectional Print on Impact Station
50
Select Receipt or Slip for Printing; Slip for MICR Read
51
Select Receipt or Slip for Setting Line Spacing
51
Select Paper Sensors to Output Paper End Signals
51
Select Paper Sensors to Output Paper End Signals (Parallel Only)
51
Select Sensors to Stop Printing
52
Enable or Disable Panel Button
52
Set Slip Paper Waiting Time
52
Generate Pulse to Open Cash Drawer
53
Release Paper
53
Set Current Color
53
Select Slip Station
54
Select Cut Mode and Cut Paper
54
Set Paper Type (Colorpos )
54
Select Cut Mode and Cut Paper (or Code 1D 56 M)
54
Set Paper Type
54
Select Receipt Station
55
Set Interpretation of "Set Current Color
55
Print and Paper Feed
56
Print and Feed Paper One Line
56
Print and Eject Slip
56
Print and Carriage Return
56
Feed N Print Lines
56
Feed N Dot Rows
57
Add N Extra Dot Rows
57
Print and Feed Paper
58
Print and Reverse Feed Paper
58
Print and Feed N Lines
58
Print and Reverse Feed N Lines
59
Reverse Feed N Lines
59
Reverse Feed N Dots
59
Print Test Form
56
Vertical and Horizontal Positioning
59
Horizontal Tab
59
Set Column
60
Set Absolute Starting Position
60
Set Vertical Line Spacing to 1/6 Inch
60
Set Vertical Line Spacing
61
Set Horizontal Tab Positions
61
Set Relative Print Position
62
Select Justification
63
Set Left Margin
63
Set Horizontal and Vertical Minimum Motion Units
64
Set Printing Area Width
64
Select Double-Wide Characters
65
Select Single-Wide Characters
65
Select 90 Degree Counter-Clockwise Rotated Print
65
Select Pitch (Column Width)
66
Set Right-Side Character Spacing
66
Select Print Mode
67
Select or Cancel User-Defined Character Set
67
Define User-Defined Character Set
68
Select or Cancel Underline Mode
69
Copy Character Set from ROM to RAM
69
Cancel User-Defined Character
70
Select or Cancel Emphasized Mode
70
Select Double-Strike
70
Cancel Double-Strike
71
Select or Cancel Italic Print
71
Select International Character Set
71
Select Character Code Table
72
Select or Cancel 90 Degree Clockwise Rotated Print
72
Select or Cancel Upside-Down Print Mode
72
Select Character Size
72
Select or Cancel White/Black Reverse Print Mode
73
Set Smoothing
74
Reverse Color Text Mode (Colorpos )
74
Text Strike-Through Mode (Colorpos )
75
Select Font ID Number
75
Select Font Style Number
75
Save Font ID Number as Default Font at Power up
76
Download Font
76
Download Font List
76
Select Superscript or Subscript Modes
76
Define Extended User-Defined Character Set
77
Select Active User-Defined Character Set
77
Graphics
78
Download BMP Logo
78
Select Bit Image Mode
78
Print Advanced Raster Graphics
79
Select Double-Density Graphics
80
Print Flash Logo
80
Define Flash Logos
80
Select the Current Logo (Downloaded Bit Image)
80
Define Downloaded Bit Image
81
Print Downloaded Bit Image
81
Print Raster Monochrome Graphics (Colorpos )
82
Print Raster Color Graphics (Colorpos )
82
Download Logo Image (Colorpos )
82
Monochrome Shade Mode (Colorpos )
83
Color Shade Mode (Colorpos )
83
Logo Print with Color Plane Swap (Colorpos )
84
Apply Shading to Logo (Colorpos )
84
Merge Watermark Mode (Colorpos )
84
Form and Merge Real-Time Surround Graphic (Colorpos )
85
Save Graphics Buffer as Logo (Colorpos )
86
Background Logo Print Mode (Colorpos )
86
Apply Margin Message Mode (Colorpos )
87
Shade and Store Logo (Colorpos )
87
Logo Print with Knife Cut
88
Set Temporary Max Target Speed
88
Set Logoez Colorization (Colorpos )
89
Set Logoez Attribute Mapping (Colorpos )
91
Convert 6-Dots/MM Bitmap to 8-Dots/MM Bitmap
93
Enable Constant Speed Logos
93
Status
94
Batch Mode
94
Transmit Peripheral Device Status
94
Transmit Paper Sensor Status
95
Transmit Printer ID
95
Transmit Printer ID, Remote Diagnostics Extension
97
Transmit Status
99
Send Printer Software Version
101
Real-Time Commands
101
Preferred Implementation
102
Alternate Implementation
102
Rules for Using Real-Time Commands
102
Moving Data through the Buffer
102
Busy Line and Fault Conditions
103
Real-Time Status Transmission
103
Real-Time Request to Printer
106
Real-Time Printer Status Transmission
107
Real-Time Commands Disable
107
Unsolicited Status Mode
108
Select or Cancel Unsolicited Status Mode (USM)
108
Recognizing Data from the Printer
111
Bar Codes
112
Select Printing Position of HRI Characters
112
Select Pitch of HRI Characters
112
Select Bar Code Height
112
Print Bar Code
112
Set GS1 Databar (Formerly RSS) Parameters
114
Print GS1 Databar (Formerly RSS), Data Length Specified
115
Print GS1 Databar (Formerly RSS), Null Terminated
115
Print Multiple Barcodes
116
Select PDF 417 Parameters
117
Select Bar Code Width
118
Page Mode
118
Slip Page Mode Considerations
119
Print and Return to Standard Mode
120
Cancel Print Data in Page Mode
120
Print Data in Page Mode
120
Select Page Mode
121
Select Standard Mode
122
Select Print Direction in Page Mode
122
Set Print Area in Page Mode
123
Set Absolute Vertical Print Position in Page Mode
124
Set Relative Vertical Print Position in Page Mode
124
Macros
125
Select or Cancel Macro Definition
125
Execute Macro
125
MICR Commands
126
MICR Reading
126
Read MICR Data and Transmit
126
Transmit Last MICR Read
127
MICR Parsing
127
Define Parsing Format, Save in NVRAM
127
Define Parsing Format, Do Not Save Permanently
127
Parsing Parameter String Options
127
Sample Parsing Formats
129
Check Serial Number
131
Loading the Exception Table
132
Exception Table Entry Format
132
Maintaining the Exception Table
133
User Data Storage
133
Write to User Data Storage
133
Read from User Data Storage
134
Read from Non-Volatile Memory
134
Write to Non-Volatile Memory (NVRAM)
134
Select Memory Type (Sram/Flash)
134
Flash Memory User Sectors Allocation
135
Expanded Flash Memory Allocation
135
Select Flash Area for Storing Logos and User-Defined Characters
136
Erase User Flash Sector
136
User Storage Status (Colorpos )
137
Flash Download
138
Switch to Flash Download Mode
138
Return Boot Sector Firmware Part Number
139
Return Segment Number Status of Flash Memory
139
Select Flash Memory Sector to Download
139
Get Firmware CRC
139
Return Microprocessor CRC
139
Erase All Flash Contents Except Boot Sector
140
Return Main Program Flash CRC
140
Erase Selected Flash Sector
140
Download to Active Flash Sector
140
Reset Firmware
141
Ethernet Setup Commands
141
Restore Default Settings
141
Set IP Address
141
Set Net Mask
141
Set Gateway
142
Set Raw TCPIP Port 9001
142
LP Daemon
142
Telnet Daemon
142
Bootp
142
DHCP (Auto-Configuration)
143
Inactivity Timeout
143
Keep-Alive Pings
143
Imaging Commands
144
Calibrate Scanner
144
Configure/Change Image Transmission Port
145
Set Top Entry Startup Delay
145
Set Image Format Properties
145
Configure Binarization Methods and Attributes
146
Define/Update Application Tag Values
147
Attach Scan Application Tags
148
Return Imager Status
148
Real-Time Imager Status
149
Real-Time Error Status
150
Real-Time Cancel Image Transmission
150
Wait for Scan & Optionally Transmit
150
Transmit Image
152
Eject from Scanner
154
Free Image
155
Free Imager Buffering
155
Get Buffered Image List
155
Get Buffered Image Attributes
155
Configure Scan Options
156
Configure Max Scan Width & Height
156
Transmit Printer Type (Extended Existing Command)
156
Chapter 6: DH Emulation for B780
157
List of DH 4700 Emulation Commands
157
List of DH 4700 Command Descriptions
159
Printer Function Commands
159
End of Text
159
Line Feed
159
Vertical Tab
159
Carriage Return
159
Setup Parameters
159
Reset Printer
160
Cash Drawer 1
160
Cash Drawer 2
160
Document Clamp Open
160
Self Test
160
Document Validation
160
Receipt/Journal Print
160
Document Clamp Close
161
Form Eject
161
Download
161
Form in
161
Select
161
Either Form-In Sensor
161
Both Form-In Sensors
161
Busy until Buffer Empty
161
Clamp Delay
161
Print Speed
162
Buffered Validate
162
Buffer Clear
162
Repeat Character
162
Print Characteristics Commands
162
Double-Wide Font
162
Double-Wide off
162
Character Set
163
Underline Print
164
Underline off
164
Double-High off
164
Double-High Font
164
Pitch Selection
164
Upside-Down off
164
Upside-Down Print
164
Graphics Commands
165
Graphics
165
Graphics: 5 Dot
165
Printer Status Commands
166
Appendix A: Commands Listed by Hexadecimal Code
168
Appendix B: Resident Character Sets
174
Code Page 437 (US)
174
Code Page 737 (Greek)
175
Code Page 850 (Multilingual)
176
Code Page 852 (Slavic)
177
Code Page 857 (Turkish)
178
Code Page 858 (with Eurosymbol)
179
Code Page 860 (Portugese)
180
Code Page 862 (Hebrew)
181
Code Page 863 (French Canadian)
182
Code Page 865 (Nordic)
183
Code Page 866 (Cyrillic)
184
Code Page 1252 (Windows Latin 1)
185
Appendix C: Electronic Journal
187
Electronic Journal Storage
187
Advertisement
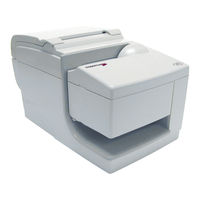
CognitiveTPG A776 ColorPOS Programming Manual (180 pages)
Two-Color Thermal/Impact Hybrid Printer
Brand:
CognitiveTPG
| Category:
Printer
| Size: 2.85 MB
Table of Contents
Table of Contents
3
Chapter 1: About this Guide
13
How to Use this Guide
13
Where to Find the Basics
13
Where to Find Advanced Technical Information
13
Support
13
Chapter 2: Printer Status and Indicators
15
Startup Diagnostics
15
Runtime Diagnostics
16
Remote Diagnostics
16
Indicators
17
Chapter 3: Migrating to A776 and B780
18
Migrating from Existing Cognitivetpg Printers
18
Moving from the A760 to the A776 (Slip Differences)
19
A776 Emulation Commands
20
Set Printer ID Mode
20
Set A776 Printer ID
20
A776 Configuration Commands
20
Select Slip Lines Per Inch
20
Select Number of Lines of Validation
20
Select A776 Narrow Slip Configuration Option to Ignore N Leading Spaces
20
Select A776 Narrow Slip Configuration Option to Ignore N Leading Spaces
21
Select A776 Narrow Slip 51-Column Compressed Print Option
21
Select A776 Delete Slip Trailing Spaces Option
21
Select A776 (21 and 25-Line) Rotated Slip Print Options
22
Select A776 First Line of Print Option in Text and Page Mode
22
Select Cover Open Option
22
Set Page Mode Margin Mechanical Adjustment
23
Select A776 Slip Eject Option
23
Select 45/60 Column Slip Option
23
Set Page Mode Option to Trim Full Dots
23
A776 Configurable Slip Commands
24
A776 Double High Slip Character Print
24
A776 Slip Character Spacing
24
A776 Slip Minimum Units
24
A776 Slip Left Margin and Print Width
24
A776 Slip Print Justification
24
Chapter 4: Programming the Printer
25
Overview of Printing Characteristics
25
Character Appearance
26
Receipt Character Specification
26
Standard
26
Compressed
26
Print Zones
27
Print Zones for Receipt Station 80 MM Paper
27
Print Zones for Slip Station
28
Print Zones for Slip, Validation
29
Rotated Printing Commands
30
Chapter 5: Programming Commands
31
Commands Listed by Function
31
Printer Actions
31
Print and Paper Feed
32
Vertical and Horizontal Positioning
32
Text Characteristics
32
Graphics
33
Status
34
Batch Mode
34
Real-Time
34
Unsolicited Status Mode
35
Bar Codes
35
Page Mode
35
Macros
35
MICR Check Reader Commands
36
MICR Reading
36
MICR Parsing
36
User Data Storage
36
Flash Download
36
Ethernet Setup Commands
37
Command Conventions
38
Command Descriptions
38
Printer Actions
38
Clear Printer
38
Close Form
39
Open Form
39
Perform Partial Knife Cut
39
Generate Tone
39
Return Home
39
Select Peripheral Device (for Multi-Drop)
40
Initialize Printer
40
Set Slip Paper Eject Length
40
Set Unidirectional Print on Impact Station
40
Select Receipt or Slip for Printing; Slip for MICR Read
41
Select Receipt or Slip for Setting Line Spacing
41
Select Paper Sensors to Output Paper End Signals
41
Select Sensors to Stop Printing
42
Enable or Disable Panel Button
42
Set Slip Paper Waiting Time
42
Generate Pulse to Open Cash Drawer
43
Release Paper
43
Set Current Color
43
Select Slip Station
44
Select Cut Mode and Cut Paper
44
Set Paper Type (Colorpos )
45
Select Receipt Station
45
Set Interpretation of "Set Current Color
45
Print Test Form
46
Print and Paper Feed
46
Print and Feed Paper One Line
46
Print and Eject Slip
46
Print and Carriage Return
46
Feed N Print Lines
46
Feed N Dot Rows
47
Add N Extra Dot Rows
47
Print
48
Print and Feed Paper
48
Print and Reverse Feed Paper
48
Print and Feed N Lines
48
Print and Reverse Feed N Lines
49
Reverse Feed N Lines
49
Reverse Feed N Dots
49
Vertical and Horizontal Positioning
49
Horizontal Tab
49
Set Column
50
Set Absolute Starting Position
50
Set Vertical Line Spacing to 1/6 Inch
50
Set Vertical Line Spacing
51
Set Horizontal Tab Positions
51
Set Relative Print Position
52
Select Justification
53
Set Left Margin
53
Set Horizontal and Vertical Minimum Motion Units
54
Set Printing Area Width
54
Text Characteristics Commands
55
Select Double-Wide Characters
55
Select Single-Wide Characters
55
Select 90 Degree Counter-Clockwise Rotated Print
55
Select Pitch (Column Width)
56
Set Right-Side Character Spacing
56
Select Print Mode
57
Select or Cancel User-Defined Character Set
57
Define User-Defined Character Set
58
Select or Cancel Underline Mode
59
Copy Character Set from ROM to RAM
59
Cancel User-Defined Character
59
Select or Cancel Emphasized Mode
60
Select Double-Strike
60
Select or Cancel Italic Print
61
Select International Character Set
61
Select Character Code Table
61
Select or Cancel 90 Degree Clockwise Rotated Print
62
Select or Cancel Upside-Down Print Mode
62
Select Character Size
62
Select or Cancel White/Black Reverse Print Mode
63
Set Smoothing
64
Reverse Color Text Mode (Colorpos )
64
Text Strike-Through Mode (Colorpos )
64
Select Font ID Number
65
Select Font Style Number
65
Save Font ID Number as Default Font at Power up
65
Lock Permanent Font Flash Area
65
Download Font
66
Download Font List
66
Dynamically Select the Font Set
66
Configure Use of Font Set
67
Configure Line Spacing
67
Select Superscript or Subscript Modes
67
Define Extended User-Defined Character Set
68
Select Active User-Defined Character Set
68
Erase User Flash Sector for Permanent Fonts
69
Select Font Style Number
69
Save Font ID Number as Default Font at Power up
69
Download Font
70
Graphics
70
Download BMP Logo
70
Select Bit Image Mode
71
Print Advanced Raster Graphics
72
Select Double-Density Graphics
72
Print Flash Logo
72
Define Flash Logos
72
Select the Current Logo (Downloaded Bit Image)
73
Define Downloaded Bit Image
73
Print Downloaded Bit Image
74
Print Raster Monochrome Graphics (Colorpos )
74
Print Raster Color Graphics (Colorpos )
74
Download Logo Image
74
Color Shade Mode (Colorpos )
76
Logo Print with Color Plane Swap (Colorpos ® )
77
Apply Shading to Logo (Colorpos ® )
77
Merge Watermark Mode (Colorpos )
77
Form and Merge Real-Time Surround Graphic (Colorpos ® )
78
Save Graphics Buffer as Logo (Colorpos )
78
Background Logo Print Mode (Colorpos ® )
79
Apply Margin Message Mode (Colorpos )
79
Shade and Store Logo (Colorpos ® )
80
Logo Print with Knife Cut
80
Set Temporary Max Target Speed
80
Set Logoez Colorization (Colorpos )
81
Set Logoez Attribute Mapping (Colorpos )
83
Convert 6-Dots/MM Bitmap to 8-Dots/MM Bitmap
85
Enable Constant Speed Logos
85
Status
86
Batch Mode
86
Transmit Peripheral Device Status
86
Transmit Paper Sensor Status
87
Transmit Printer ID
88
Transmit Printer ID, Remote Diagnostics Extension
89
Transmit Status
92
Send Printer Software Version
93
Real-Time Commands
94
Preferred Implementation
94
Alternate Implementation
94
Rules for Using Real-Time Commands
95
Moving Data through the Buffer
95
Busy Line and Fault Conditions
96
Real-Time Status Transmission
96
Real-Time Request to Printer
99
Real-Time Printer Status Transmission
100
Real-Time Commands Disable
100
Unsolicited Status Mode
101
Select or Cancel Unsolicited Status Mode (USM)
101
Recognizing Data from the Printer
104
Bar Codes
105
Two-Dimensional Bar Code QR Code
105
Select the QR Code Model
105
Set Size of QR Code Module
105
Select the QR Code Error Correction Level
106
Set QR Code Data
106
Print QR Code
107
Select Printing Position of HRI Characters
108
Select Pitch of HRI Characters
108
Select Bar Code Height
108
Print Bar Code
109
Set GS1 Databar (Formerly RSS) Parameters
111
Print GS1 Databar (Formerly RSS), Data Length Specified
111
Note: Data Length Specified 1 to 2436 Via Integer Nh : Nl
111
Print GS1 Databar (Formerly RSS), Null Terminated
112
Print Multiple Barcodes
112
Select PDF 417 Parameters
113
Select Bar Code Width
114
Page Mode
115
Slip Page Mode Considerations
115
Print and Return to Standard Mode
116
Cancel Print Data in Page Mode
116
Print Data in Page Mode
117
Select Page Mode
117
Select Standard Mode
118
Select Print Direction in Page Mode
118
Set Print Area in Page Mode
119
Set Absolute Vertical Print Position in Page Mode
120
Set Relative Vertical Print Position in Page Mode
120
Macros
122
Select or Cancel Macro Definition
122
Execute Macro
122
MICR Commands
123
MICR Reading
123
Read MICR Data and Transmit
123
Transmit Last MICR Read
123
MICR Parsing
124
Define Parsing Format, Save in NVRAM
124
Define Parsing Format, Do Not Save Permanently
124
Parsing Parameter String Options
124
Sample Parsing Formats
125
Check Serial Number
128
Loading the Exception Table
129
Exception Table Entry Format
129
Maintaining the Exception Table
130
User Data Storage
131
Write to User Data Storage
131
Read from User Data Storage
131
Read from Non-Volatile Memory
131
Write to Non-Volatile Memory (NVRAM)
131
Select Memory Type (Sram/Flash)
132
Flash Memory User Sectors Allocation
132
Expanded Flash Memory Allocation
133
Define Extended User-Defined Character Set
133
Select Flash Area for Storing Logos and User-Defined Characters
134
Erase User Flash Sector
134
User Storage Status (Colorpos )
135
Lock Permanent Font Flash Area
136
Flash Download
136
Switch to Flash Download Mode
136
Return Boot Sector Firmware Part Number
137
Return Segment Number Status of Flash Memory
137
Select Flash Memory Sector to Download
137
Get Firmware CRC
137
Return Microprocessor CRC
138
Erase All Flash Contents Except Boot Sector
138
Return Main Program Flash CRC
138
Erase Selected Flash Sector
138
Download to Active Flash Sector
139
Reset Firmware
139
Ethernet Setup Commands
140
Restore Default Settings
140
Set IP Address
140
Set Net Mask
140
Set Gateway
140
Set Raw TCPIP Port 9001
141
LP Daemon
141
Telnet Daemon
141
Bootp
141
DHCP (Auto-Configuration)
141
Inactivity Timeout
142
Keep-Alive Pings
142
Chapter 6: DH Emulation for B780
143
List of DH 4700 Emulation Commands
143
List of DH 4700 Command Descriptions
145
Printer Function Commands
145
End of Text
145
Line Feed
145
Vertical Tab
145
Carriage Return
145
Setup Parameters
145
Reset Printer
146
Cash Drawer 1
146
Cash Drawer 2
146
Document Clamp Open
146
Self Test
146
Document Validation
146
Receipt/Journal Print
146
Document Clamp Close
147
Form Eject
147
Download
147
Form in
147
Select
147
Either Form-In Sensor
147
Both Form-In Sensors
147
Busy until Buffer Empty
147
Clamp Delay
147
Print Speed
148
Buffered Validate
148
Buffer Clear
148
Repeat Character
148
Print Characteristics Commands
148
Double-Wide Font
148
Double-Wide off
148
Character Set
149
Underline Print
150
Underline off
150
Double-High off
150
Double-High Font
150
Pitch Selection
150
Upside-Down off
150
Upside-Down Print
150
Graphics Commands
151
Graphics
151
Graphics: 5 Dot
151
Printer Status Commands
152
Appendix A: Commands Listed by Hexadecimal Code
153
Appendix B: Resident Character Sets
159
Code Page 437 (US)
159
Code Page 737 (Greek)
160
Code Page 850 (Multilingual)
161
Code Page 852 (Slavic)
162
Code Page 857 (Turkish)
163
Code Page 858 (with Eurosymbol)
164
Code Page 860 (Portugese)
165
Code Page 862 (Hebrew)
166
Code Page 863 (French Canadian)
167
Code Page 865 (Nordic)
168
Code Page 866 (Cyrillic)
169
Code Page 1251 (Cyrillic)
170
Code Page 1252 (Windows Latin 1)
171
Code Page 1255 (Hebrew)
172
Code Page KZ_1048 (Kazakh)
173
Appendix C: Electronic Journal
175
Electronic Journal Storage
175
CognitiveTPG A776 ColorPOS Setup Manual (2 pages)
Two-Color Hybrid Thermal/Impact Printer
Brand:
CognitiveTPG
| Category:
Printer
| Size: 0.57 MB
Advertisement
CognitiveTPG A776 ColorPOS Specifications (2 pages)
Two-Color Hybrid Receipt/Slip Printer
Brand:
CognitiveTPG
| Category:
Printer
| Size: 0.28 MB
Advertisement
Related Products
CognitiveTPG Advantage RFID Thermal Printer
CognitiveTPG A760
CognitiveTPG A798
CognitiveTPG ColorPOS A799
CognitiveTPG A799II
CognitiveTPG A798II
CognitiveTPG A776II
CognitiveTPG Advantage LX
CognitiveTPG CognitiveTPG Advantage DLX
CognitiveTPG Advantage DLX DBD24-2085-01S
CognitiveTPG Categories
Printer
Label Maker
Barcode Reader
Battery Charger
Medical Equipment
More CognitiveTPG Manuals
Login
Sign In
OR
Sign in with Facebook
Sign in with Google
Upload manual
Upload from disk
Upload from URL