Bosch KETTLER KB112-ZARD Series Manuals
Manuals and User Guides for Bosch KETTLER KB112-ZARD Series. We have 2 Bosch KETTLER KB112-ZARD Series manuals available for free PDF download: Translation Of The Original Operating Instructions

Bosch KETTLER KB112-ZARD Series Translation Of The Original Operating Instructions (124 pages)
Brand: Bosch
|
Category: Bicycle Accessories
|
Size: 18.45 MB
Table of Contents
-
Language12
-
Warnings13
-
Nameplate14
-
Safety16
-
Data Privacy18
-
Emergency19
-
Brake Fluid20
-
Damper20
-
Overview21
-
Description22
-
Valve22
-
Suspension22
-
Damper24
-
Brake System24
-
Rim Brake24
-
Disc Brake25
-
Abs26
-
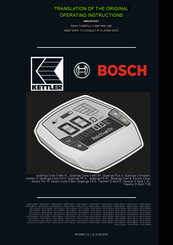
Display29
-
USB Port30
-
Riding Light30
-
Charger30
-
Proper Use31
-
Improper Use32
-
Pedelec33
-
Lighting34
-
USB Port34
-
Emissions35
-
Handlebars36
-
Transporting43
-
Storing44
-
Assembly46
-
Unpacking46
-
(15 MM)47
-
(20 MM)48
-
Axle49
-
Pedelec Sale53
-
Operation54
-
Release59
-
Force62
-
Accessories70
-
Child Seat70
-
Pannier Rack71
-
Information82
-
Brake83
-
Using ABS85
-
While Riding86
-
Fox Fork86
-
Fox Damper87
-
Shox Damper88
-
Gear Shift88
-
Use Eshift89
-
Hub Gears89
-
Hub Gears90
-
Maintenance95
-
Wheel95
-
Dunlop Valve95
-
Presta Valve96
-
Brake System96
-
Gear Shift97
-
Stem97
-
USB Port97
-
Maintenance98
-
Error Messages101
-
Repair102
-
Documents104
-
Parts List104
-
Assembly Report105
-
Maintenance Log107
-
Manufacturer107
-
Keyword Index119
-
Glossary121
-
Appendix124
Advertisement
Bosch KETTLER KB112-ZARD Series Translation Of The Original Operating Instructions (125 pages)
Brand: Bosch
|
Category: Bicycle Accessories
|
Size: 18.53 MB
Table of Contents
-
Warnings12
-
Nameplate13
-
Safety15
-
Data Privacy17
-
Brake Fluid19
-
Damper19
-
Overview20
-
Description21
-
Valve21
-
Suspension21
-
Damper23
-
Brake System23
-
Rim Brake23
-
Disc Brake24
-
Abs25
-
Display28
-
USB Port29
-
Riding Light29
-
Charger29
-
Proper Use30
-
Improper Use31
-
Pedelec32
-
USB Port33
-
Emissions34
-
Handlebars35
-
Storing43
-
Assembly45
-
Unpacking45
-
(15 MM)46
-
(20 MM)47
-
Axle48
-
Pedelec Sale52
-
Operation53
-
Release58
-
Accessories70
-
Child Seat70
-
Pannier Rack71
-
Charging76
-
Information82
-
Brake83
-
Using ABS85
-
While Riding86
-
Fox Fork86
-
Fox Damper87
-
Shox Damper88
-
Gear Shift89
-
Use Eshift90
-
Servicing95
-
Maintenance95
-
Wheel95
-
Dunlop Valve96
-
Presta Valve96
-
Brake System97
-
Gear Shift98
-
Stem98
-
USB Port98
-
Maintenance99
-
Error Messages102
-
Repair103
-
Documents105
-
Parts List105
-
Assembly Report106
-
Maintenance Log108
-
Keyword Index120
-
Glossary122
-
Appendix125
Advertisement
Related Products
- Bosch KETTLER KB112-ZAFD Series
- Bosch KETTLER KB112-ZAFT Series
- Bosch KETTLER KB112-ZAFW Series
- Bosch KETTLER KB112-ZART Series
- Bosch KETTLER KB112-ZARW Series
- Bosch KETTLER KB112-ZCFT Series
- Bosch KETTLER KB112-ZCFW Series
- Bosch KETTLER KB112-ZCRD Series
- Bosch KETTLER KB112-ZBRW Series
- Bosch KETTLER KB112-ZBRT Series