Sign In
Upload
Manuals
Brands
Barco Manuals
Projector
CLM R10+
Barco CLM R10+ Manuals
Manuals and User Guides for Barco CLM R10+. We have
5
Barco CLM R10+ manuals available for free PDF download: User Manual, Specifications, Supplementary Manual
Barco CLM R10+ User Manual (229 pages)
Brand:
Barco
| Category:
Projector
| Size: 13.55 MB
Table of Contents
Users Manual
1
Software License Agreement
3
Disposal Information
4
Table of Contents
5
1 Safety
9
General
9
Important Safety Instructions
10
Recycling Guidelines
12
Important Warnings Concerning CLM Flight Cases
13
2 General
15
Installation Requirements
15
Unpacking the Projector
16
Box Content
17
Projector Configurations
18
Positioning the Projector
19
Projector Air Inlets and Outlets
21
Free Download of Projector Toolset
21
3 Physical Installation
23
Remote Control Unit (RCU)
23
RCU Battery Installation
24
RCU Rugged Case Installation
25
RCU XLR Adaptor Installation
25
Using the XLR Adaptor of the RCU
26
RCU Usage Possibilities
26
Lenses
27
Available Lenses
27
Lens Selection
28
Lens Formulas
29
Alignment of a Table Mounted CLM Projector
30
Suspension of the CLM Projector with Rigging Clamps
30
Alignment of a Ceiling Mounted CLM Projector
34
4 Stacking CLM Projectors
37
Aligning Stacked CLM Projectors
39
5 Connections
43
Power Connection
43
Input Source Connections
45
Communication Connections
46
Wired Remote Control
47
Usb Port
48
6 Getting Started
51
RCU & Local Keypad
51
Terminology Overview
51
Operating the Projector
53
Switching on
53
Errors, Warnings and Messages During Start up
54
Switching to Standby
54
Switching off
55
Using the RCU
55
Quick Setup Adjustments
56
Text Boxes on or off
56
Quick Lens Adjustment
56
Quick Lens Adjustment Via LENS Key
56
Direct Lens Adjustment (RCU)
57
Quick Picture in Picture
58
Quick Layout Selection with Rigging Key
58
Quick Language Selection
59
Use of the AUTO Button
59
Projector Address
59
Displaying and Programming Addresses
59
Controlling the Projector
60
Source Selection
61
Controlling the Projector
61
The Pause Key
62
7 Start up of the Adjustment Mode
63
About the Adjustment Mode
63
About the Use of the Remote Control and the Local Keypad
63
Start up the Adjustment Mode
63
Navigation and Adjustments
64
On Screen Menus Versus LCD Display Menus
64
Test Patterns in Adjustment Mode
65
Menu Memory
65
8 Input Menu
67
Overview Flow
67
Slot Module Type
67
About Input Setup
67
Input Configuration
68
Input Locking
69
Minimum Delay
71
Native Resolution
71
Source Switching
73
No Signal
73
Background Color
73
Shutdown Setting
74
Shutdown Retarding Time
74
9 Image Menu
77
Overview Flow
77
How to Select the Image Adjustments
78
Image Settings
78
Contrast
79
Brightness
79
Saturation
80
Tint (Hue)
81
Phase
81
Sharpness
82
Noise Reduction
83
Color Temperature
83
Predefined Color Temperature
84
Set a Custom Color Temperature
84
Input Balance
85
Introduction to Input Balance
85
Adjusting the Input Balance
87
Aspect Ratio
89
Timings
91
Source Timings
91
Advanced Settings
92
Advanced Settings, Film Mode Detection
94
Advanced Setting, Brilliant Color Look
95
Image Files Services
96
Files and File Manipulations
96
Manual Load File
97
Delete File
97
Delete All Custom Files
98
Rename a File
99
Copy a File
99
File Options
100
Save Custom Settings
101
10 Layout Menu
103
Overview Flow
103
Main Window
103
Source Selection
104
Size Adjustment
104
How to Adjust Height and Width Separately
106
Position Adjustment
107
PIP Window
108
Introduction to PIP
108
Picture in Picture Activation
108
Picture in Picture Source Selection
109
Picture in Picture Size of the Window
110
How to Change the Height and Width Separately
111
Picture in Picture, Position Window
112
Layout File Services
113
Load Layout
113
Rename a Layout
114
Delete a Layout
114
Copy / Save as a Layout
115
11 Lamp Menu
117
Overview Flow
117
Lamp Power Mode
117
Lamp Power
118
Lamp Identification
119
Status and Run Time Overview Lamps
120
Lamp Mode
120
12 Alignment Menu
121
Overview Flow
121
Orientation
122
Lens Adjustment
123
Side Keystone
124
Blanking
125
Intensity
126
Gamma
126
Internal Pattern
127
Color Space
128
White Peaking
129
Scenergix
130
Introduction
130
Preparations
131
Scenergix Activation
131
Scenergix Pattern
132
Scenergix Overlap Zone (Horizontal Scenergix)
132
Scenergix Overlap Zone (Vertical Scenergix)
134
Scenergix Size Adjustment (White Level)
135
Adjusting the Black Level of the Images
137
How to Adjust
139
13 Projector Control
141
Overview Flow
141
Projector Address
142
Individual Projector Address
142
Common Address
143
Serial Communication
143
Baud Rate Setup
143
Interface Standard
144
RS422 Termination
145
Network
145
Introduction to a Network Connection
145
DHCP Setup
146
IP-Address Set up
146
Subnet-Mask Set up
147
Default Gateway Set up
148
IR Control Switching
148
DMX
149
DMX Address
149
DMX Universe
150
DMX Monitor
151
DMX Mode
152
Art-Net Activation
153
Buttons
153
APA Button
153
Shortcut Keys
154
Menu Position
155
Local LCD Contrast
155
Language Selection
156
14 Service Menu
157
Overview Flow
157
Identification
157
Diagnosis
159
How to Start up the Diagnosis
159
Versions
159
Voltages
160
I²C Diagnosis
161
Temperatures
161
Fan Speeds Overview
162
Spi
163
Error Logging Overview
163
Internal Service Patterns
164
Restore Factory Defaults
164
Save Custom Settings
165
Refill Mode
166
USB Memory
167
Over Temperature DMD Safety
168
15 Maintenance
171
Cleaning the Lens
171
Cleaning the Exterior of the Projector
171
Level Check of Cooling Liquid
171
16 Servicing
173
Replacement of the Dust Filter on the Top Side
173
Replacement of the Dust Filters on the Front Side
174
Lens Installation
175
Lens Removal
176
Removal of a Lamp Unit
177
Mounting a New Lamp Unit
179
Removal of an Input Module
180
Inserting an Input Module
181
Top-Up the Reservoir with Cooling Liquid
181
17 Projector Covers, Removal and Installation
185
Removal of the
185
Removal of the Lamp Door
186
Removal of the
187
Removal of the Top Cover
188
Removal of the Side Cover
188
Installation of the Side Cover
189
Installation of the Top Cover
190
Installation of the
190
Installation of the
191
Installation of the Lamp Door
192
Dimensions
195
Dimensions of the CLM R10
195
A.1 Dimensions of the CLM R10
195
Standard Source Files
197
B.1 Table Overview
197
DMX Chart
199
CLM Control Channel Mapping (Full Mode)
199
CLM Control Channel Mapping (Basic Mode)
200
D.1 Specifications CLM R10
203
Specifications
203
Specifications CLM R10
203
Specifications CLM 5 Cable Input (Multi Purpose)
204
Specifications CLM HDSDI - SDI Input
205
Specifications CLM DVI Input
206
Specifications CLM DVI HDCP Input
206
Troubleshooting
207
Error Codes
207
Mounting Optional Carry Handle
213
Mounting Stacking Points on Top Cover
213
Preparing the New Carry Handle
214
Preparing the Projector
215
Mounting the Carry Handle
216
Order Info
219
Spare Part Order Info
219
Glossary
221
Index
223
Advertisement
Barco CLM R10+ User Manual (215 pages)
CLM R10+
Brand:
Barco
| Category:
Projector
| Size: 10.83 MB
Table of Contents
Software License Agreement
3
Table of Contents
5
1 Safety
9
General
9
Important Safety Instructions
9
Recycling Guidelines
12
Important Warnings Concerning CLM Flight Cases
13
2 General
15
Installation Requirements
15
Unpacking the Projector
16
Box Content
17
Projector Configurations
18
Positioning the Projector
19
Projector Air Inlets and Outlets
21
Free Download of Projector Toolset
21
3 Physical Installation
23
Remote Control Unit (RCU)
23
RCU Battery Installation
24
RCU Rugged Case Installation
25
RCU XLR Adaptor Installation
25
Using the XLR Adaptor of the RCU
26
RCU Usage Possibilities
26
Lenses
27
Available Lenses
27
Lens Selection
28
Lens Formulas
29
Alignment of a Table Mounted CLM Projector
30
Suspension of the CLM Projector with Rigging Clamps
30
Alignment of a Ceiling Mounted CLM Projector
34
4 Stacking CLM Projectors
37
Aligning Stacked CLM Projectors
39
5 Connections
41
Power Connection
41
Input Source Connections
43
Communication Connections
44
Projector Status
45
Wired Remote Control
45
Usb Port
47
6 Getting Started
49
RCU & Local Keypad
49
Terminology Overview
49
Operating the Projector
51
Switching on
51
Errors, Warnings and Messages During Start up
52
Switching to Standby
52
Switching off
53
Using the RCU
53
Quick Setup Adjustments
54
Text Boxes on or off
54
Quick Lens Adjustment
54
Quick Lens Adjustment Via LENS Key
54
Direct Lens Adjustment (RCU)
55
Quick Picture in Picture
56
Quick Language Selection
56
Use of the AUTO Button
57
Projector Address
57
Displaying and Programming Addresses
57
Controlling the Projector
58
Source Selection
58
Controlling the Projector
59
7 Start up of the Adjustment Mode
61
About the Adjustment Mode
61
About the Use of the Remote Control and the Local Keypad
61
Start up the Adjustment Mode
61
Navigation and Adjustments
62
On Screen Menus Versus LCD Display Menus
62
8 Input Menu
65
Overview Flow
65
Slot Module Type
65
About Input Setup
65
Input Configuration
66
Input Locking
67
Minimum Delay
69
Native Resolution
69
Source Switching
71
No Signal
71
Background Color
71
Shutdown Setting
72
Shutdown Retarding Time
72
9 Image Menu
75
Overview Flow
75
How to Select the Image Adjustments
76
Image Settings
76
Contrast
77
Brightness
77
Saturation
78
Tint (Hue)
79
Phase
79
Sharpness
80
Noise Reduction
81
Color Temperature
82
Predefined Color Temperature
82
Set a Custom Color Temperature
83
Input Balance
84
Introduction to Input Balance
84
Adjusting the Input Balance
85
Black Balance
86
Aspect Ratio
87
How to Select an Aspect Ratio
88
Timings
89
Source Timings
89
Advanced Settings
90
Advanced Settings, Film Mode Detection
92
Advanced Setting, Brilliant Color Look
93
Image Files Services
94
Files and File Manipulations
94
Manual Load File
95
Delete File
95
Delete All Custom Files
96
Rename a File
97
Copy a File
98
File Options
98
Save Custom Settings
99
10 Layout Menu
101
Overview Flow
101
Main Window
101
Size Adjustment
102
How to Adjust Height and Width Separately
103
Position Adjustment
104
PIP Window
105
Introduction to PIP
105
Picture in Picture Activation
106
Picture in Picture Size of the Window
106
How to Change the Height and Width Separately
108
Picture in Picture, Position Window
109
Layout File Services
110
Load Layout
110
Rename a Layout
111
Delete a Layout
112
Copy / Save as a Layout
113
11 Lamp Menu
115
Overview Flow
115
Lamp Power Mode
115
Lamp Power
116
Lamp Identification
117
Status and Run Time Overview Lamps
117
Lamp Mode
118
12 Alignment Menu
119
Overview Flow
119
Orientation
120
Lens Adjustment
121
Side Keystone
122
Blanking
123
Intensity
124
Gamma
124
Internal Pattern
125
Color Space
126
White Peaking
127
Scenergix
128
Introduction
128
Preparations
129
Scenergix Activation
129
Scenergix Pattern
129
Scenergix Overlap Zone (Horizontal Scenergix)
130
Scenergix Overlap Zone (Vertical Scenergix)
132
Scenergix Size Adjustment
133
Adjusting the Black Level of the Images
135
13 Projector Control
137
Overview Flow
137
Projector Address
138
Individual Projector Address
138
Common Address
139
Serial Communication
139
Baud Rate Setup
139
Interface Standard
140
RS422 Termination
140
Network
141
Introduction to a Network Connection
141
DHCP Setup
142
IP-Address Set up
142
Subnet-Mask Set up
143
Default Gateway Set up
144
IR Control Switching
144
DMX
145
DMX Address
145
DMX Monitor
146
DMX Mode
148
Buttons
148
APA Button
148
Shortcut Keys
149
Menu Position
150
Local LCD Contrast
150
Language Selection
151
14 Service Menu
153
Overview Flow
153
Identification
153
Diagnosis
155
How to Start up the Diagnosis
155
Versions
155
Voltages
156
I²C Diagnosis
157
Temperatures
157
Fan Speeds Overview
158
Spi
159
Error Logging Overview
159
Internal Service Patterns
160
Restore Factory Defaults
160
Save Custom Settings
161
Refill Mode
161
USB Memory
162
Over Temperature DMD Safety
164
15 Maintenance
165
Cleaning the Lens
165
Cleaning the Exterior of the Projector
165
16 Servicing
167
Replacement of the Dust Filter on the Top Side
167
Replacement of the Dust Filters on the Front Side
168
Lens Installation
169
Lens Removal
170
Removal of a Lamp Unit
171
Mounting a New Lamp Unit
173
Removal of an Input Module
174
Inserting an Input Module
175
17 Projector Covers, Removal and Installation
177
Removal of the
177
Removal of the Lamp Door
178
Installation of the
179
Installation of the Lamp Door
180
Dimensions
181
Dimensions of the CLM R10
181
A.1 Dimensions of the CLM R10
181
Standard Source Files
183
B.1 Table Overview
183
DMX Chart
185
CLM Control Channel Mapping Mode 1
185
CLM Control Channel Mapping (Simple Mode)
186
Specifications
187
Specifications CLM R10
187
D.1 Specifications CLM R10
187
Specifications CLM 5 Cable Input (Multi Purpose)
188
Specifications CLM HDSDI - SDI Input
189
Specifications CLM DVI Input
190
Specifications CLM DVI HDCP Input
191
Troubleshooting
193
Error Codes
193
E.1 Error Codes
193
Mounting Optional Carry Handle
199
Mounting Stacking Points on Top Cover
199
Preparing the New Carry Handle
200
Preparing the Projector
201
Mounting the Carry Handle
202
Order Info
205
Spare Part Order Info
205
Glossary
207
Index
209
Barco CLM R10+ User Manual (101 pages)
Brand:
Barco
| Category:
Projector
| Size: 9.51 MB
Table of Contents
Table of Contents
3
1 Safety
7
General
7
Installation Requirements
7
Unpacking the Projector
8
Box Content
9
Projector Configurations
10
Projector Air Inlets and Outlets
13
Free Download of Projector Toolset
13
2 General
7
3 Physical Installation
14
Remote Control Unit (RCU)
14
RCU Battery Installation
15
RCU Rugged Case Installation
16
RCU XLR Adaptor Installation
16
Using the XLR Adaptor of the RCU
17
RCU Usage Possibilities
17
Lenses
18
Available Lenses
18
Lens Selection
18
Lens Formulas
19
Alignment of a Table Mounted CLM Projector
19
Suspension of the CLM Projector with Rigging Clamps
20
Alignment of a Ceiling Mounted CLM Projector
24
4 Stacking CLM Projectors
25
Aligning Stacked CLM Projectors
27
5 Connections
29
Power Connection
29
Input Source Connections
31
Communication Connections
32
6 Getting Started
36
RCU & Local Keypad
36
Terminology Overview
36
Operating the Projector
38
Switching on
38
Errors, Warnings and Messages During Start up
39
Switching to Standby
39
Switching off
40
Using the RCU
40
Quick Setup Adjustments
41
Text Boxes on or off
41
Quick Lens Adjustment
41
Quick Lens Adjustment Via LENS Key
41
Direct Lens Adjustment (RCU)
42
Quick Picture in Picture
43
Use of the AUTO Button
43
Projector Address
43
Displaying and Programming Addresses
43
Controlling the Projector
44
Source Selection
45
Controlling the Projector
45
7 Start up of the Adjustment Mode
47
About the Adjustment Mode
47
About the Use of the Remote Control and the Local Keypad
47
Start up the Adjustment Mode
47
Navigation and Adjustments
48
On Screen Menus Versus LCD Display Menus
48
8 Input Menu
49
Overview Flow
49
Slot Module Type
49
About Input Setup
49
Input Configuration
50
Input Locking
51
Minimum Delay
52
Native Resolution
53
Source Switching
54
No Signal
55
Background Color
55
Shutdown Setting
55
Shutdown Retarding Time
56
9 Image Menu
57
Overview Flow
57
How to Select the Image Adjustments
58
Image Settings
59
Contrast
59
Brightness
59
Saturation
60
Tint (Hue)
61
Phase
62
Sharpness
63
Noise Reduction
64
Color Temperature
64
Predefined Color Temperature
64
Set a Custom Color Temperature
65
Input Balance
66
Introduction to Input Balance
66
Adjusting the Input Balance
67
Aspect Ratio
70
Timings
72
Source Timings
72
Advanced Settings
73
Image Files Services
75
Files and File Manipulations
75
Manual Load File
75
Delete File
76
Delete All Custom Files
77
Rename a File
78
File Options
79
Save Custom Settings
79
10 Layout Menu
81
Overview Flow
81
Main Window
81
Size Adjustment
82
Position Adjustment
84
PIP Window
86
Introduction to PIP
86
Picture in Picture Activation
86
Picture in Picture Size of the Window
87
Picture in Picture, Position Window
89
Layout File Services
90
Load Layout
90
Rename a Layout
91
Delete a Layout
92
Copy / Save as a Layout
93
11 Lamp Menu
95
Overview Flow
95
Lamp Power Mode
95
Lamp Power
96
Lamp Identification
97
Status and Run Time Overview Lamps
97
Lamp Mode
98
12 Alignment Menu
99
Overview Flow
99
Orientation
99
Lens Adjustment
99
Side Keystone
99
Blanking
99
Optical Dimming
99
Gamma
99
Internal Pattern
99
Color Space
100
Advertisement
Barco CLM R10+ Specifications (4 pages)
Barco CLM R10+: Specifications
Brand:
Barco
| Category:
Projector
| Size: 0.75 MB
Barco CLM R10+ Supplementary Manual (1 page)
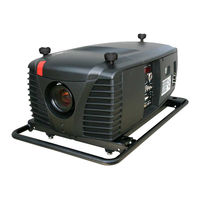
CLM series projectors
Brand:
Barco
| Category:
Projector
| Size: 0.02 MB
Advertisement
Related Products
Barco CLM-HD6
Barco CLM HD8
Barco CLM W6
Barco OverView cDR+80-DL
Barco CADWall
Barco SERIAL COMMUNICATION LCD PROJECTOR
Barco CTHD-61B
Barco CRPN-52B
Barco CRPN-62B
Barco CINEVERSUM 70
Barco Categories
Projector
Monitor
Projector Accessories
Medical Equipment
Controller
More Barco Manuals
Login
Sign In
OR
Sign in with Facebook
Sign in with Google
Upload manual
Upload from disk
Upload from URL