Sign In
Upload
Manuals
Brands
Alpine Manuals
Car Navigation system
X009-FD2
Alpine X009-FD2 Manuals
Manuals and User Guides for Alpine X009-FD2. We have
1
Alpine X009-FD2 manual available for free PDF download: Quick Reference Manual
Alpine X009-FD2 Quick Reference Manual (250 pages)
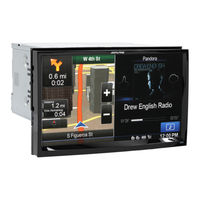
9-INCH ADVANCED NAVI STATION
Brand:
Alpine
| Category:
Car Navigation system
| Size: 42.19 MB
Table of Contents
English
26
Table of Contents
26
Warning
31
Points to Observe for Safe Usage
31
Operating Instructions
31
Important Information
31
Precautions
31
Warning
32
Caution
32
Notice
33
Discs Playable on this Unit
34
Features
38
Auto User Setting Change
38
My Favorites
38
Easy Sound Setting by Car Type (I-Personalize)
39
About Dual Screen
39
Dual Screen Display Position
40
Accessory List
41
Location of Controls
41
Getting Started
41
Turning Power on or off
42
Turning the System on
42
Initial System Start-Up
42
Inserting/Ejecting a Disc
42
Inserting the Disc
42
Removing the Disc
42
Common Operations
43
Using My Favorites
43
Lowering Volume Quickly
43
Adjusting the Volume
43
Adjusting the Screen Viewing Angle
43
User Registration
44
Setting My Favorites
45
Adding My Favorites
45
Editing My Favorites
45
Displaying the Camera Image
46
I-Personalize Setup
46
Easy Sound Setup Mode/Bass ENGINE SQ Mode
47
Easy Sound Setup Mode
47
BASS ENGINE SQ Mode
47
Facebook Notification Function
48
Applying Tuneit
48
Adjusting the Sound Via the Smartphone
48
Access to Idatalink Mode
48
Settings When Switching Users
50
How to Input Characters and Numbers (Keypad)
50
Top Banner and Bottom Banner Fade out Setting
51
Switching Sources
51
Screen off Function
51
Rear Entertainment Function
52
Switching the Dual Screen Display
52
Touch Operation
52
Selecting an Item in a List
52
About the Indicator Display
53
Presetting Stations Manually
54
Radio/Hd Radio
54
Listening to the Radio
54
Rbds
54
Presetting Stations Automatically
55
Tuning to Preset Stations
55
Forced Analog Mode
55
Receiving a Multicast (HD Radio Mode Only)
55
PTY (Program Type) Tuning (Analog Broadcasts Only)
55
Displaying Radio Text
56
Storing the Tag Information (HD Radio Mode Only)
56
About the Feature Logos
56
Storing the Tag Information
56
Random Play)
57
Playback
57
Repeat Play
57
CD/Mp3/Wma/Aac
57
Selecting Folders (Concerning MP3/WMA/AAC)
58
Searching from CD Text
58
File/Folder Name Search (Concerning MP3/WMA/AAC)
58
About MP3/WMA/AAC
58
DVD
60
Playing a Disc
60
If a Menu Screen Appears
61
Numeric Keypad Input Operations
61
Finding the Beginnings of Chapters/Tracks/Files
62
Fast-Forwarding/Fast-Reversing
62
Stopping Playback (PRE STOP)
62
Stopping Playback
62
Displaying the Top Menu Screen
62
Displaying the Menu Screen
62
Playing Still Frames (Pausing)
63
Forward Frame-By-Frame Playback
63
Slow Motion Playback
63
Selecting Folders
63
Repeat Playback
63
Searching by Title Number
64
Searching Directly by Chapter Number
64
Searching for a Desired Video File
64
Switching the Angle
64
About DIVX
65
Switching the Audio Tracks
65
Switching the Subtitles (Subtitle Language)
65
Setup
66
Setup Operation
66
General Setup
66
General Setup Operation
66
Idatalink Setup
66
Setting the Source Category
66
Format Settings
67
Setting Top Banner and Bottom Banner Display
67
Remote Sensor Setting
67
Setting the Menu Language
67
Setting the Default Vehicle Screen
67
Setting the Scroll
67
Setting the Hands-Free Connection
67
Text Display Setting
67
Setting the Maestro Module
67
Adjusting the Touch Panel
68
Screen/Led Customize
68
Initializing the Touch Panel Corrected Values
68
Visual Setting
68
Switching the Display Color
68
Adjusting the Dimmer of Button Lighting at Night
68
Backlight
68
Setting the Brightness of the Backlighting
68
Switching Display Modes
69
Adjusting the Live Contrast
69
Selecting the Visual EQ Mode (Factory's Setting)
69
Adjusting Brightness
69
Adjusting Color of Picture
69
Adjusting Tint of Picture
69
Displaying the Product Information
70
Checking the DIVX ® Registration
70
Initializing the System
70
About X009
70
Adjusting Picture Quality
70
Saving and Calling the Adjusted Picture Quality
70
Adjusting Image Contrast
70
Sound Setup
71
Sound Setup Operation
71
Installation Setup
71
Setting the Digital Output
71
Setting the External Audio Processor On/Off
71
Setting the Subwoofer Phase
72
Setting the MX (Media Xpander)
72
Adjusting the Subwoofer Level
72
Turning Subwoofer ON/OFF
72
Rear Speaker Setting
72
Setting the Balance/Fader
72
Setting the Balance/Fader/Subwoofer
72
Equalizer Presets
73
Adjusting the Parametric Equalizer Curve (Parametric EQ)
73
Adjusting the Time Correction (Time Correction)
74
Adjusting the Crossover Settings (X-Over)
75
Setting Defeat
75
Volume Setting
75
Setting the Volume for each Source
75
About Time Correction
76
About the Crossover
77
Setting the Slide Source Change
78
Customizing the Source Banner
78
Setting the Easy Sound Setup Position
78
Source Layout Setting
78
Source Setup Operation
78
Source Setup
78
Disc Setting
79
Changing the Language Setting
79
Setting of the Menu Language
79
Setting of the Audio Language
79
Setting of the Subtitle Language
79
Changing the Country Code Setting
79
Setting the Rating Level (Parental Lock)
79
Setting the TV Screen Mode
80
Setting the Favorite Sports Team Alerts
81
Managing Artist, Song and Sports Team Alerts
81
Siriusxm Setting
81
Setting the Parental Lock
82
Signal Strength Information
82
Auxiliary (AUX) Setting
83
Setting the Auxiliary (AUX) Mode
83
Setting the Primary Auxiliary (AUX) Name (aux 1 Setup)
83
Setting the AUX3
83
Setting the aux 3 Source Select (Switching the Visual Input Signal System)
83
Rear Seat Entertainment (RSE) Setting
83
Setting the Rear Seat Entertainment System
83
Bluetooth Setup Operation
84
Bluetooth Setup
84
Setting the Communication Mode with a Smartphone
84
Tuneit Setting
84
Setting the Bluetooth Pandora
84
Setting Hands-Free Connection of Idatalink
85
Bluetooth Setting
85
Displaying Bluetooth Information
85
Registering the Bluetooth Device
85
Adjusting the Caller Volume
86
Deleting All the Histories
86
Adjusting the Microphone Level
86
Adjusting the Ring Tone Volume
86
Selecting the Output Speaker
86
Changing the Character Code of the Phone Book
86
Setting the Passcode
86
Automatic Connection Setting
86
Camera Setup
87
Camera Setup Operation
87
Direct Camera Setting
87
Setting the Camera Input
87
AUX Camera Setting
88
Setting the Camera Input
88
Camera Interrupt Setting (Power off Mode)
89
Reverse Mute Setting
89
Hands-Free Phone Control
90
Disconnecting the Bluetooth Connection
90
Connecting a Bluetooth Device
90
Bluetooth Operation
90
Before Using Bluetooth
90
Setup before Using
90
About the Hands-Free Phone
90
About Bluetooth
90
Calling
91
Dialing a Number in Call History
91
Using Short Cut Dialing to Make a Call
91
Changing the Connecting Bluetooth Device
91
Hanging up the Telephone
91
Adjusting Ringtone Volume
91
Answering a Call
91
Dialing a Number in the Phone Book
92
Entering a Phone Number to Make a Call
92
Redial Function
92
Using Voice Recognition Function
92
Using Siri
92
Voice Dial Function
93
Adjusting the Speech Volume
93
Changing the Voice Output
93
DTMF (Touch-Tone) Function
93
Operations During a Conversation
93
Phone Book Function
94
Synchronizing the Phone Book
94
Adding the Phone Book
94
Deleting the Phone Book Entries
94
Playback
95
Bluetooth Audio
95
Assigning as a Short Cut Dialing Number
95
Repeat Play
96
Random Play)
96
Selecting Groups
96
Search Function
96
Playing the Idatalink-Bluetooth Audio
96
Auxiliary Device (Optional)
97
Operating Auxiliary Devices (Optional)
97
Operating an External DVD Player
97
Change to the External DVD Mode
97
About the DVD Operation Screen
97
About the DVD Changer Operation Screen
98
Operating an External DVD Changer
98
Change to the External DVD Changer Mode
98
Operating the Mobile Digital TV Receiver (DVB-T)
99
Changing to the Mobile Digital TV Receiver (DVB-T) Mode
99
About the DVB-T Operation Screen
99
Operating a TV
99
Change to the TV Mode
99
About the TV Operation Screen
99
Adjusting the Caution Display Location
100
Switching the Image Pattern for the Rear Camera
100
Guide Display ON/OFF Setting
100
Displaying the Rear View Video Manually
100
Displaying the Rear View Video While the Car Is in Reverse
100
Rear Camera Operation
100
Camera Operation (Optional)
100
About the Rear Camera Guide
101
Front Camera Operation
103
Displaying the Front View Video Manually
103
Switching the Image Pattern for the Front Camera
103
About the Adjustment of Guide Display ON/OFF Setting and Adjustment of Caution Display Location
103
Other Camera Operation
103
About the Adjustment of the Caution Display Location
103
Changing the Display
104
Receiving Channels with the Siriusxm Tuner
104
Tuning Channels by Category
104
Siriusxm Satellite Radio Operation (Optional)
104
Checking the Siriusxm Radio ID Number
105
Storing Channel Presets
105
Tuning Channels Using Presets
105
Tune Start Function
105
Tune Scan Function
105
Search Function
106
Selecting the Channel Directly
106
Storing the Desired Song/Artist
106
Using Jump Memory and Jump Recall Function
107
Parental Lock Function
107
Replay Function
107
Receiving and Tuning to an Alert
107
Random Play (M.I.X.)
110
Random Play (M.I.X. ALL)
110
Searching for a Desired Song
110
File/Folder Name Search
110
Tag Search
111
Direct Up/Down Function
111
Select the Desired Folder (Folder Up/Down)
111
Playing the Idatalink Usb/Ipod
111
Ipod/Iphone (Optional)
112
Playback
113
Searching for a Music File
113
Search Position Memory
114
Searching for a Desired Video File
114
Direct Up/Down Function
114
Alphabet Skip Function
114
Repeat Play
115
Random Play (Shuffle)
115
Random Play (Shuffle All)
115
HDMI Device (Optional)
115
Pandora ® Internet Radio (Optional)
116
Listening to Pandora
116
Iphone Pandora
116
Bluetooth Pandora
116
Quickmix
117
Thumbs" Feedback
117
Creating a New Station
117
Searching for a Desired Station
117
Bookmarking a Desired Track or Artist
118
Information
118
Product Software Update
118
About Dvds
118
List of Language Codes
120
List of Country Codes
121
In Case of Difficulty
123
If this Message Appears
124
Specifications
127
END USER LICENSE AGREEMENT (Microsoft)
128
End User License Agreement (Navteq)
130
Installation and Connections
131
Warning
131
Caution
131
Precautions
131
Installation
132
Connections
134
System Example
137
Table of Contents
164
Warnings and Safety Information
167
Getting Started
168
Buttons and Other Controls on the Screen
169
Using Keyboards
170
Beyond Single Screen Tap
171
Map Screen
172
Navigating on the Map
172
Objects on the Map
174
Position Markers
174
Selected Map Location (Cursor) and Selected Map Object
174
Streets and Roads
174
Vehimarker and Lock-On-Road
174
Turn Preview and Next Street
175
Junction View
176
Lane Information and Signposts
176
Motorway Exit Services
177
Object Types
177
Elements of the Active Route
178
Traffic Events
178
Manipulating the Map
179
Checking the Details of the Current Position (Where am I?)
181
Navigation Menu
182
Entering an Address or a Part of the Address
183
On-Road Navigation
183
Selecting the Destination of a Route
183
Entering an Address
184
Entering the Midpoint of a Street as the Destination
186
Selecting an Intersection as the Destination
187
Selecting a City/Town Centre as the Destination
189
Entering an Address with a Postal Code
190
Tips on Entering Addresses Quickly
191
Quick Search for a Place of Interest
192
Selecting the Destination from the Places of Interest
192
Searching for a Place of Interest Using Preset Categories
193
Searching for a Place of Interest by Category
196
Searching for a Place of Interest by Name
198
Using the Free Form Search
200
Selecting a Map Location as the Destination
201
Selecting the Destination from Your Address Book
202
Selecting a Recent Destination from the History
203
Entering the Coordinate of the Destination
204
Building a Route from the List of Destinations (Create Route)
205
Checking Route Parameters and Accessing Route Related Functions
206
Viewing the Entire Route on the Map
206
Modifying the Route
207
Selecting a New Destination When Already Having a Route: New Route, Waypoint or Final Destination
207
Setting a New Starting Position for the Route
208
Editing the List of Destinations (Edit Route)
209
Cancelling the Active Route
210
Checking Route Alternatives
210
Changing the Vehicle Used in Route Planning
211
Changing the Road Types Used in Route Planning
212
Saving a Location as an Address Book Entry
214
Saving a Location as an Alert Point
215
Editing an Alert Point
216
Watching the Simulation of the Route
217
Navigating in Off-Road Mode
219
Off-Road Navigation
219
Selecting the Destination of the Route
219
Concepts
220
Reference Guide
220
Route Calculation and Recalculation
220
Smart Zoom
220
Green Routing
222
Speed Limit Warning
222
Historical Traffic
223
Real-Time Traffic Information (TMC)
223
Traffic Information in Route Planning
223
Information Menu
224
Settings Menu
226
Sound and Warnings
228
Route Settings
230
Traffic Settings
230
Map Settings
233
Visual Guidance Settings
235
Regional Settings
236
Trip Monitor
237
Trip Monitor Settings
237
Glossary
238
Advertisement
Advertisement
Related Products
Alpine X009
Alpine X008U
Alpine X009E
Alpine X008AU
Alpine X008EU
Alpine X009E-U
Alpine X009-FD1
Alpine X702D-F
Alpine X803D-T6R
Alpine X903D-G7
Alpine Categories
Car Receiver
Amplifier
Outdoor Fountain
Car Video System
Car Navigation system
More Alpine Manuals
Login
Sign In
OR
Sign in with Facebook
Sign in with Google
Upload manual
Upload from disk
Upload from URL