Miele FNS37492iE Operating And Installation Instructions
Hide thumbs
Also See for FNS37492iE:
- Operating and installation instructions (92 pages) ,
- Operating and installation instructions (92 pages)

Related Manuals for Miele FNS37492iE


Summary of Contents for Miele FNS37492iE
- Page 1 Operating and Installation Instructions Freezer To prevent accidents and damage to the appliance, you must read all instructions before installing for using the appliance. en - US M.-Nr. 10 117 220...
-
Page 2: Table Of Contents
Contents IMPORTANT SAFETY INSTRUCTIONS....... . . 4 Guide to the appliance ..........10 How to save energy . - Page 3 Contents Turning the ice cube maker On/Off ........34 Making a large amount of ice cubes .
-
Page 4: Important Safety Instructions
The appliance is not accidents and machine damage. suitable for use in areas where there is a risk of explosion. Miele cannot be held liable for damage This appliance conforms to current resulting from improper or incorrect use safety requirements. Inappropriate of the appliance. -
Page 5: Technical Safety
– air the room in which the appliance is posed by it. They should be supervised located for several minutes whenever you are working in the – contact Miele Technical Service kitchen. The more coolant there is in an Ensure that any packing material is... - Page 6 IMPORTANT SAFETY INSTRUCTIONS If the power cord is damaged, it Installation, repair and maintenance must be replaced by a Miele authorized work should be performed by a Miele technician in order to protect the user authorized service technician in from harm.
- Page 7 The cans or bottles could dates and storage instructions! explode. Danger of injury and damage to the appliance! Use only genuine original Miele parts. If parts or accessories from other When cooling drinks quickly in the manufacturers are used, the warranty freezer section, make sure bottles are may become invalid.
-
Page 8: Cleaning And Care
IMPORTANT SAFETY INSTRUCTIONS Cleaning and care – before turning off the ice cube maker for a long period of time Do not use any oil or grease on the door seals. Transport They can cause the seals to deteriorate over time. Always transport the appliance in an upright position and in its original Never use a steam cleaner to clean... - Page 9 IMPORTANT SAFETY INSTRUCTIONS When disposing of the appliance, ensure that the refrigeration circuit is not damaged to prevent uncontrolled escape of the refrigerant it contains (data on type plate) and oil. Take care not to damage any part of the cooling system, for example by –...
-
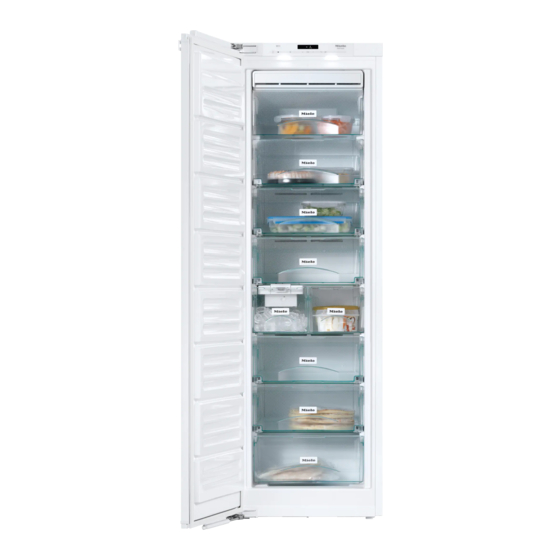
Page 10: Guide To The Appliance
Guide to the appliance Control panel a For turning the entire appliance on d For setting the temperature and off. (X for colder), selection button in settings mode. b Optical interface e For confirming a selection (OK (for Service use only) button) c For turning the SuperCool function f For setting the temperature... - Page 11 Guide to the appliance Explanation of symbols Symbol Meaning Function Safety lock Prevents the user from unintentionally turning off the appliance, adjusting the temperature, turning on the SuperCool functions or entering settings. Acoustic signals Selection options for the keypad tone and the door and temperature alarm tones Display brightness For adjusting the brightness of the display...
- Page 12 Guide to the appliance a Control panel b Interior lighting c Frost-free unit d Top freezer drawer, can also be used as a freezing tray e Freezer drawers f Ice cube drawer with automatic ice cube maker...
-
Page 13: How To Save Energy
How to save energy Normal Increased energy consumption energy consumption Installation / In a well-ventilated room. In an enclosed, maintenance poorly ventilated room. Protected from direct In direct sunlight. sunlight. Away from heat sources Near a heat source (radiator, (radiator, range/oven). range/oven). - Page 14 How to save energy Normal Increased energy consumption energy consumption Drawers and shelves arranged as they were when the appliance was delivered. Only open the doors when Frequent opening of the door necessary and for as short a for long periods will cause a time as possible.
-
Page 15: Turning The Appliance On And Off
Turning the appliance on and off Before first use Turning the appliance on Once the appliance has been Packaging material connected to the electrical supply, the ^ Remove all packaging material from power supply symbol t will appear in the inside of the appliance. the display after a short while. -
Page 16: Turning The Appliance Off
Turning the appliance on and off Turning the appliance off Turning off for longer periods of time If the appliance is not needed for a longer period of time: ^ turn the appliance off, ^ Touch the On/Off button. ^ unplug the power cord or trip the If this does not work, the safety lock circuit breaker, is activated. -
Page 17: The Right Temperature
The right temperature Temperature display It is very important to set the correct temperature for storing food in the In normal operation the temperature appliance. Bacteria will cause food display shows the average, current which is not stored at the correct temperature in the freezer. -
Page 18: Sets The Temperature
The right temperature Sets the temperature Approximately 5 seconds after you release the button, the actual ^ Use the two buttons underneath the temperature value in the appliance will display to set the temperature. be displayed. By touching the button: When you have adjusted the temperature, wait for approx. -
Page 19: Using Supercool
Using SuperCool For best results, turn on SuperCool Turning off SuperCool before putting fresh food into the The SuperCool function will turn itself freezer. off automatically after approx. 65 hours. Fresh food will be frozen quickly, so The quantity of fresh food placed in the that the nutritional value, vitamin freezer will determine the duration content, appearance and taste are... -
Page 20: Temperature And Door Alarm
Temperature and door alarm Your appliance has been fitted with a warning system which ensures that the However, if the temperature in the temperature in the freezer section freezer remains above 0°F (-18°C) cannot rise unnoticed and to avoid for a long time, check that the frozen energy being wasted if the door is left food has not started to defrost. -
Page 21: Door Alarm
Temperature and door alarm Door alarm Turning off the audio alarm An alarm will sound if the door is left If the audio alarm bothers you, it can be open for too long. The alarm symbol ; silenced. will light up. The amount of time until the door alarm is triggered depends on the setting selected and can be either 2 minutes... -
Page 22: Selecting Additional Settings
Selecting additional settings Safety lock 0 Certain appliance settings can only be selected in the settings mode. The safety lock can be activated to prevent: While you are in settings mode, the door alarm and any other fault – the appliance being turned off by messages are suppressed mistake, automatically, but the alarm symbol... -
Page 23: Temperature Unit (Celsius Or Fahrenheit)
Selecting additional settings Temperature unit (Celsius or Fahrenheit) The temperature can be displayed in either Fahrenheit °F or Celsius °C. ^ By touching the X or Y button, you The factory default is Fahrenheit °F. can now select whether the safety lock is activated or deactivated: 0: the safety lock is deactivated Setting the temperature display to... - Page 24 Selecting additional settings ^ By tapping the X or Y button you can ^ Touch the buttons for setting the now select °C. temperature (X or Y) repeatedly until °C and °F flash in the display. ^ Touch the OK button to confirm your ^ Touch the OK button to confirm your selection.
-
Page 25: Acoustic Signals )
Selecting additional settings Acoustic signals ) The appliance has acoustic signals such as the sensor tone and the door and temperature alarms. ^ By touching the X or Y button you You can turn the button tone or the door can now select: 0: button tone off;... -
Page 26: Display Brightness S
Selecting additional settings Display brightness s You can adjust the brightness of the display to suit the light conditions in the room. ^ By touching the X or Y button, you The display brightness can be changed can now alter the brightness of the in increments from 1 to 3. -
Page 27: Sabbath Mode
Selecting additional settings Sabbath mode ¬ Turning on Sabbath mode The appliance offers a Sabbath mode for the purposes of religious observance. The following are turned off: ^ Touch the settings button. – the interior lighting when the door is All symbols available for selection will opened, appear in the display and the 0 symbol... - Page 28 Selecting additional settings ^ Touch the OK button to confirm your selection. The selected setting is applied, the ¬ symbol lights up. As soon as the ¬ symbol goes out in the display after about 3 seconds, Sabbath mode is turned on. ^ Turn off Sabbath mode after the Sabbath has passed.
-
Page 29: Adjusting The Interior Fittings
Adjusting the interior fittings Freezer drawers on telescopic Shelves runners The shelves can be removed. Some of the freezer drawers are on ^ Lift the shelf slightly at the front and telescopic runners and can be then pull it forwards and out. removed for filling, emptying or cleaning purposes. -
Page 30: Freezing And Storing Food
Freezing and storing food Before placing food in the freezer Always follow USDA guidelines on ^ When freezing more than food safety. 4.5 lb (2 kg) of fresh food, turn on the SuperCool function some time before placing food in the freezer (see WARNING! "Using SuperCool"). -
Page 31: Defrosting
Freezing and storing food Defrosting When removing the upper freezer Frozen food can be thawed in various drawers, please note: ways: The bottom drawer must always – in the microwave remain in the appliance. When placing food on the shelf, –... -
Page 32: Cooling Drinks Quickly
Freezing and storing food Cooling drinks quickly When cooling drinks quickly in the freezer, make sure bottles are not left in for more than one hour; otherwise they could burst. Using the cool pack The cool pack prevents the temperature in the freezer rising too quickly in the event of a power cut. -
Page 33: Making Ice Cubes
Making ice cubes For the automatic ice cube maker to Rinse the ice cube maker along with operate it must be connected to the the water pipes: water supply. – before installation, – if the ice cube maker has not been Ice cube maker with integrated used for a longer period of time –... -
Page 34: Turning The Ice Cube Maker On/Off
Making ice cubes Turning the ice cube maker Make only the number of ice cubes On/Off required in your household with the ice cube maker. The drawer must be completely shut for ice cubes to be produced. ^ Touch the settings button. After the appliance is turned on for All symbols available for selection will the first time it can take up to 24... -
Page 35: Changing The Size Of The Ice Cubes
Making ice cubes ^ Touch the buttons for setting the If you require a large quantity of ice temperature (X or Y) repeatedly until cubes, the symbol for the ice cube maker ® ^ replace the full ice cube drawer with flashes in the display. -
Page 36: Turning The Ice Cube Maker On/Off With The On/Off Button
Making ice cubes Turning the ice cube maker On/Off with the On/Off button ^ Open the ice cube drawer slightly. ^ Press and hold the On/Off button a on the ice cube maker – until the indicator light comes on. The symbol for the ice cube maker ®... -
Page 37: Automatic Defrosting
Automatic defrosting WARNING! Risk of injury and damage. Do not use mechanical devices or other means to accelerate the defrosting process, other than those recommended by the manufacturer. The appliance is equipped with a "NoFrost" system for automatic defrosting as needed. The moisture generated in the appliance collects on the condenser, and is automatically defrosted and... -
Page 38: Cleaning
Cleaning Information regarding cleaning WARNING! agents Danger of electric shock. To better maintain your appliance Unplug refrigerator or disconnect avoid the following: power. – cleaning products containing soda, Danger of fire. ammonia, acid or chloride Do not damage the refrigerant –... -
Page 39: Rinsing The Ice Cube Maker
Cleaning Rinsing the ice cube maker Ensure the ice cube drawer is empty before selecting the "Rinse the ice Rinse out the ice cube maker and cube maker" setting. The water will the water pipes: otherwise flow onto the contents of –... -
Page 40: Cleaning The Ice Cube Tray
Cleaning ^ Touch the OK button to confirm your Cleaning the ice cube tray selection. Clean the ice cube maker: The selected setting will be saved. The – before switching off the ice cube ice cube maker symbol ® will flash in maker for an extended period of the display and the indicator light will time,... - Page 41 Cleaning ^ Remove and clean the ice cube drawer. The ice cube tray is not removable and can only be cleaned when in ^ Touch the settings button. place. All symbols available for selection will appear in the display and the 0 symbol flashes.
-
Page 42: Before Cleaning
Cleaning Before cleaning To remove the telescopic runners: ^ Turn off the appliance. The display goes out and cooling is turned off. If this does not happen, then the safety lock is still activated (see "Selecting additional settings - Deactivating the lock"). ^ Unplug the appliance or trip the circuit breaker. -
Page 43: Interior And Accessories
Cleaning Interior and accessories The following parts cannot be cleaned in a dishwasher: Clean the appliance at least once a – the ice cube drawer month. – the freezer drawers Remove any soiling immediately so – the shelves that it does not dry up. –... -
Page 44: Ventilation Slits
Cleaning Ventilation slits After cleaning ^ The ventilation slits should be ^ Slide all shelves back into the cleaned on a regular basis with a appliance. brush or vacuum cleaner. A build-up ^ Close the appliance door. of dust will increase the energy ^ Connect the appliance again and consumption of the appliance. -
Page 45: Frequently Asked Questions
With the aid of the following guide minor problems can be corrected without a ser- vice call. If, having followed the suggestions below, you still cannot resolve the problem, please contact Miele Technical Service. To prevent cold from escaping, open the appliance doors as little as possible until the malfunction has been corrected. - Page 46 Frequently asked questions The compressor runs more and more often and for longer periods of time, and the temperature in the appliance drops. Problem Possible cause Solution ^ Correct the temperature The temperature in The temperature setting is setting. the appliance is too too low.
- Page 47 Frequently asked questions The compressor runs more and more often and for longer periods of time, and the temperature in the appliance drops. Problem Possible cause Solution ^ Do not block the The compressor is The ventilation slits in the turning on more housing unit have been ventilation slits.
- Page 48 Frequently asked questions The compressor comes on less and less often and for shorter periods of time, the temperature in the appliance rises. Problem Possible cause Solution ^ Correct the temperature The temperature in This is not a fault. setting. the appliance is too high.
- Page 49 Frequently asked questions Indication in the display Problem Possible cause Solution "F0 to F9" appears in ^ Contact Miele Technical There is a fault. Service. the display. ^ Contact Miele Technical "FE*" appears in the There is a fault. Service.
- Page 50 Frequently asked questions Indication in the display Problem Possible cause Solution ^ Remedy the alarm. The The alarm symbol The temperature in the ; flashes in the alarm symbol ; will freezer has risen higher or disappear and the display. fallen lower than the audible tone will stop.
- Page 51 15 minutes if the door is left will come on. open. ^ Contact Miele Technical If this is not the case, then Service. there is a fault. The LED lighting may only be repaired or replaced by Miele Technical Service.
- Page 52 ^ Contact Miele Technical The ® and ; The is a fault with the ice Service. symbols flash. The cube maker. indicator light on the ice cube maker also flashes.
- Page 53 Frequently asked questions Other problems Problem Possible cause Solution ^ Use a blunt instrument Food has frozen The food packaging was (such as a spoon handle) together or to the not dry when loaded in the to carefully pry them wall.
-
Page 54: Noises
Noises Normal noises What causes them Brrrrr... This noise may get louder for brief periods when the motor kicks on. Blub, blub..A gurgling noise can be heard when the refrigerant circulates through the pipes. Click..Clicking sounds occur whenever the thermostat turns the motor on or off. -
Page 55: Lead Free Certificate
Lead free certificate This product is tested and certified by WQA against ORD0902 for California "lead free" compliance. Miele & Cie. KG Carl-Miele-Straße 29 D-33332 Gütersloh... -
Page 56: Service / Warranty
– Miele Technical Service. telephone number. See back cover of the this manual contact details. When contacting Miele Technical Ser- vice, please quote the model and serial number of your appliance. This information is given on the data plate inside your appliance. -
Page 57: Information For Dealers/Showrooms
Information for dealers/showrooms Demo mode r This appliance can be presented in retails stores and in showrooms with the help of the "Demo mode." The controls ^ Place your finger on the X button and and lighting will still work, but the hold it there. - Page 58 Information for dealers/showrooms Switching off Demo mode The r is illuminated in the display. ^ Tap the X or Y button so that 0 appears in the display (Demo mode is inactive). ^ Tap the settings button. All symbols available for selection will appear in the display and the 0 symbol flashes.
-
Page 60: Installation Instructions
Installation Instructions Information is subject to change. Please refer to our website to obtain the most current product specification, technical & warranty information. To prevent accidents and machine damage read these instructions before installation or use. -
Page 61: Caring For The Environment
Caring for the environment Disposing of the packaging Disposal of your old appliance materials Old appliances may contain materials that can be recycled. Please contact The packaging is designed to protect your local recycling authority about the the appliance from damage during possibility of recycling these materials. -
Page 62: Plumbing
Plumbing Information regarding the The appliance must be connected to a cold water line that: water connection – is directly connected to the fresh All plumbing work should be carried water supply in order to ensure a out by a suitable qualified person, in circulation of the water in the cold accordance with local and national water line. - Page 63 Plumbing The water connection can be found at the back of the appliance. The solenoid In the following, please note: valve b has a 3/4" connection thread. inserting the water filter incorrectly can cause damage! The connection parts included with the appliance permit the connection of ^ Place the water filter e on top of the various water lines (a water line is not...
- Page 64 Plumbing Caution! Risk of damage to the ice cube maker! During the operation of the ice cube maker, do not interrupt the water supply. ^ Secure the water line g using the retaining clip j. ^ Slowly open the water shut-off valve and check for leaks.
-
Page 65: Electrical Connection
Electrical connection Failure to follow these This appliance is equipped with instructions can result in death, fire, a three-prong grounding plug to or electrical shock. prevent shock hazards. It should be plugged directly into a properly Improper connection of the grounded outlet. - Page 66 Electrical connection The appliance must be connected to an Do not use an extension cord to electrical outlet that is properly connect the appliance to the power grounded. The electrical installation supply. Extension cords do not must comply with the applicable guarantee the required safety of the electrical code.
-
Page 67: Installation Information
Installation information – The plug and cord must not touch To avoid tipping over, the appliance the rear of the appliance as they must be properly installed and could be damaged by vibrations secured. from the appliance. – Do not plug in other devices behind this appliance. -
Page 68: Ventilation
Installation information Ventilation WARNING! Danger of damage from overheating. May restrict operation. Keep ventilation openings, in the appliance enclosure or in the built-in structure, clear of obstruction. The ventilation gaps given must be observed, otherwise the compressor will run more frequently and for longer periods. -
Page 69: Ventilation Slits
Installation information Ventilation slits Top ventilation cross-section The ventilation cross section at the top If you would like to use the ventilation of the appliance can be constructed in slits, proceed as follows: different ways: ^ Cut an opening in the plinth b as shown in the figure. -
Page 70: Before Installation
Installation information Before installation ^ Before installation, remove the accessories bag containing installation components and accessories from the appliance, and remove the sealing strip from the appliance door. ^ Do not remove the following from the back of the appliance: ^ Remove the red transport safety device a and close the created hole with the included stopper b. -
Page 71: Installation Dimensions
Installation dimensions Before installation, ensure the building-in niche is the correct size. The specified ventilation cross-sections must be adhered to in order to ensure the correct functioning of the appliance. Niche height FNS 37492 iE 69 3/4" - 70 3/8" (1772 - 1788 mm) -
Page 72: Adjusting The Door Hinge
Adjusting the door hinge The door hinges are factory set so that the door can be opened wide. However if the opening angle of the door needs to be limited for any reason, the hinge can be adjusted to accommodate this. If, for instance, when it is opened the appliance door would hit an adjacent wall, you should limit the opening angle... -
Page 73: Changing The Door Hinging
Changing the door hinging Always change the door hinge with the assistance of another person. The appliance is supplied right-hand hinged. If left-hand hinging is required, the hinges must be changed: You will need the following tools for changing the door hinging: ^ Open the appliance door. - Page 74 Changing the door hinging Unscrew the door closing dampers Attention! When removed from the unit, the soft-close mechanism snaps shut. Risk of injury! ^ Place the door with the outer side downwards on a stable surface. ^ Remove the screws d completely. ^ Place the mounting bracket g on the opposite side and loosely screw in the screws d.
- Page 75 Changing the door hinging ^ Now turn over the appliance door so Fastening the soft-close mechanism that outer side faces upwards ^ Now turn over the appliance door so (hinges remain open). that the outer side faces downwards. Do not close the hinges. Danger of injury.
- Page 76 Changing the door hinging ^ Hang the appliance door f onto the pre-fitted screws d and , and then tighten the screws d and ^ Replace the covers a, b, and c. ^ Refit the locking pins into the top of the hinges to prevent the doors opening too far.
-
Page 77: Installing The Appliance
Installing the appliance To install the appliance you will need Two people are required to install the the following tools: appliance. ^ Install the appliance in a stable, solid housing unit, positioned on an even and level floor. ^ Secure the housing unit against tipping. - Page 78 Installing the appliance Parts required for installation – Required for fitting the cabinet door: All installation parts are number coded. This coding is also used in the installation instructions. – Required for installing the appliance in its housing unit: ** Number depending on niche height. Also contains additional installation parts for fitting large or divided furniture doors.
- Page 79 Installing the appliance ^ Push the appliance two-thirds of the way into the installation space. Ensure that the power cord does not get caught. Tip to help you push it into position: Tie a piece of string around the plug to "increase"...
- Page 80 Installing the appliance ^ Screw in adjustable feet l completely. ^ Remove the cover f. ^ Secure the fastening part g using screws h loosely into the top left-hand side of the appliance. Do not tighten the screws so that you can adjust the position of this part.
- Page 81 Installing the appliance Installing the appliance ^ Push the appliance into the niche until all of the brackets are in line with the front edge of the furniture side wall. ^ Carefully remove the protective foil from sealing strip m. ^ Secure the sealing strip m flush with the front of the appliance on the door opening side.
-
Page 82: Securing The Appliance In The Niche
Installing the appliance ^ Check the position of the fixing bracket at the top and bottom front If the all round gap of 1 5/8" (42 mm) edge of the cabinet side wall again. is not maintained between the appliance housing and the front This will help maintain a 1 5/8"... - Page 83 Installing the appliance ^ Snap off any protruding ends from the mounting bracket. They are no longer required. ^ Replace covers f and u on the mounting brackets. ^ Push the loose bracket against the cabinet wall. ^ Secure mounting bracket j to the housing unit side wall with screw s.
- Page 84 Installing the appliance Only for an appliance with a niche height greater than 55'' (140 cm) For additional stability of the appliance in the unit, push the rods supplied in underneath the appliance between it and the floor of the housing unit: ^ Then secure handle v to one of the rods w.
-
Page 85: Installing The Custom Door Front
When fitting large or divided cabinet The door panel must be installed doors an extra fitting kit or set of correctly and not under tension. fixing brackets should be used. These are available to order from Miele. - Page 86 Installing the appliance Tip: Push installation aids b together with the cabinet front up to the height of the adjoining unit cabinet doors. ^ A gap of 5/16" (8 mm) is set ex works between the appliance door and the fixing bracket.
- Page 87 Installing the appliance ^ Place the door panel with the outer side downwards on a stable surface. ^ Secure the side cover q to the bracket on the opposite side of the hinge. ^ Turn the door over and attach the handle (if required).
- Page 88 Installing the appliance ^ Open the appliance door. Adjusting the position of the door ^ Hang the door panel on the threaded – Side adjustments (X) bolts h. ^ Adjust the door panel. ^ Screw the nuts c loosely onto bolts. –...
- Page 89 Installing the appliance ^ While counterholding adjusting bolts ^ Drill holes l in the door panel and fit h with a screwdriver, tighten nuts c screws m. Make sure the two metal edges are aligned (Symbol II). on the appliance door with ring spanner j.
- Page 90 Installing the appliance ^ Tighten all the screws again. The following confirms that the appliance is correctly installed: – The door must close properly. – The door must not touch the furniture body. – The seal at the upper corner of the side with the handle contacts tightly.
- Page 92 FNS 37492 iE en - US M.-Nr. 10 117 220 / 00...