Epson SureColor P800 Series Basics Manual
Hide thumbs
Also See for SureColor P800 Series:
- User manual (209 pages) ,
- Start here (4 pages) ,
- Reference manual (32 pages)
Table of Contents
Advertisement
Advertisement
Table of Contents

Related Manuals for Epson SureColor P800 Series


Summary of Contents for Epson SureColor P800 Series
- Page 1 Epson SureColor P800 Series ® ® Basics...
-
Page 2: Table Of Contents
Contents Introduction ......... . . 3 Using the Touch Screen . -
Page 3: Introduction
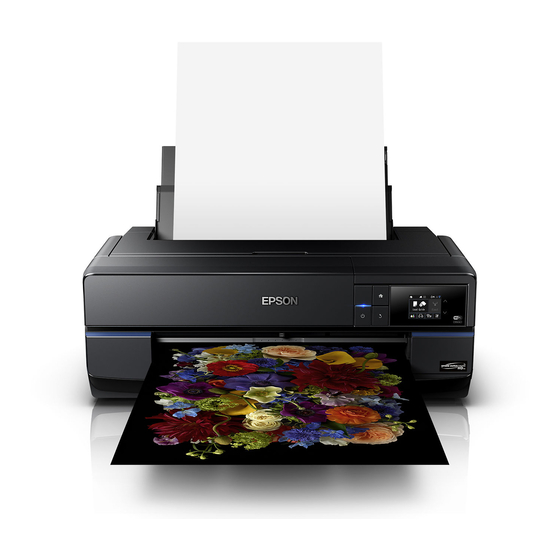
Introduction ® ® Your Epson SureColor P800 Series printer gives you exhibition quality prints on a wide variety of glossy and matte papers in many sizes. Your outstanding printouts result from these advanced features: ■ ® ® Epson UltraChrome HD ink cartridges for unprecedented gray balance, outstanding tonal range, and astounding color ■... -
Page 4: Using The Touch Screen
Using the Touch Screen The touch screen makes it easy to use all the features of your product. To save energy, the screen goes dark after several minutes of inactivity. Touch the screen to wake it up. Home menu LCD screen Power on/off Return to previous Navigate menus... -
Page 5: Loading Paper
You can purchase genuine Epson ink and paper at Epson Supplies Central ® www.epson.com/ink3 (U.S. sales) or www.epson.ca (Canadian sales). You can also purchase supplies from an Epson authorized reseller. To find the nearest one, call 800-GO-EPSON (800-463-7766). Loading Paper in the Sheet Feeder You can load the following paper types and quantities in the sheet feeder. - Page 6 1. Turn on the printer. 2. Open the paper support and pull up the extensions. 3. Press the front cover to open it. 4. Fully extend the output tray. Loading Paper...
- Page 7 5. Insert paper, glossy or printable side up, short edge first, against the right side and beneath the tab. Then press the button on the edge guide and slide it against the paper (but not too tightly). Note: Always load paper short edge first, even for landscape printing. Load letterhead or pre-printed paper top edge first.
-
Page 8: Loading Fine Art Paper
■ ■ ® Epson Cold Press Natural Epson UltraSmooth Fine Art Paper ■ ■ Epson Exhibition Fiber Paper Epson Velvet Fine Art Paper ■ ■ Epson Exhibition Watercolor Epson Watercolor Paper Radiant Paper Textured White ■ Epson Hot Press Bright 1. - Page 9 5. Insert a single sheet of fine art paper. Insert it short edge first with the printable side faceup. Note: Load paper short edge first, no matter which way your photo faces. Check the paper package for any additional loading instructions. 6.
-
Page 10: Loading Thick Media
9. Fully extend the output tray. 10. If necessary, select the , then press Paper Size Paper Type Note: To eject paper, press Eject on the main menu and press Yes to confirm. Loading Thick Media Use the manual feed tray to load media that is 1.2 to 1.5 mm thick. Note: Be sure to leave at least 17 inches (43 cm) of space behind the printer for the media to feed through. - Page 11 3. Press the front cover to open it, then push the center of the manual feed tray to extend it. 4. Insert a single sheet of thick media. Insert it short edge first with the printable side faceup. Note: Never try to load media from the rear, or you could damage the printer. 5.
- Page 12 6. Press on the touch screen. The paper loads inside the printer. Load Note: If you are returned to the home screen, select Load Guide, and then follow the instructions on the LCD screen. 7. When you see a message on the screen, close the manual feed tray by pushing it in until it latches.
-
Page 13: Loading Roll Paper (Optional)
Loading Roll Paper (Optional) You can load 13-inch to 17-inch wide roll paper for printing large images, panoramic images, or multiple photos, with or without borders using the optional roll paper unit. Tip: It’s a good idea to check the ink status and replace cartridges, if necessary, before printing a large print job. - Page 14 Removing and Installing the Roll Media Adapter ■ For roll canvas media with a 2-inch core, you need to remove the roll media adapter from the flange to fit the core size of the roll canvas media. Note: Thin media (less than 250 gsm) is not supported in this core size. 1.
- Page 15 2. Align the triangles on the gray adapter and the flange, and press until the hooks click into place. 3. Insert the other gray adapter onto the spindle, then attach it to the flange that is fixed to the spindle. Loading Roll Paper on the Spindle 1.
- Page 16 3. Insert the spindle into the roll paper core so that the end of the roll paper is facing towards you. 4. Press the roll paper against the fixed flange so that there is no gap between the flange and the roll paper. 5.
- Page 17 Loading Roll Paper in the Printer 1. Press the front cover to open it. Note: If the manual feed tray is open, push the center of the tray to close it. 2. Only extend the first section of output tray. 3.
- Page 18 4. Load the spindle with the roll paper into the roll paper unit. Load from the rear and make sure that the gray (fixed) flange is on the left side. Note: When loading canvas media, leave slack in the roll as it feeds and prints for the best results.
- Page 19 Removing Roll Paper Prints and Roll Paper 1. When printing is finished, you see this screen: Select to print a cut line and feed the paper. (If you select , you return to the main menu and your next print will No Cut be placed on the roll immediately following the last.
- Page 20 5. Hold both ends of the spindle and remove it from the roll paper unit. 6. Remove the black flange from the spindle. While holding the flange, press the edge of the spindle with your thumbs as shown. If it is difficult to remove, tap on the tip of the spindle on the black flange side.
-
Page 21: Printing From Start To Finish
Mac computer. For detailed instructions, see the online User’s Guide. Tip: It’s a good idea to check for updates to your Epson SureColor P800 Series software. See “Checking for Software Updates” on page 44 for instructions. Printing in Windows 1. - Page 22 3. On the Main tab, select the setting that matches the paper you Media Type loaded (see page 29). Note: The available media types vary depending on the type of black ink currently selected as the Ink setting. To avoid changing black ink more often than necessary, set the printer to the type of black ink you usually use (see page 41).
- Page 23 5. For the setting, select , or Print Quality Speed Quality Max Quality (available with certain media types only), or select to display Quality Options a window like this: Use the Speed/Quality slider to set from the following quality levels: ■...
- Page 24 Off (No Color Adjustment) driver. (The appropriate ICC profile must be selected in the imaging application.) Note: For color management instructions, see epson.com/proimaging/iccprofiles.html. For more information about print settings, click Help or see your online User’s Guide. 7. Choose the paper...
- Page 25 8. Select the paper setting for the paper you loaded. Size If you loaded roll paper, create a custom paper size. Select User Defined the Size menu, then click the button. Type a name for your User Defined custom size. For the Paper Width, enter inches (32.9 cm) for Super 12.95 B-size rolls.
-
Page 26: Printing With Os X
1. Open a photo or document in a printing program, then select the print command in your application. 2. Select your product as the setting. Printer Select your Epson product 3. Click Show Details 4. Select the setting for the paper size and source you are using: Paper Size ■... - Page 27 ■ To print on paper loaded in the manual feed tray, select a paper size with a ) option. Front - FineArt Fr.-FineArt 5. Choose portrait or landscape as the setting for your document or Orientation photo. 6. Select from the pop-up menu. Printer Settings Note: In certain programs, you may need to select Advanced before you can select Print...
- Page 28 Adobe RGB color standard. Adobe RGB Use this setting if your source file was captured in Adobe RGB. Note: For color management instructions, see epson.com/proimaging/iccprofiles.html. For more information about print settings, click Help or see your online User’s Guide. 10. Select an...
-
Page 29: Selecting The Correct Paper Type
* OS X: When printing with Photo Black ink, select the PK (Photo Black) option. ** For the best results on this paper, print using the premium ICC profile installed by the driver. For new media types, download the premium ICC profiles from Epson at epson.com/proimaging/iccprofiles.html. - Page 30 Epson Watercolor Paper Radiant White Watercolor Paper - Radiant White Epson Exhibition Watercolor Paper Textured Exhibition Watercolor Textured Epson UltraSmooth Fine Art Paper 325 gsm UltraSmooth Fine Art Paper Epson Exhibition Canvas Matte Exhibition Canvas Matte Epson Exhibition Canvas Natural Matte...
-
Page 31: Maintaining Your Printer
Maintaining Your Printer Follow the steps in these sections to keep the Epson SureColor P800 Series working at its best: ■ “Checking and Cleaning the Print Head” below ■ “Checking and Aligning the Print Head” on page 33 ■ “Checking the Ink Cartridge Status” on page 34 ■... -
Page 32: Cleaning The Print Head
If quality does not improve, one of the ink cartridges may need to be replaced. If that doesn’t help, contact Epson as described on page 48. If you do not use your product often, it is a good idea to print a few pages at least once a month to maintain good print quality. -
Page 33: Checking And Aligning The Print Head
Banding may also occur if your print head nozzles need cleaning (see page 31). 1. Load a few sheets of Epson Presentation Paper Matte (or the photo paper you have on hand) in the sheet feeder (see page 5). It’s best to use matte or photo paper for the most accurate alignment. -
Page 34: Checking The Ink Cartridge Status
On a Windows computer that is connected to the Internet, you may see a screen asking if you want to receive Epson offers the first time you try to print when ink is low. Click Accept or Decline. To disable checking for ink offers or updates from Epson, see the instructions in your online User’s Guide. - Page 35 System Preferences Printers , select your product, and select & Scanners Print & Fax Print & Scan . Select and select Options & Supplies Utility Open Printer Utility 2. Select EPSON Status Monitor You see this screen: Maintaining Your Printer...
-
Page 36: Replacing Ink Cartridges
T8509 Note: We recommend that you use genuine Epson cartridges and do not refill them. The use of other products may affect your print quality and could result in printer damage. Yields vary considerably based on images printed, print settings, paper type, frequency of use, and temperature. - Page 37 Make sure you have a new ink cartridge before you begin. You must install new cartridges immediately after removing the old ones. 1. Press the button or tap the printer’s touch screen to open the main menu. 2. Press the button.
- Page 38 6. Pull out the ink cartridge. Warning: If ink gets on your hands, wash them thoroughly with soap and water. If ink gets into your eyes, flush them immediately with water. Keep ink cartridges out of the reach of children. 7.
-
Page 39: Replacing Maintenance Cartridges
9. Close the ink cartridge cover. Wait for the printer to check the ink cartridges and charge the ink delivery system, if necessary. Caution: Never turn off the printer while ink is charging or you’ll waste ink. Replacing Maintenance Cartridges The maintenance cartridge absorbs ink that is used in maintenance operations such as head cleaning and changing black ink. - Page 40 Caution: Do not touch the area shown or you may damage the product. 4. Push up slightly on the maintenance cartridge and slide it out carefully so that it does not tilt. 5. Place the old maintenance cartridge in the bag supplied with the new cartridge, and then seal the bag.
-
Page 41: Switching Black Ink Types
Switching Black Ink Types Your printer comes with Matte Black and Photo Black ink cartridges. Although both must be installed for the printer to work, the printer can use only one type of black ink at a time. The printer will switch ink automatically, depending on the type of media you load. - Page 42 The following media use Photo Black ink: ■ Photo Paper Glossy ■ Premium Photo Paper Glossy ■ Ultra Premium Photo Paper Glossy ■ Premium Photo Paper Semi-gloss ■ Ultra Premium Photo Paper Luster ■ Exhibition Canvas Satin ■ Exhibition Canvas Natural Satin ■...
-
Page 43: Cleaning The Rollers
Cleaning the Rollers If you notice lines or streaks on your printouts, you may need to clean the rollers inside the printer by feeding several sheets of plain paper through it. Note: If paper dust builds up on the rollers, they may lose traction and become unable to feed paper properly. -
Page 44: Printing Problems
Solving Problems If you have a problem with your Epson product, check the messages on the LCD screen to diagnose the cause. You can also check the basic troubleshooting suggestions below or in your online User’s Guide. Checking for Software Updates Periodically, it’s a good idea to check Epson’s support website for free updates to... -
Page 45: Paper Feeding Problems
■ When using the manual feed tray, load only one sheet of compatible paper (see page 8). ■ Make sure the paper size settings in the printer software are correct for the paper you loaded. Paper Feeding Problems ■ If paper doesn’t feed into the sheet feeder, remove the paper and fan the stack of paper to separate the sheets. -
Page 46: Print Quality Problems
Print Quality Problems ■ For the best print quality, use Epson papers and genuine Epson ink cartridges (see page 36). ■ Load the paper printable side up (usually the whiter, brighter, or glossy side). ■ Make sure your paper isn’t damp or curled. - Page 47 ■ If your wireless router doesn’t broadcast its network name (SSID), see the online User’s Guide for instructions on manually entering your wireless network name. ■ If your wireless router has security enabled, make sure you entered the WEP key or WPA passphrase correctly. ■...
-
Page 48: Where To Get Help
Purchase Supplies and Accessories You can purchase genuine Epson ink and paper at Epson Supplies Central at www.epson.com/ink3 (U.S. sales) or www.epson.ca (Canadian sales). You can also purchase supplies from an Epson authorized reseller. To find the nearest one, call 800-GO-EPSON (800-463-7766). -
Page 49: Notices
Notices Important Safety Instructions Before using your Epson SureColor P800 Series printer, read and follow these safety instructions: ■ Be sure to follow all warnings and instructions marked on the printer. ■ Use only the type of power source indicated on the printer label. -
Page 50: Ink Cartridge Safety
■ If the touch screen is damaged, contact Epson. If the liquid crystal solution gets on your hands, wash them thoroughly with soap and water. If the liquid crystal solution gets into your eyes, flush them immediately with water. If discomfort or vision problems remain after a thorough flushing, see a doctor immediately. - Page 51 If service is needed, Epson will, at its option, exchange or repair the printer without charge for parts or labor. If Epson authorizes an exchange for the defective unit, Epson will ship a replacement printer to you, freight prepaid, so long as you use an address in the United States, Canada, or Puerto Rico.
- Page 52 Remedies: Your exclusive remedy and Epson’s entire liability for a material breach of this Agreement will be limited to a refund of the price paid for the Epson products covered by this Agreement. Any action for breach of warranty must be brought within 3 months of the expiration date of the warranty.
-
Page 53: Declaration Of Conformity
To find the Epson Authorized Reseller nearest you, visit our website at: epson.com To find the Epson Customer Care Center nearest you, visit epson.com/support You can also write to: Epson America, Inc., P.O. Box 93012, Long Beach, CA 90809-3012 Declaration of Conformity According to 47CFR, Part 2 and 15 for: Class B Personal Computers and Peripherals;... -
Page 54: Fcc Compliance Statement
FCC Compliance Statement For United States Users This equipment has been tested and found to comply with the limits for a Class B digital device, pursuant to Part 15 of the FCC Rules. These limits are designed to provide reasonable protection against harmful interference in a residential installation. This equipment generates, uses, and can radiate radio frequency energy and, if not installed and used in accordance with the instructions, may cause harmful interference to radio or television reception. -
Page 55: Copyright Notice
Seiko Epson Corporation. The information contained herein is designed only for use with this Epson product. Epson is not responsible for any use of this information as applied to other equipment.