Advertisement
Quick Links
Advertisement

Related Manuals for Kodak PixPro SL5

Summary of Contents for Kodak PixPro SL5
- Page 1 SMART LENS Camera User Manual...
-
Page 2: About This Manual
All trademarks mentioned in this manual are used for identification purposes only and are properties of their respective owners. This manual is to introduce you how to operate this KODAK PIXPRO SMART LENS Camera. JK Imaging Ltd. has tried its utmost to ensure the correctness of all contents here, but reserves the right to modify. - Page 3 INDUSTRY CANADA This device complies with Canadian RSS-210. This device complies with Industry Canada license-exempt RSS standard (s).Operation is subject to the following two conditions: (1) this device may not cause interference, and (2) this device must accept any interference, including interference that may cause undesired operation of the device.
- Page 4 “CE” mark indicates that this product complies with the European requirements for safety, health, environment and customer protection. “CE” marked cameras are intended for sales in Europe. Europe – EU Declaration of Conformity This device complies with the essential requirements of the R&TTE Directive 1999/5/ EC.
- Page 5 Electromagnetic compatibility and Radio spectrum Matters (ERM); Wideband Transmission systems; Data transmission equipment operating in the 2.4 GHz ISM band and using spread spectrum modulation techniques; Harmonized EN covering essential requirements under article 3.2 of the R&TTE Directive. - EN 301 489-1 V1.9.2: 2011 Electromagnetic compatibility and Radio Spectrum Matters (ERM);...
- Page 6 This equipment has been tested and found to comply with the limits for a Class B digital device, pursuant to Part 15 of the FCC Rules. These limits are designed to provide reasonable protection against harmful interference in a residential installation. This equipment generates, uses and can radiate radio frequency energy and, if not installed and used in accordance with the instructions, may cause harmful interference to radio communications.
- Page 7 Radiation Exposure Statement: This product complies with the FCC portable RF exposure limit set forth for an uncontrolled environment and is safe for intended operation as described in this manual. Additional RF exposure reduction can be achieved if the product can be kept as far as possible from the user body or set the device to lower output power if such function is available.
-
Page 8: Safety Notes
Safety Notes Safety notes for this camera Do not disassemble or repair this camera by yourself. Do not drop the camera or allow it to hit solid objects. To prevent the camera from being damaged by moisture, do not use or store the camera in very humid environments, such as in rain or near bodies of water. - Page 9 In cleaning the camera body, please don’t use corrosive cleaning agents or those with alcohol or organic solvent. If this camera is not in use for a long time, please keep it in a dry and clean condition. Our company will not pay compensation for any failure of playback of pictures or videos caused by improper operation.
- Page 10 To prevent the battery from being damaged, do not drop the battery or allow it to hit solid objects or to be scratched by the objects. Do not let the battery come in contact with metal objects (including coins) to avoid short circuiting, discharging, excessive heat, or possible leakage.
- Page 11 Do not attempt to disassemble or repair the memory card. Do not expose the memory card to water. Always keep it dry. Do not remove the memory card when the camera is turned on. Otherwise, the memory card could be damaged. Do not directly edit the data on the memory card.
-
Page 12: Product Specifications
Product Specifications Image Sensor 1/2.3” BSI CMOS Effective Pixels 16.35 Megapixels Total Pixels 16.76 Megapixels Focal Length 5.1mm (Wide) ~ 25.5mm (Tele) 35mm film equivalent 28mm (Wide) ~ 140mm (Tele) F number F3.9 (Wide) ~ F6.3 (Tele) Optical Zoom Normal: (Wide) 60cm ~ ∞, (Tele) 100cm ~ ∞ Focusing Range Macro: 5cm ~ ∞... - Page 13 (4:3) (16:9) Still 16MP: 4608×3456 12MP: 4608×2592 Number of Image 10MP:3648×2736 2MP: 1920×1080 Recording Pixels 1920×1080 (30fps), 1280×720 (30fps), Movie High-Speed Movie: 848×480(120fps) Still Image: Exif 2.3 (JPEG) File Format Movie : MP4 [Image: H.264; Audio: AAC(Monaural)] ISO Sensitivity Auto, ISO100/200/400/800/1600/3200 AF Method Single AF, Touch focus Exposure Metering...
- Page 14 Exposure Control Method Program AE (AE-Lock Available) ±3EV in 1/3 Step Increments Exposure Compensation Shutter 1/2000 ~ 4 Seconds Burst Mode Flash Method Internal Flash Flash Modes Force Off, Flash Auto, Fill Flash Micro SD/ Micro SDHC Card (Up to 32GB Support) Recording Media [MMC Card Not Supported] Jacks...
- Page 15 Wi-Fi Yes (802.11 b/g/n) Remote Control Yes (via smart device) Rechargeable Li-ion Battery LB-012, 3.7V 700mAh, Power In-Camera Charging Shooting Capability Approx. 160 Shots (Based on CIPA Standards) Operation Environment Temperature: 0 ~ 40°C, Humidity: 0 ~ 90% Dimensions (W×H×D) 54.8×54.8×42.9mm (Based on CIPA Standards) Weight Approx.
-
Page 16: Getting Ready
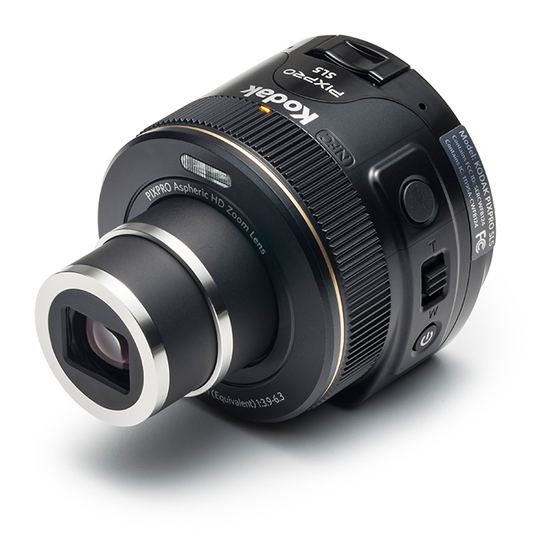
Getting Ready Accessories Included Your camera box should contain the camera model you purchased along with the following accessories. If anything is missing or appears to be damaged, please contact your retailer. ▪ Rechargeable Li-ion battery ▪ AC adapter ▪ Micro USB cable ▪... - Page 17 Part Names Flash lamp NFC mark Indicator lamp Shutter button Microphone Zoom lever Battery cover Power button Wrist strap buckles Tripod socket After turning the camera on, you may move the camera's zoom lever to zoom, and press the shutter button to take photos.
- Page 18 Installation of Wrist Strap It is recommended to use the wrist strap to prevent the camera falling off during use. Please install it on the camera and then wear it around your hand per the diagram below.
- Page 19 Installing Battery and Memory Card 1. Open the battery cover. 2. Insert the battery into the battery compartment according to the negative and positive directions as illustrated in the picture. Push the battery down until it locks in place.
- Page 20 3. Insert the memory card into the memory card slot as shown in the diagram. Push it down until it locks in place. 4. Close the battery cover. When you insert a memory card, make sure the notch of the card matches the markings on the top of the card slot.
- Page 21 Charging Battery Please insert the battery and charge it under shutdown mode. 1. Connect the camera and the power charger using the supplied Micro USB cable. 2. Insert the plug of the power charger into the power outlet to charge the battery.
- Page 22 When the camera is turned off, you can also connect the camera to your PC using a Micro USB cable to charge the battery.
- Page 23 Connect the smart device Install APP Download a dedicated installation package from the application store corresponding to the device (APP name: PIXPRO Remote Viewer) and then install it. Your smart device operating system version needs to be iOS 7 or higher, or Android 4.2 or higher.
- Page 24 To maintain a connection, please keep the camera within 10 meters (32.8 feet) without signal shielding interference. The camera and the smart device can only be connected one to one. Power button PIXPRO SL5_XXXX PIXPRO-SL5_XXXX...
- Page 25 NFC Connection (Android system) 1. Enable the NFC of your smart device. 2. Use your smart device to slightly touch the NFC mark on the camera. The APP will open automatically.
- Page 26 The NFC feature will be available only when your smart device's screen is unlocked. After successful connection of your smart device with camera, if you use another camera to touch the smart device, or if you use another smart device to touch the camera, the previous connection will be replaced.
- Page 27 Installation on smart phone. 1. Open the clasp arm of the camera as shown in Figure 1. 2. Insert smart phone into the clasp as shown in Figure 2. Please don't swing the phone/lens after installation to prevent them from damage. Please take care not to pinch your fingers during installation.
-
Page 28: Troubleshooting
Troubleshooting ▪ Camera does not turn on Correctly reinstall the battery per the instructions in this manual. The battery power is low, so please charge it or replace it with a fully charged battery. ▪ Camera turns off suddenly during operation The battery power is low. - Page 29 The Kodak trademark and trade dress are used under license from Kodak. © 2014 by JK Imaging Ltd. All Rights Reserved. JK Imaging Ltd., 17239 South Main Street, Gardena, CA 90248, USA JK Imaging Europe, 71 Clarendon road, Watford, WD17 1DS, UK www.kodakpixpro.com...