Poulan Pro HDF900 Operator's Manual
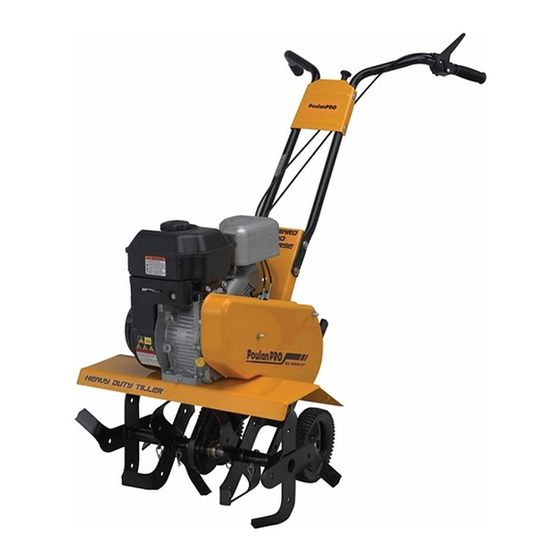
Front tine tiller
Hide thumbs
Also See for HDF900:
- Operator's manual (40 pages) ,
- Repair parts manual (8 pages) ,
- Operator's manual (40 pages)
Table of Contents
Advertisement
IMPORTANT MANUAL
OPERATOR'S MANUAL
MODEL:
900
HDF
FRONT TINE TILLER
ALWAYS WEAR EYE PROTECTION DURING OPERATION
Visit our website: www.poulanpro.com
Gasoline containing up to 10% ethanol (E10) is acceptable for use in this machine.
The use of any gasoline exceeding 10% ethanol (E10) will void the product warranty.
115 73 27-32
Do Not Throw Away
WARNING:
Read this Man u al and follow all Warn-
ings and Safety Instructions. Fail ure
to do so can re sult in serious in ju ry.
01.30.15 BY Printed in U.S.A.
Advertisement
Table of Contents

Related Manuals for Poulan Pro HDF900


Summary of Contents for Poulan Pro HDF900
- Page 1 IMPORTANT MANUAL Do Not Throw Away OPERATOR'S MANUAL MODEL: WARNING: Read this Man u al and follow all Warn- ings and Safety Instructions. Fail ure to do so can re sult in serious in ju ry. FRONT TINE TILLER ALWAYS WEAR EYE PROTECTION DURING OPERATION Visit our website: www.poulanpro.com Gasoline containing up to 10% ethanol (E10) is acceptable for use in this machine.
-
Page 2: Safety Rules
SAFETY RULES Safe Operation Practices for Walk-Behind Powered Ro ta ry Tillers TRAINING dangerous. • Never operate the tiller without proper guards, plates, • Read this Manual care ful ly. Be thor ough ly fa mil iar with or other safety protective devices in place. the controls and the proper use of the equip ment. -
Page 3: Table Of Contents
PRODUCT SPECIFICATIONS CUSTOMER RESPONSIBILITIES • Read and observe the safety rules. • Follow a regular schedule in maintaining, caring for GASOLINE CAPACITY: 3 Quarts (2.8L) Unleaded Regular and using your tiller. • Follow instructions under “Maintenance” and “Stor age” OIL (API:SG-SL): SAE 30 (Above 32°F ) sections of this Manual. -
Page 4: Assembly
ASSEMBLY Your new tiller has been assembled at the factory with exception of those parts left unassembled for shipping purposes. To ensure safe and proper operation of your tiller all parts and hardware you assemble must be tightened securely. Use the correct tools as necessary to insure proper tightness. -
Page 5: See Fig
ASSEMBLY UNPACK CARTON & INSTALL HANDLE (See INSTALL DEPTH STAKE ASSEMBLY Fig. 2) (See Fig. 3) • Loosen nut “A”. CAUTION: Be careful of exposed sta ples • Insert stake support between engine bracket halves when handling or disposing of carton- with stake spring down. -
Page 6: Operation
OPERATION KNOW YOUR TILLER READ THIS MANUAL AND SAFETY RULES BEFORE OPERATING YOUR TILLER. Compare the illustrations with your tiller to familiarize yourself with the location of various controls and adjustments. Save this manual for future reference. These symbols may appear on your Tiller or in literature supplied with the product. Learn and understand their meaning. FORWARD TINE CONTROL THROTTLE... - Page 7 OPERATION The operation of any tiller can result in foreign objects thrown into the Use ear protec- eyes, which can result in severe eye damage. Always wear safety glasses tors to avoid or eye shields before starting your tiller and while tilling. We recommend d a m a g e a wide vision safety mask over spectacles or standard safety glasses.
- Page 8 OPERATION TO TRANSPORT ADD GASOLINE • Fill to within 1/2" of top of fuel tank to prevent spills and CAUTION: Before lifting or trans port- to allow for fuel expansion. Do not overfill. Use fresh, ing, allow tiller engine and muffler to clean, regular un lead ed gasoline with a minimum of cool.
-
Page 9: Tilling Hints
OPERATION 7. If the choke lever has been moved to the "ON" position • Tilling is digging into, turning over, and breaking up to start the engine, gradually move it to the opposite packed soil before planting. Loose, unpacked soil position as the engine warms up. -
Page 10: Maintenance Schedule
MAINTENANCE MAINTENANCE SCHEDULE FILL IN DATES AS YOU COMPLETE SERVICE DATES REGULAR SERVICE Check Engine Oil Level Change Engine Oil Oil Pivot Points Inspect Spark Arrester / Muffler Inspect Air Screen Clean or Replace Air Cleaner Cartridge Clean Engine Cylinder Fins Replace Spark Plug 1 - Change more often when operating under a heavy load or in high ambient temperatures. -
Page 11: Maintenance
MAINTENANCE Disconnect spark plug wire before performing any maintenance to prevent accidental start ing of engine. Prevent fires! Keep the engine free of grass, leaves, spilled oil, or fuel. Re move fuel from tank before tipping unit for maintenance. Clean muffler area of all grass, dirt, and debris. Do not touch hot muffler or cylinder fins as contact may cause burns. -
Page 12: Spark Plug
MAINTENANCE MUFFLER COOLING SYSTEM (See Fig. 14) Your engine is air cooled. For proper en gine performance Do not operate tiller without muffler. Do not tamper with and long life keep your engine clean. exhaust system. Damaged mufflers or spark arresters could •... -
Page 13: Service & Adjustments
SERVICE AND ADJUSTMENTS CAUTION: Disconnect spark plug wire from spark plug and place wire where it cannot come into contact with plug. TILLER MID-WIDTH TILLING - 24" PATH (See Fig. 17) • Assemble holes “A” in tine hubs to holes “C” in tine TO ADJUST HANDLE HEIGHT (See Fig. - Page 14 SERVICE AND ADJUSTMENTS • Recheck in “OFF” position and adjust if necessary. BELT GUARD FINAL CHECK “ON” POSITION • With tine control “ON” (held down to handle) push down on handle to raise tines off the ground. • Slowly pull recoil starter handle while observing tines. SCREW Tines should rotate forward.
-
Page 15: Storage
SERVICE AND ADJUSTMENTS ENGINE IMPORTANT: NEVER TAMPER WITH THE ENGINE GOVERNOR, WHICH IS FACTORY SET FOR PROPER ENGINE Maintenance, repair, or replacement of the emission control SPEED. OVERSPEEDING THE ENGINE ABOVE THE FACTORY devices and systems, which are being done at the cus tom- HIGH SPEED SETTING CAN BE DANGEROUS. -
Page 16: Troubleshooting
TROUBLESHOOTING POINTS Will not start Out of fuel. 1 Fill fuel tank. Fuel valve “OFF” 2 Turn fuel valve to the “ON” position. Engine Switch “OFF” 3 Turn engine switch to the “ON” position. Engine not “CHOKED” properly. 4 See “TO START ENGINE” in Operation section. Engine flooded. -
Page 17: Warranty
LIMITED WARRANTY What is covered. We warrant that this product is free from defects in material or workmanship under normal use and maintenance. Certain components, such as normal wear parts, engines, and transmissions are excluded from this warranty. We will, at our option, repair or replace any defective product or part covered by the Limited Warranty, free of charge at any authorized Servicing Dealer/Center using OEM replacement parts, subject to the limitations and exclusions described below. -
Page 18: Product Registration
Poulan, Poulan Pro, Weedeater, & McCulloch® Consumer Commercial Rental Warranty Chart 2015 (any commercial, (any (personal, professional, agri- rental household cultural, institutional usage) use only) or income producing use, other than rental use) HANDHELD PRODUCTS Cordless products 2 Years No Warranty...