Table of Contents
Advertisement
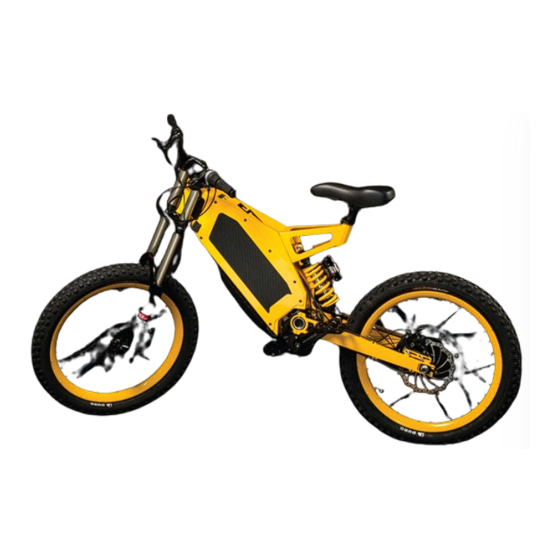
Stealth Electric Bikes Owner's Manual
IMPORTANT:
This manual contains important safety, performance and service information. Read it before you take the first ride on
your new Stealth Bike, and keep it for future reference.
Additional safety, performance and service information for specific components such as transmission, suspension or
brakes on your bike may also be available. Make sure that your dealer has given you all of the manufacturers'
literature that was included with your bike or accessories. In case of a conflict between the instructions in this manual
and information provided by a component manufacturer, always follow the component manufacturer's instructions.
To the best knowledge of Stealth Electric Bikes, the material contained herein is accurate as of the date this
publication was approved for printing. Stealth Electric Bikes reserves the right to change specifications, equipment,
or designs at any time without notice and without incurring obligation. Illustrations in this manual are merely for
demonstration purposes and may not exactly match the detail described.
NOTE:
This manual is not intended as a comprehensive use, service, repair or maintenance manual. Please see your
dealer for all service, repairs or maintenance. Your dealer may also be able to refer you to classes, clinics or
books on bike use, service, repair or maintenance.
PRODUCT REGISTRATION
In order to receive full warranty support, you must completely fill out the online warranty registration form upon
receiving your bike.
This can be found at: www. XXXXXXX
To see Stealth Electric Bikes current limited warranty and related warranty claims information please visit:
http://www.stealthelectricbikes.com.au/policies.html
Outside the USA and Canada, the WARRANTY REGISTRATION CARD included in the back of this Owners Manual must
be filled out immediately and returned to the Stealth Electric Bikes distributor in your country or at their website if
that distributor offers web based warranty registration. The contact information of the distributor in the country in
which you bought your bike is listed at: http://www.stealthelectricbikes.com
Warranty policies vary depending upon the Stealth Distributor in the country of your purchase. Please check with
your Stealth Dealer or the Stealth Distributor in your country for the warranty policy covering your purchase.
Advertisement
Table of Contents

Related Manuals for Stealth Bomber

Summary of Contents for Stealth Bomber
- Page 1 Outside the USA and Canada, the WARRANTY REGISTRATION CARD included in the back of this Owners Manual must be filled out immediately and returned to the Stealth Electric Bikes distributor in your country or at their website if that distributor offers web based warranty registration. The contact information of the distributor in the country in which you bought your bike is listed at: http://www.stealthelectricbikes.com...
- Page 2 These hybrid electric bikes come standard with hydraulic disc brakes, take only 2 hours to charge, and are silent with zero emissions. So if you need to get there faster or just have a lot more fun, use your Stealth Electric Bike.
-
Page 3: Table Of Contents
MAINTENANCE SCHEDULE ................................. 23 EVERY RIDE ..................................... 23 EVERY MONTH ..................................23 EVERY SIX MONTHS ................................24 TROUBLESHOOTING ................................... 25 BMS RESET PROCEDURE ................................ 26 APPENDIX 1: RECOMMENDED TORQUE VALUES ........................27 WARRANTY....................................28 Stealth Electric Bikes Warranty Registration ..........................29... -
Page 4: General Warning
Stealth Electric Bikes Owner’s Manual GENERAL WARNING All sport involves risk of injury or death. In choosing to ride a Stealth Bike, you accept that risk and take responsibility to learn and practise safe and responsible riding. This e-bike is sold with a limited warranty against defective workmanship. In some countries it does not conform to federal motor vehicle safety standards and operation on public roads, streets or highways may be illegal. -
Page 5: Safe Operation
1. Always wear an approved helmet when riding and follow the helmet manufacturer’s instructions for fit, use and care. Stealth Electric Bikes strongly recommend the use of a motorcycle helmet due to the extreme speeds which can be reached on our bikes. Always wear sturdy footwear which grips to the pedals. Ensure shoe laces and other loose clothing are safely secured. -
Page 6: Whilst Riding Your Bike
WHILST RIDING YOUR BIKE Even though your Stealth Bike has been constructed using the highest quality materials, if you exceed the limit of strength of your bike or a given part, it may fail. After any high force load, thoroughly inspect all the parts of your bike. -
Page 7: Stealth Bike Care
Rain or snow may cause the metal on your e-bike to corrode and also affect the electrical system. WARNING Riding your Stealth Bike in sand will void your warranty. Due to the demands of deep sand on the power train of the bike, we advise that this bike should not to be ridden in sand. -
Page 8: Assembling Your Bike
WARNING Electricity has the potential to kill. Do not tamper with the electrical components of the bike without authorisation from a Stealth technician or dealer CAUTION Working on your bike can be hazardous in ways that may not appear obvious. The presence of others in your work environment can contribute and increase the likelihood of such accidents. - Page 9 Stealth Electric Bikes Owner’s Manual Remove stem cap Hold assembly for ease of installation 2. Install the front wheel For ease of transport, your bike may come with the front wheel uninstalled. The 20mm thru axle needs to be correctly inserted into the dropout when installing the wheel.
- Page 10 Stealth Electric Bikes Owner’s Manual White Brothers If your bike is equipped with White Brothers forks see White Brothers manual for wheel installation. 3. Install the pedals WARNING When installing the cranks and pedals to the bike please take note that the pedals and cranks are labelled “L” and “R”...
- Page 11 Disconnect the charger when battery is fully charged. WARNING Only use the charger specified by Stealth Electric Bikes. Failure to do so may result in serious injury or damage to property. Stealth battery packs have no memory effect. This means that they can be recharged or discharged from any state of...
- Page 12 Stealth Electric Bikes Owner’s Manual CAUTION: The battery charger for your Stealth Bike can operate on dual voltages (120V/240V). Before charging the bike for the first time, make sure that the red switch on the back of the charger is set to the correct mains power supply voltage for your region.
-
Page 13: Your First Ride
Stealth Electric Bikes Owner’s Manual YOUR FIRST RIDE BATTERY BREAK IN For the first 2-3 cycles, avoid heavy and sudden acceleration in order to minimize the load placed on the battery cells. This “break in” will help to prolong the life of the battery pack and at the same time help the cells to operate at their full potential. -
Page 14: Regenerative Braking
The pressure on the pedals must be released when shifting gears. Failure to do so may damage your transmission. For pedalling, the Bomber uses a 9-speed sequential gearbox. To shift gears, the left hand grip may be twisted forward for a lower gear (when climbing hills) and rearward for a taller gear (for higher speeds). -
Page 15: Cycle Analyst
Stealth Electric Bikes Owner’s Manual Fighter WARNING The pressure on the pedals must be released when shifting gears. Failure to do so may damage your transmission. The Fighter is fitted with a 2-speed internally geared bottom bracket. To shift gears, kick the button found on the cranks to the right for high range and to the left for low range. - Page 16 Ah is your battery capacity used. The batteries on the Bomber and the Fighter have an absolute maximum of 18Ah on a full charge. As you ride, you will see the Ah slowly rise at a speed relative to the Watts that you are using. The higher the Watts, the faster the Ah will rise.
-
Page 17: Riding Efficiently
RIDING EFFICIENTLY Both the Stealth Bomber and Stealth Fighter have the versatility to take you to places that you might not usually go. Being a hybrid, Stealth owners have a lot of flexibility in how they manage their power consumption for any given ride through different combinations of the pedals and the throttle. - Page 18 Stealth Electric Bikes Owner’s Manual battery. In a normal hydraulic braking system this kinetic energy is dissipated as heat via friction and leads to premature wear of your brake pads. In emergency braking situations however, always use the hydraulic brake system.
-
Page 19: Adjusting Your Bike
Stealth Electric Bikes Owner’s Manual ADJUSTING YOUR BIKE TYRES Check tyre pressures and ensure that the pressure range is between 25psi and 40psi. CHAIN The chain should be checked, adjusted and lubricated as shown on the Maintenance Schedule to ensure proper operation and prevent excessive wear. -
Page 20: Suspension
Stealth Electric Bikes Owner’s Manual SUSPENSION Suspension is a key component of your Stealth Bike. Fork stanchions and preload adjustment should be checked periodically and adjusted to suit the riders preferred setting. Always follow the manufacturer’s instructions for use and maintenance. - Page 21 Stealth Electric Bikes Owner’s Manual RST R1 forks - Refer to the RST Owner’s manual for more details. Compression and rebound adjusters can be found at the top and bottom of the right hand fork leg respectively. Compression adjustment Rebound adjustment White Brothers Groove 200 forks - Refer to White Brothers Owner’s manual for more details.
- Page 22 Stealth Electric Bikes Owner’s Manual Rebound adjustment Compression adjustment Preload adjustment RST R1 forks - Refer to the RST Owner’s manual for more details. Compression and rebound adjusters can be found at the top and bottom of the right hand fork leg respectively.
-
Page 23: Maintenance Schedule
WARNING Many Stealth service and repair tasks require special knowledge and tools. Do not begin any adjustments or service on your bike until you have learned from your dealer how to properly complete them. Improper adjustment or service may result in damage to the bike or in an accident which can cause serious injury or death. -
Page 24: Every Six Months
Stealth Electric Bikes Owner’s Manual EVERY SIX MONTHS 1. Replace transmission grease (refer to Schlumpf Speed Drive or V-Boxx manual). 2. Lubricate suspension and shock bushings. 3. Lubricate brake levers. -
Page 25: Troubleshooting
TROUBLESHOOTING In the event that your Stealth Bike will not go, or runs roughly, the following chart may help to quickly fix the problem. In other instances you will require the assistance of your dealer. If in any doubt, contact your dealer. -
Page 26: Bms Reset Procedure
Stealth Electric Bikes Owner’s Manual Make sure that when selecting each gear, a positive shift/click is heard each time. Improper gear shifting Ensure that when shifting, pressure is released from the pedals slightly as the next gear is selected Gears not changing smoothly... -
Page 27: Appendix 1: Recommended Torque Values
Stealth Electric Bikes Owner’s Manual APPENDIX 1: RECOMMENDED TORQUE VALUES Front axle – 20 Nm Axle locknut – 10 Nm Rear axle nuts – 45 Nm Stem (Handlebar bolts) – 12.5 Nm Stem (Steerer tube bolts) – 15 Nm Cranks (V-boxx bolts) – 60 Nm Cranks (Speed Drive bolts) –... -
Page 28: Warranty
Claims Warranty claims must be directed to your dealer. Parts will be replaced or repaired at the discretion of Stealth Electric Bikes. Stealth Electric Bikes will cover the component costs of approved warranty claims as well as return shipping. -
Page 29: Stealth Electric Bikes Warranty Registration
Stealth Electric Bikes Owner’s Manual Stealth Electric Bikes Warranty Registration Name: ____________________________________________________________________________ Address: __________________________________________________________________________ _______________________________________________________________________________ Phone: ___________________________________________ Email: ____________________________________________ Bike model: _______________________________________ Bike number: ______________________________________ Purchase date: _____________________________________ Dealer purchased from: ______________________________...