Table of Contents
Advertisement
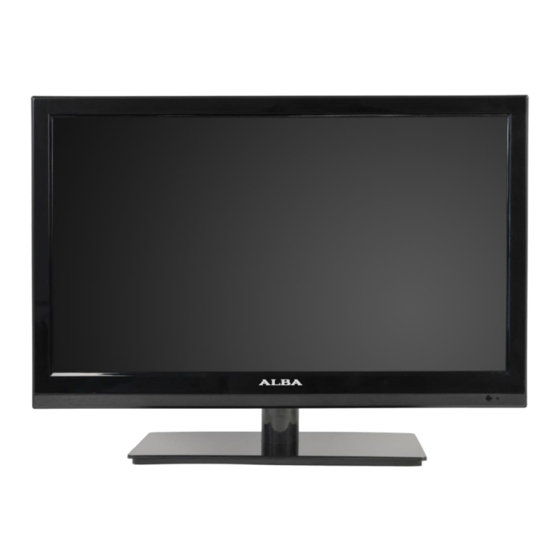
19" HD Ready Digital LED TV
with integrated DVD Player
Installation & Operating Instructions
Please keep safe for future reference
Important –
Please read these instructions before installing or operating
These instructions contain important information which will help you get the best from
your television and ensure safe and correct installation and operation.
For any help concerning setup and use of your TV please call the
Customer Helpline: 0845 604 0105
Lines open: 9am – 8pm Monday to Saturday and 10am – 4pm Sunday
129/6693 ASMKDVD19
Advertisement
Table of Contents

Related Manuals for Alba 129/6693 ASMKDVD19


Summary of Contents for Alba 129/6693 ASMKDVD19
- Page 1 19” HD Ready Digital LED TV with integrated DVD Player Installation & Operating Instructions 129/6693 ASMKDVD19 Please keep safe for future reference Important – Please read these instructions before installing or operating These instructions contain important information which will help you get the best from your television and ensure safe and correct installation and operation.
-
Page 2: Table Of Contents
Contents Safety Information Advanced Features (DVD) 22–25 DVD/CD Operation Getting Started 4-10 Playing a Disc Play/Pause Helpline Information Stop TV Features Fast Reverse DVD Features Fast Forward Accessories Previous Page/Up Remote Control Next Page/Down Remote Control Battery Installation Repeat TV/DVD User Button location A-B Repeat User Input Connections Language... -
Page 3: Safety Information
Safety Information Important - Please read these instructions fully before installing or operating The lightning flash with an arrowhead within a triangle alerts you to uninsulated dangerous voltages within the product’s enclosure that could cause an electric shock The exclamation mark within a triangle alerts you to the presence of important operating, maintenance and servicing instructions in this user manual... -
Page 4: Safety Instructions
Safety Instructions Unpacking and Handling. Open the carton carefully Class Two. The mains adaptor has Double and remove the card packing. Carefully lift the TV Insulation and is a Class Two device and must and place onto a firm stable surface. Lift off the Poly not be earthed. -
Page 5: Getting Started
Getting Started The Argos Technical Helpline is here to help Technical experts are available 7 days a week. • Simple help and advice on setting up your digital equipment. • Guidance on connecting other devices to your television such as a DVD player, Sky, home cinema system or a games console. -
Page 6: Tv Features
Getting Started TV Features DVD Features • Remote controlled colour LED TV • DVD / CD / CDR / CD-RW / JPEG / MPEG • Fully integrated digital TV (DVB-T) playback • HDMI socket with HDCP decoding • NTSC / PAL playback (according to disc content) •... -
Page 7: Remote Control
Getting Started Remote Control 23. RECALL. Recall previous channel viewed. 24. SOURCE. Select between 1. STANDBY/ON. Switches TV inputs. to ON and Standby. 25. VOL+ Volume increase 2. 0-9. Numeric buttons for 26. UP. Navigation button direct channel selection or 27. - Page 8 Getting Started Remote Control Using the remote control • Point the remote control at the Remote Sensor on the TV. • Bright sunlight shining onto the remote control sensor may cause the TV not to respond correctly. • The recommended operating distance is up to 3 metres (10 feet).
- Page 9 Getting Started TV Control Buttons CH+: Increases channel selection by 1 with each press. CH- : Reduces channel selection by 1 with each press. VOL+: Increases volume level. In menu mode increases values. VOL- : Reduces volume level. In menu mode decreases values.
-
Page 10: Typical Connections
Getting Started Typical connections Antenna or cable Connecting a TV antenna Blu-ray Player, VCR, Games Console, etc. To view digital Freeview TV channels a signal must be received from one of the following sources. Connecting to other apparatus An indoor or outdoor antenna •... -
Page 11: Getting Started
Connect a suitable antenna or signal source, and plug into a mains supply. Use the POWER button on the remote control or the TV. The screen will display the ALBA splash screen and then Fig 1. Press OK to continue. Fig 2 Follow the screen prompts as below to complete the tuning process. -
Page 12: Fig 7
Getting Started Initial Setup Fig 7 Fig 7 will show the progress of tuning and the number of channels received. Allow the tuning to complete. If you wish to terminate the search at any time press EXIT. Any stations found will be stored in the memory. -
Page 13: Fig
Basic Features (TV) LCD Menu (General) Fig 10 Press the MENU button to display the main menu, Fig 10 will be displayed. To select the other menus press the ▲▼ button and the highlight bar at the left of the menu will move upwards or downwards. -
Page 14: Tuning Menu
Basic Features (TV) Tuning Menu Tuning Menu (Fig 12) Press the MENU button to display the main menu, Fig 10 will be Fig 12 displayed. Use the ▲▼ buttons to select Tuning (Fig 12). To enter the menu press ► and to select the required function use the ▲▼... -
Page 15: Fig 15
Basic Features (TV) Tuning Menu Fig 15 Favourite Selection (Fig 15) To select your favourite channels once the memories have been set, press the FAV button on the remote control. Use the ◄► buttons to select which favourite memory is required. Use the ▲▼ buttons to select which favourite channel is required and press OK. -
Page 16: Renaming Stations
Basic Features (TV) Renaming Stations Fig 19 To rename a channel press MENU and select the Tuning menu. Press OK to enter the menu and ▲▼ buttons to select Channel Manager and then press Press OK to select Rename. See Fig 19. Use the ▲▼►◄... -
Page 17: Key Lock
Basic Features (TV) Features Menu Key Lock. When set on the user control buttons are inoperative (except for the power button). The Fig 23 TV will come out of standby, but will be locked on the channel last viewed. If you wish that you do not want the TV changed from that setting, it is wise to hide the remote control, this would stop unauthorised use of other channels or features. -
Page 18: Clock
Basic Features (TV) Features Menu Clock: (Fig 26) To select Clock use the ▲▼ buttons and Fig 26 ► or OK. • Date: Use the ▲▼ buttons to select Date . This window is for information only; the data displayed is taken from the digital TV transmission. -
Page 19: Basic Features (Tv)
Basic Features (TV) Setup Menu Setup Menu Sleep Timer: Use the ▲▼ buttons to select Sleep Reset to Default: Use the ▲▼ buttons to select Timer and press OK to enter the sub-menu. Use the Reset to Default and press OK . You will be asked if ▲▼... -
Page 20: Ci Slot (Cam Module)
Advanced Operation (TV) C I Slot (Cam Module) Fig 31 Using a CAM (Conditional Access Module) (CI Slot). This feature allows the user to access digital terrestrial pay-per- view channels. To use this facility a conditional access module (CAM) and viewing card need to be obtained by subscribing to a pay channel company. - Page 21 Advanced Operation (TV) Electronic Programme Guide (EPG) Fig 36 An Electronic Programme Guide (EPG) is provided by the programme providers. To access this press the EPG button on the remote control. The EPG provides daily programme information and for the next 7 days.
-
Page 22: Digital Radio
Advanced Operation (Radio) Digital Radio Digital Radio is available on this TV. To select radio press the DTV/RADIO button on the remote control. To view the station listings press the OK button. Press▲▼to move up and down the list and OK to select the required station. -
Page 23: Play/Pause
Advanced Operation (DVD) • Language: DVD only. Press to select the Playing a DVD Disc language required (disc dependent) Insert the DVD disc as described on page 21 • SUBTITLE: Press to cycle between available The disc will now rotate and the contents will be subtitle languages. -
Page 24: Picture Play
Advanced Operation (DVD) Playing a picture disc • PLAY/PAUSE: Starts playback and pause. Insert a CD/DVD containing picture files, and press • STOP/LIST: Stops playback and returns to the 12 PLAY/PAUSE. previous file menu. The disc will start playing the first file. •... -
Page 25: Audio Cd
Advanced Operation (DVD) DVD Setup Audio CD Insert the disc and it will start playing as soon as the disc contents have been read. The disc will start To set the DVD section to your requirements a playing track one. series of menus are provided. -
Page 26: Audio Setup
Advanced Operation (DVD) DVD Setup Fig 42 Audio Setup Page (Fig 42) Downmix: LT/RT for surround systems. Stereo for normal use. Dual Mono: Stereo for normal use. Dynamic: Defaulted to FULL Preference Page (Fig 43) TV SYSTEM: Select from PAL, AUTO (which detects TV system from the disc information) and NTSC (USA) AUDIO: Select Audio using the ▲▼... -
Page 27: Product Support
Product Support Disc Formats This unit can playback the following: Titles, chapters and tracks DVDs are divided into titles and chapters. If discs DVDs Audio CDs have more than one movie, each movie will have a different title. Chapters are sections of each title. CD-R/CD-RW Compatible Audio CDs are divided into tracks. -
Page 28: Troubleshooting Guide
Troubleshooting Guide Should you experience difficulties operating this product please consult the guide below before calling the Customer Helpline. SYMPTOM POSSIBLE CAUSE REMEDY Check power lead and mains supply Dead. No LED lit Power not connected to TV connections and supply to the TV is turned On No picture. -
Page 29: Specifications
Specifications 12V DC 1.1A/13.2W (avg) Power Requirements 2.8A/34W (max) Mains Adaptor 100-230VAC 50/60Hz 3.0A (max) Standby Power <0.4W 447 x 326 x 139 mm (inc base) Cabinet Dimensions 447 x 282 x 44 mm (no base) RF Antenna Input 75 ohm (unbalanced) 2.72 (inc base) Weight (kg) 2.53 (no base) -
Page 30: Base Fitting Guide
Base Fitting Guide To minimize packaging the TV stand is packed separately. • Place the TV (screen down) on a suitable flat scratch-free surface. • Fit the base stem to rear of cabinet using supplied screws (x3) • Locate the base onto the stem screw mounts •... - Page 31 Guarantee Product Guarantee This product is guaranteed against manufacturing defects for a period of Year This product is guaranteed for twelve months from the date of original purchase. Any defect that arises due to faulty materials or workmanship will either be replaced, refunded or repaired free of charge where possible during this period by the dealer from whom you purchased the unit The guarantee is subject to the following provisions...
- Page 32 Product Support The Argos Technical Helpline is here to help Technical experts are available 7 days a week. • Simple help and advice on setting up your digital equipment. • Guidance on connecting other devices to your television such as a DVD player, Sky, home cinema system or a games console.