
Summary of Contents for Adayo AN6Q24
- Page 1 2-DiN DVD MULtiMEDiA StAtiON BUiLt-iN NAVigAtiON / BLUEtOOth AN6Q24 OWNER'S MANUAL...
-
Page 2: Precautions
Precautions Thank you for purchasing this product. Never expose this unit, amplifier or speakers Please read through the Owner’s Manual to to moisture or water to prevent electronic learn how to properly operate the unit. After sparks or fires. you have finished reading the manual, please keep it in a safe place for future reference. -
Page 3: Table Of Contents
Precautions Contents Warning Precautions ..........1 Operate the unit correctly according to the Control Panel ...........3 instruction manual to prevent unnecessary Remote Control .........4 problems. Basic Operations ........6 Turn On/Off the Power......6 CAUTIONS ON HANDLING Mute ............6 Adjust the Volume........6 This product is a CLASS 1 LASER PRODUCT. Playing Source Selection ......6 Use of controls or adjustments or performance When Vehicle is Put in Reverse .....6... -
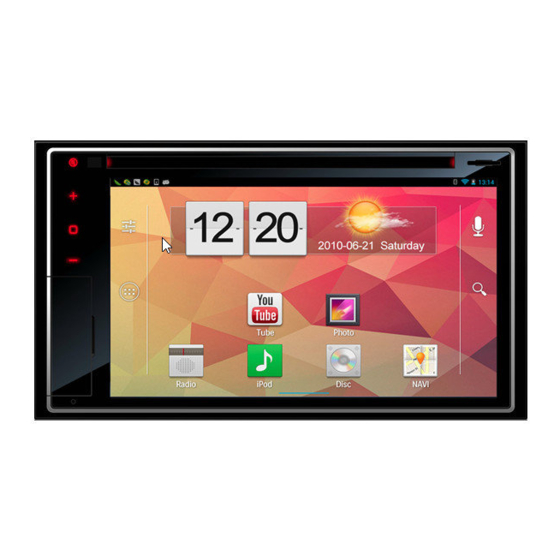
Page 4: Control Panel
Control Panel Long press [ ] knob (3) to turn on the unit. MUTE Button HOME Button > Mute the Volume (Press) Show main menu > Eject disc (when disc inserted) MENU Button (Long press) Show MENU options 2. Volume BACK Button Increase the volume Back to previous MENU. -
Page 5: Remote Control
Remote Control 1. Change playing source in sequence 2. Eject the disc 3. Select audio language Show music catalog 4. Display playback information 5. Zoom 6. Select radio band 7. Call out - Outgoing call 8. Go-to search 9. DVD title 10. - Page 6 Remote Control Notes of remote control using 1) Aim the remote control at the remote sensor on the unit. 2) Remove the battery from the remote control or insert a battery insulator if the battery has not been used for a month or longer. 3) DO NOT store the remote control under direct sunlight or in high temperature environment, or it may not function properly.
-
Page 7: Basic Operations
Basic Operations Turn On/Off the Power When Parking Brake Applied 1. Long press the [ ] knob to turn on the 1. If 'PRK SW' cable is connected to hand brake switch, the video display of the TFT unit. monitor will be controlled by driving status, The unit will go back to the last source system setup and input video sources. -
Page 8: Main Menu
Main menu Disc Operation Main Menu Insert a Disc Touch the [ ] button to enter main source Insert a disc into the slot, and the unit will menu. change to disc mode automatically. Notes: • Please confirm whether there is a disc in the unit before you insert another one. - Page 9 Disc Operation 6. Next chapter 1. Return to home menu Fast forward (long press) 2. Show more control buttons 7. To enter search menu 3. Previous track Fast backward (long press) 4. Play/Pause 5. Next track Fast forward (long press) 6.
- Page 10 Disc Operation When viewing a picture, touch the screen Note: (except top left corner) to show control If you do not select Repeat on, when the buttons. entire disc or TITLE playback has finished, the system will stop. If no other control, after 5 minutes the unit will turn into standby mode.
-
Page 11: Radio Operations
Radio Operations Select One Radio Band Select [Radio] on the main menu to enter radio mode. Touch the [ ] button to select one radio band among FM1, FM2, FM3, AM1 and AM2. Manual Tuning During manual tuning, the frequency will be changed in steps. -
Page 12: Usb Operations
Radio Operations USB Operations Recall the Stored Stations Using USB Device 1. Connect your USB device to the USB Method 1: cable. Touch the 1~6 on the left of screen to listen to When connecting a USB device, the unit the preset station of current band. -
Page 13: Video Playback
USB Operations Select Music by Song Name 11. Show more control buttons 12. Previous track 1. Touch [Songs] on the left of the screen. Fast backward (long press) 2. Select a song to play. 13. Play/Pause 14. Next track Fast forward (long press) Video Playback 15. - Page 14 USB Operations Gallery Operations 1. Select [Gallery] on the APPS menu. 2. Select one gallery to show the picture list. 10. Show previous page of control buttons 11. Enter search menu 3. Touch to view it. 12. Repeat play 13. Random play Notes • D isconnect USB storage devices from the unit when not in use.
-
Page 15: Bluetooth Operations
Bluetooth Operations The Bluetooth allows you to utilize your car’s built-in audio system for handsfree wireless mobile phone or music communication. Some Bluetooth mobile phones have the audio features, and some portable audio players support Bluetooth feature. This system can play audio data stored in a Bluetooth audio device. -
Page 16: Call History
Bluetooth Operations : Previous track : Play/Pause Call History : Next track Access Call History by touching [ ] button. Bluetooth Settings Touch [ ] button to show Bluetooth setting menu. Then select a number from Dialled/Missed/ Received calls. Bluetooth Audio Streaming What is audio streaming? Audio streaming is a technique for transferring audio data such that it can be processed... -
Page 17: Ipod/Iphone Operations
iPod/iPhone Operations This unit supports only the following iPod/iPhone models: · iPhone 5 · iPhone 4S · iPhone 4 · iPod touch (5th generation) · iPod touch (4th generation) · iPod classic · iPod nano (7th generation) · iPod nano (6th generation) ·... -
Page 18: Internet
Internet 3G APN Settings 7. Must setup following options: Name, APN, MCC, MNC. Note: Touch the dialogue box to show keypad, Contact the manufacturer for latest compatible and input your desired name. 3G devices. APN according to the operator to determine. -
Page 19: Wi-Fi Settings
Internet Wi-Fi Settings Create Wi-Fi Hotspot This unit generally supports the following: User can use the unit to create a personal realtek 8188cu, 8188eu. Wi-Fi hotspot. All your other Wi-Fi enabled devices will then be able to connect to this 1. -
Page 20: Visit Website
Internet If your device can’t connect to the Wi-Fi hotspot: 1. Check the Wi-Fi network. icon will appear on the top left of the screen after setting successfully. If not, check your Wi-Fi dongle connection and the Hotspot settings. 2. Check the 3G network. If the signal indicator on the top taskbar turns grey, the network is unavailable,... -
Page 21: Other Mode
Other Mode Navigation Operations Google Calendar Configuration To navigate by the unit, simply select the desired navigation application on the main 1. Ensure the network is available, refer to the menu. Then navigate by the touch screen. <Internet>. 2. Touch [ ] icon on the main menu, select [Date &... -
Page 22: Delete Gmail Account
Other Mode Delete Gmail Account If you want to establish a new account, please touch [New]. If you want to use an existing account, 1. Touch [ ] icon on the main menu to please touch [Existing]. enter settings menu, slide down the screen After select “Existing”, input your mail to find "Google". -
Page 23: System Settings
System settings Input Gain Select [ ] on the main menu to enter Choose input volume gain of each source. settings mode. Drag up/down to scroll the options. WIRELESS & NETWORKS To setup the wireless configuration, such as Wi-Fi, VPN, 3G network. * For 3G APN settings, refer to “Internet”. -
Page 24: Sound Setting
Sound setting Select [EQ] on the menu to enter sound setting mode. Touch to select a preset EQ on upper side of the screen from Flat, Pop, User, Techno, Rock, Classic and Jazz. Touch [ ] or [ ] to adjust the level, Frequency and Q for Bass/Mid/Treb. -
Page 25: Device Connections
Device Connections Notes of connection • This unit is designed to be used in a vehicle with a 12-volt battery and negative grounding. Before installing this unit to a recreational vehicle, a bus, or a truck, make sure the battery voltage is appropriate for this unit to be used, otherwise, have a professionally installed transformer to convert the output voltage to 12V. - Page 26 Device Connections Parking Brake Cable Connections Orange Wire Back Up Camera Connections...
-
Page 27: Wiring Diagram
Device Connections Wiring Diagram... -
Page 28: Troubleshooting
Troubleshooting The following checklist can help you solve the problems which you may encounter when using the unit. Before consulting it, check the connections and follow the instructions in the user manual. Problem Possible cause Solution General Car ignition is not on. Turn your car key in the ignition. -
Page 29: Specifications
Specifications General Reference Supply Voltage ..............12V(DC) Operating Voltage Range ............10.5 - 15.8V(DC) Max Operating Current .................15A Grounding System ............ Car Battery Negative Pole Dimensions(WXHXD) ............178X101.5X161.8mm Weight(main unit) ..................1.9kg Signal Noise Ratio ................≥55dB Usable Sensitivity(S/N=30dB) ............≤15dBμV Frequency Response(-3dB) ............20Hz~7KHz Station Seeking Level .............. - Page 30 CLASS 1 LASER PRODUCT P/N: 127075006299...